
You could assume that title sounds too good to be true, however it’s not! I had been eyeing a beautiful pink velvet bed for a number of months, however it was too costly to ever truly pull the set off on.
Now we have a fairly small bed room, and having massive darkish items of furnishings doesn’t assist the room really feel its largest/brightest. However when a mattress is material, you possibly can’t simply repaint it once you get uninterested in the colour.
So what’s a woman to do? Reupholster the mattress body!
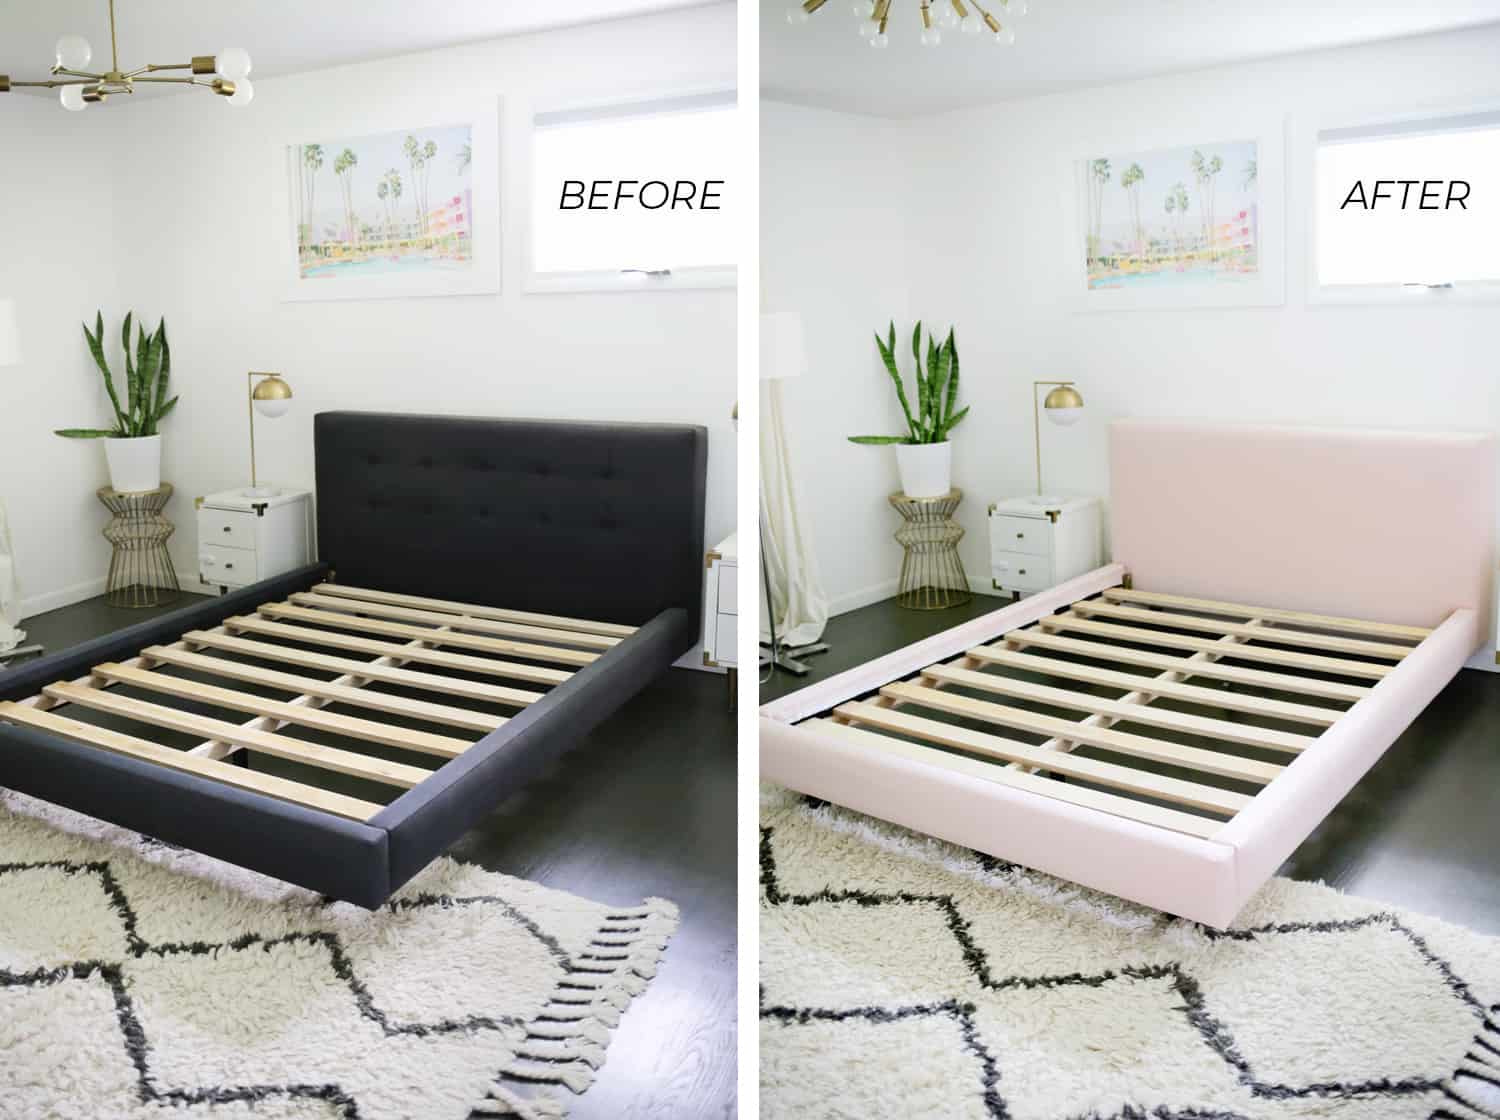
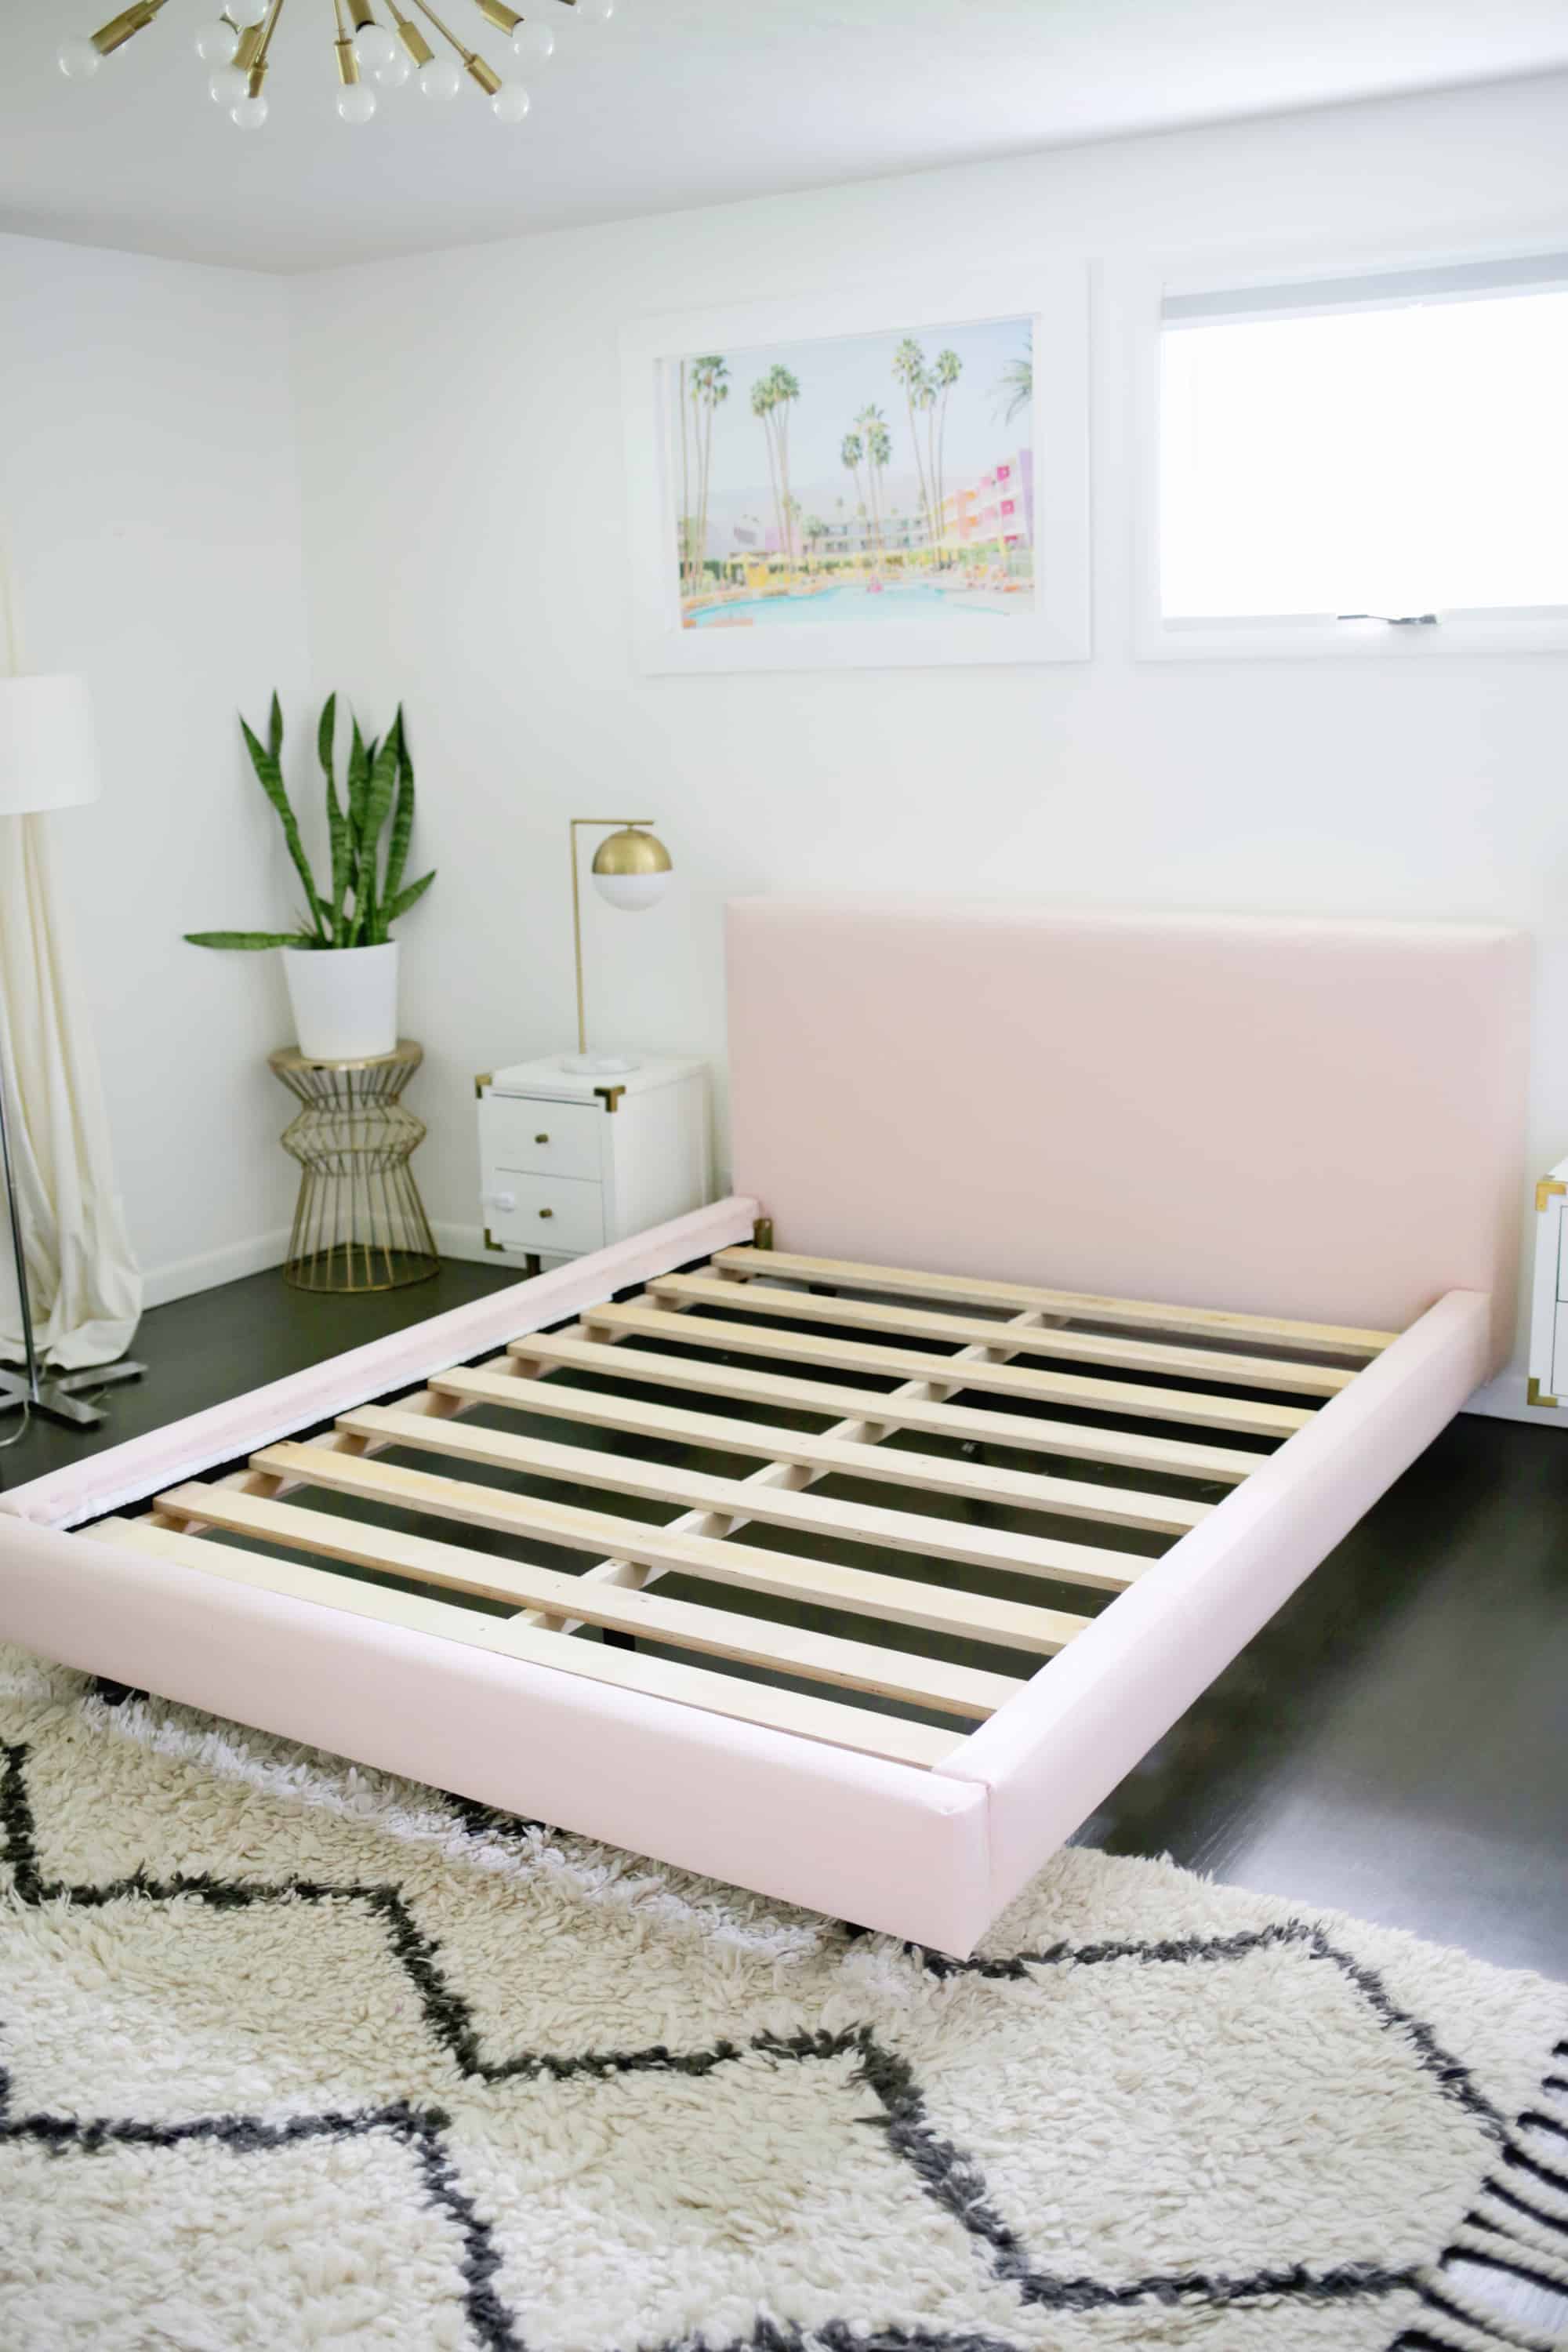
Isn’t {that a} loopy distinction in simply in the future?! I’ll present you what I did with mine, and provide you with decisions to do issues the simpler no-sew route when you would moderately. Or, you are able to do 10 minutes of very fundamental stitching—it’s as much as you!
Provides:
–wide bolt upholstery or multi-use material in your colour of alternative (vast sufficient to cowl your headboard and be wrapped across the again, the blush material I selected was 54″ vast). I used about 5.5 yards for my mattress.
–wide bolt white fabric as an underlayment (non-compulsory however useful in case you have skinny major material and are going from a darkish mattress to a lightweight mattress)*
–electric staple gun and 1/2″ staples
–fabric scissors and straight pins
*NOW, BEFORE WE BEGIN, I’ll let you understand that my mattress took somewhat longer to cowl than yours most likely will due to two issues: the material I preferred finest was on the thinner aspect and the mattress I used to be protecting was an excellent darkish colour.
If I didn’t cowl the mattress in white material first, then the blush pink would look form of boring since you’d be seeing a number of the darkish gray coming by way of, however by protecting it in white first, you bought the complete blush colour.
For those who aren’t going from a really darkish mattress to a really mild coloured mattress OR in case you have a thicker backed material like an upholstery grade material then you definitely most likely received’t want to do that step.
Simply lay your material alternative over your mattress body and when you can’t see any of the colour beneath coming by way of, then skip the white material step—quicker and cheaper!
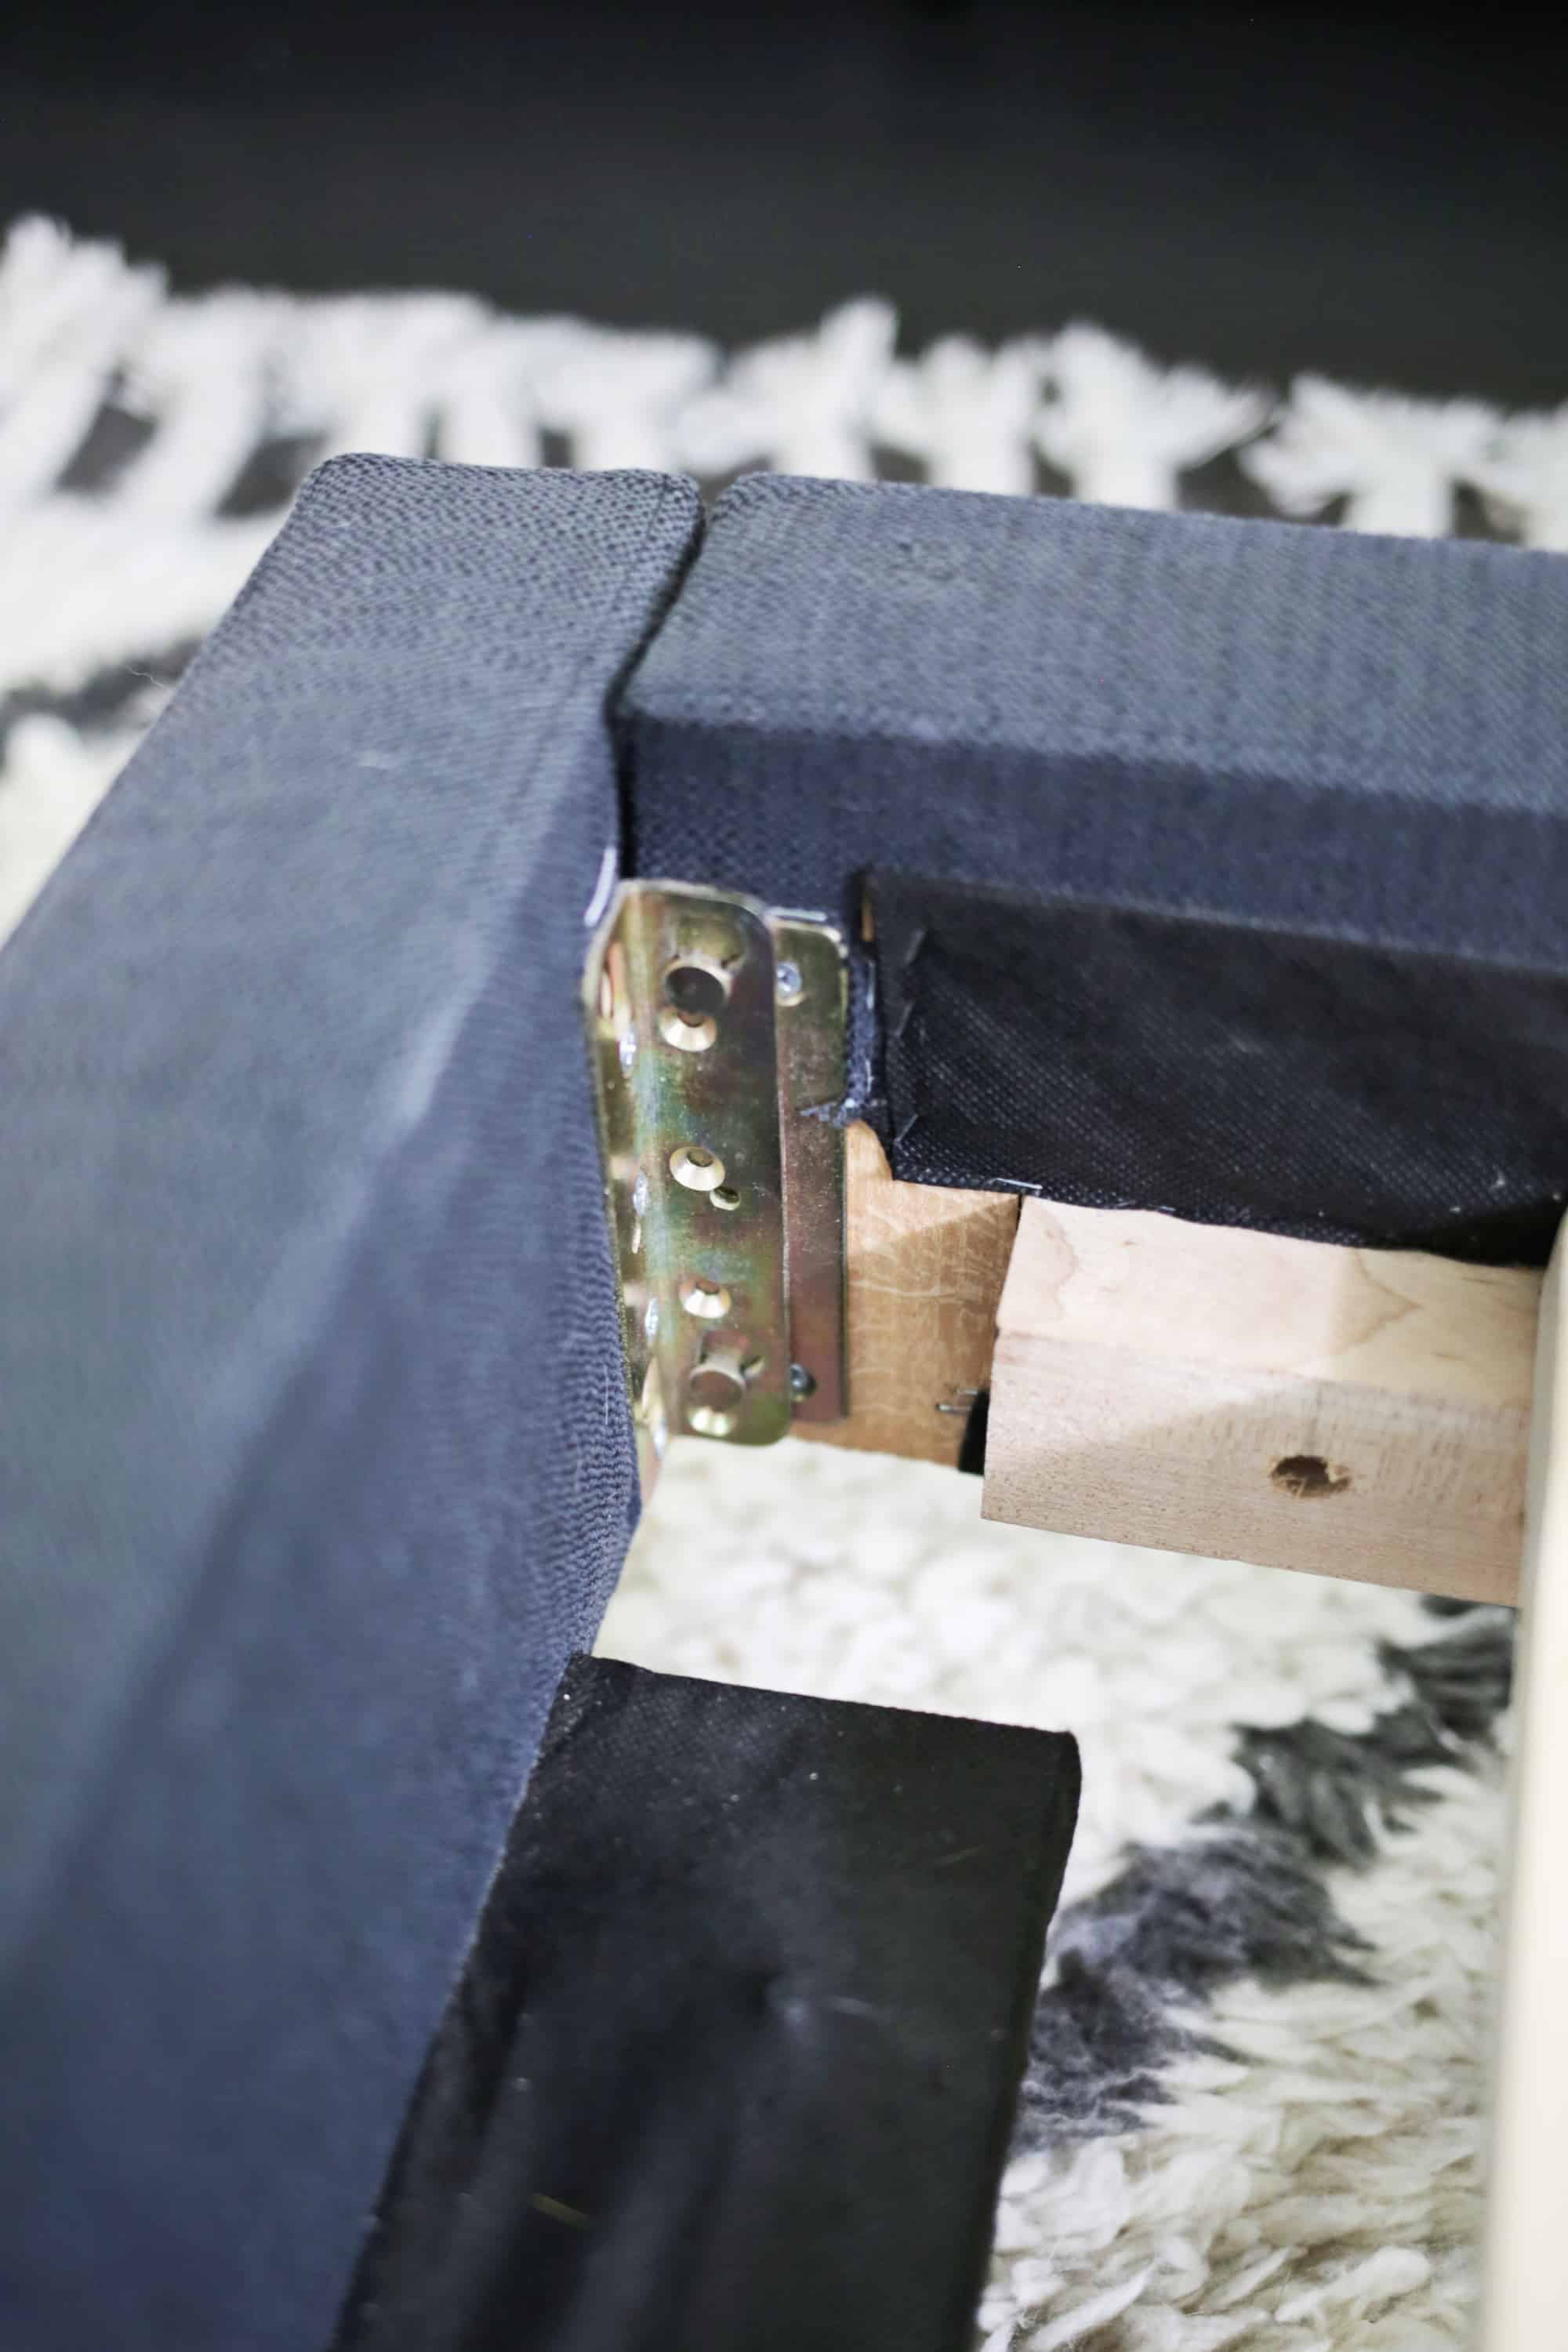
OK! So, most material lined beds are available in 4 items (headboard, two aspect rails, and a footer) that join with some kind of {hardware} items such as you see above.
Most beds come aside like that as a result of it’s each simpler for the producer to wrap the items individually, and who has a home with doorways and hallways large enough to maneuver a full-sized mattress into rooms if it doesn’t come aside, proper?
You may as well see above that the mattress was initially lined with material after which stapled into place, and that’s mainly what we’re going to do too!
As soon as we had taken aside every of the rails (and eliminated that picket backbone half within the center that holds the mattress up) we additionally took off the connecting {hardware} on every part, too.
Ensure to label the place every bit goes and what route it faces so you possibly can put it again collectively on the finish.
I additionally recommend jotting down a fast measurement of the place the {hardware} is linked on every board so you possibly can simply discover that spot once more if you find yourself protecting that space with material.
For instance, 8″ in from the skin edge and 1/2″ up from the underside sort of measurements.
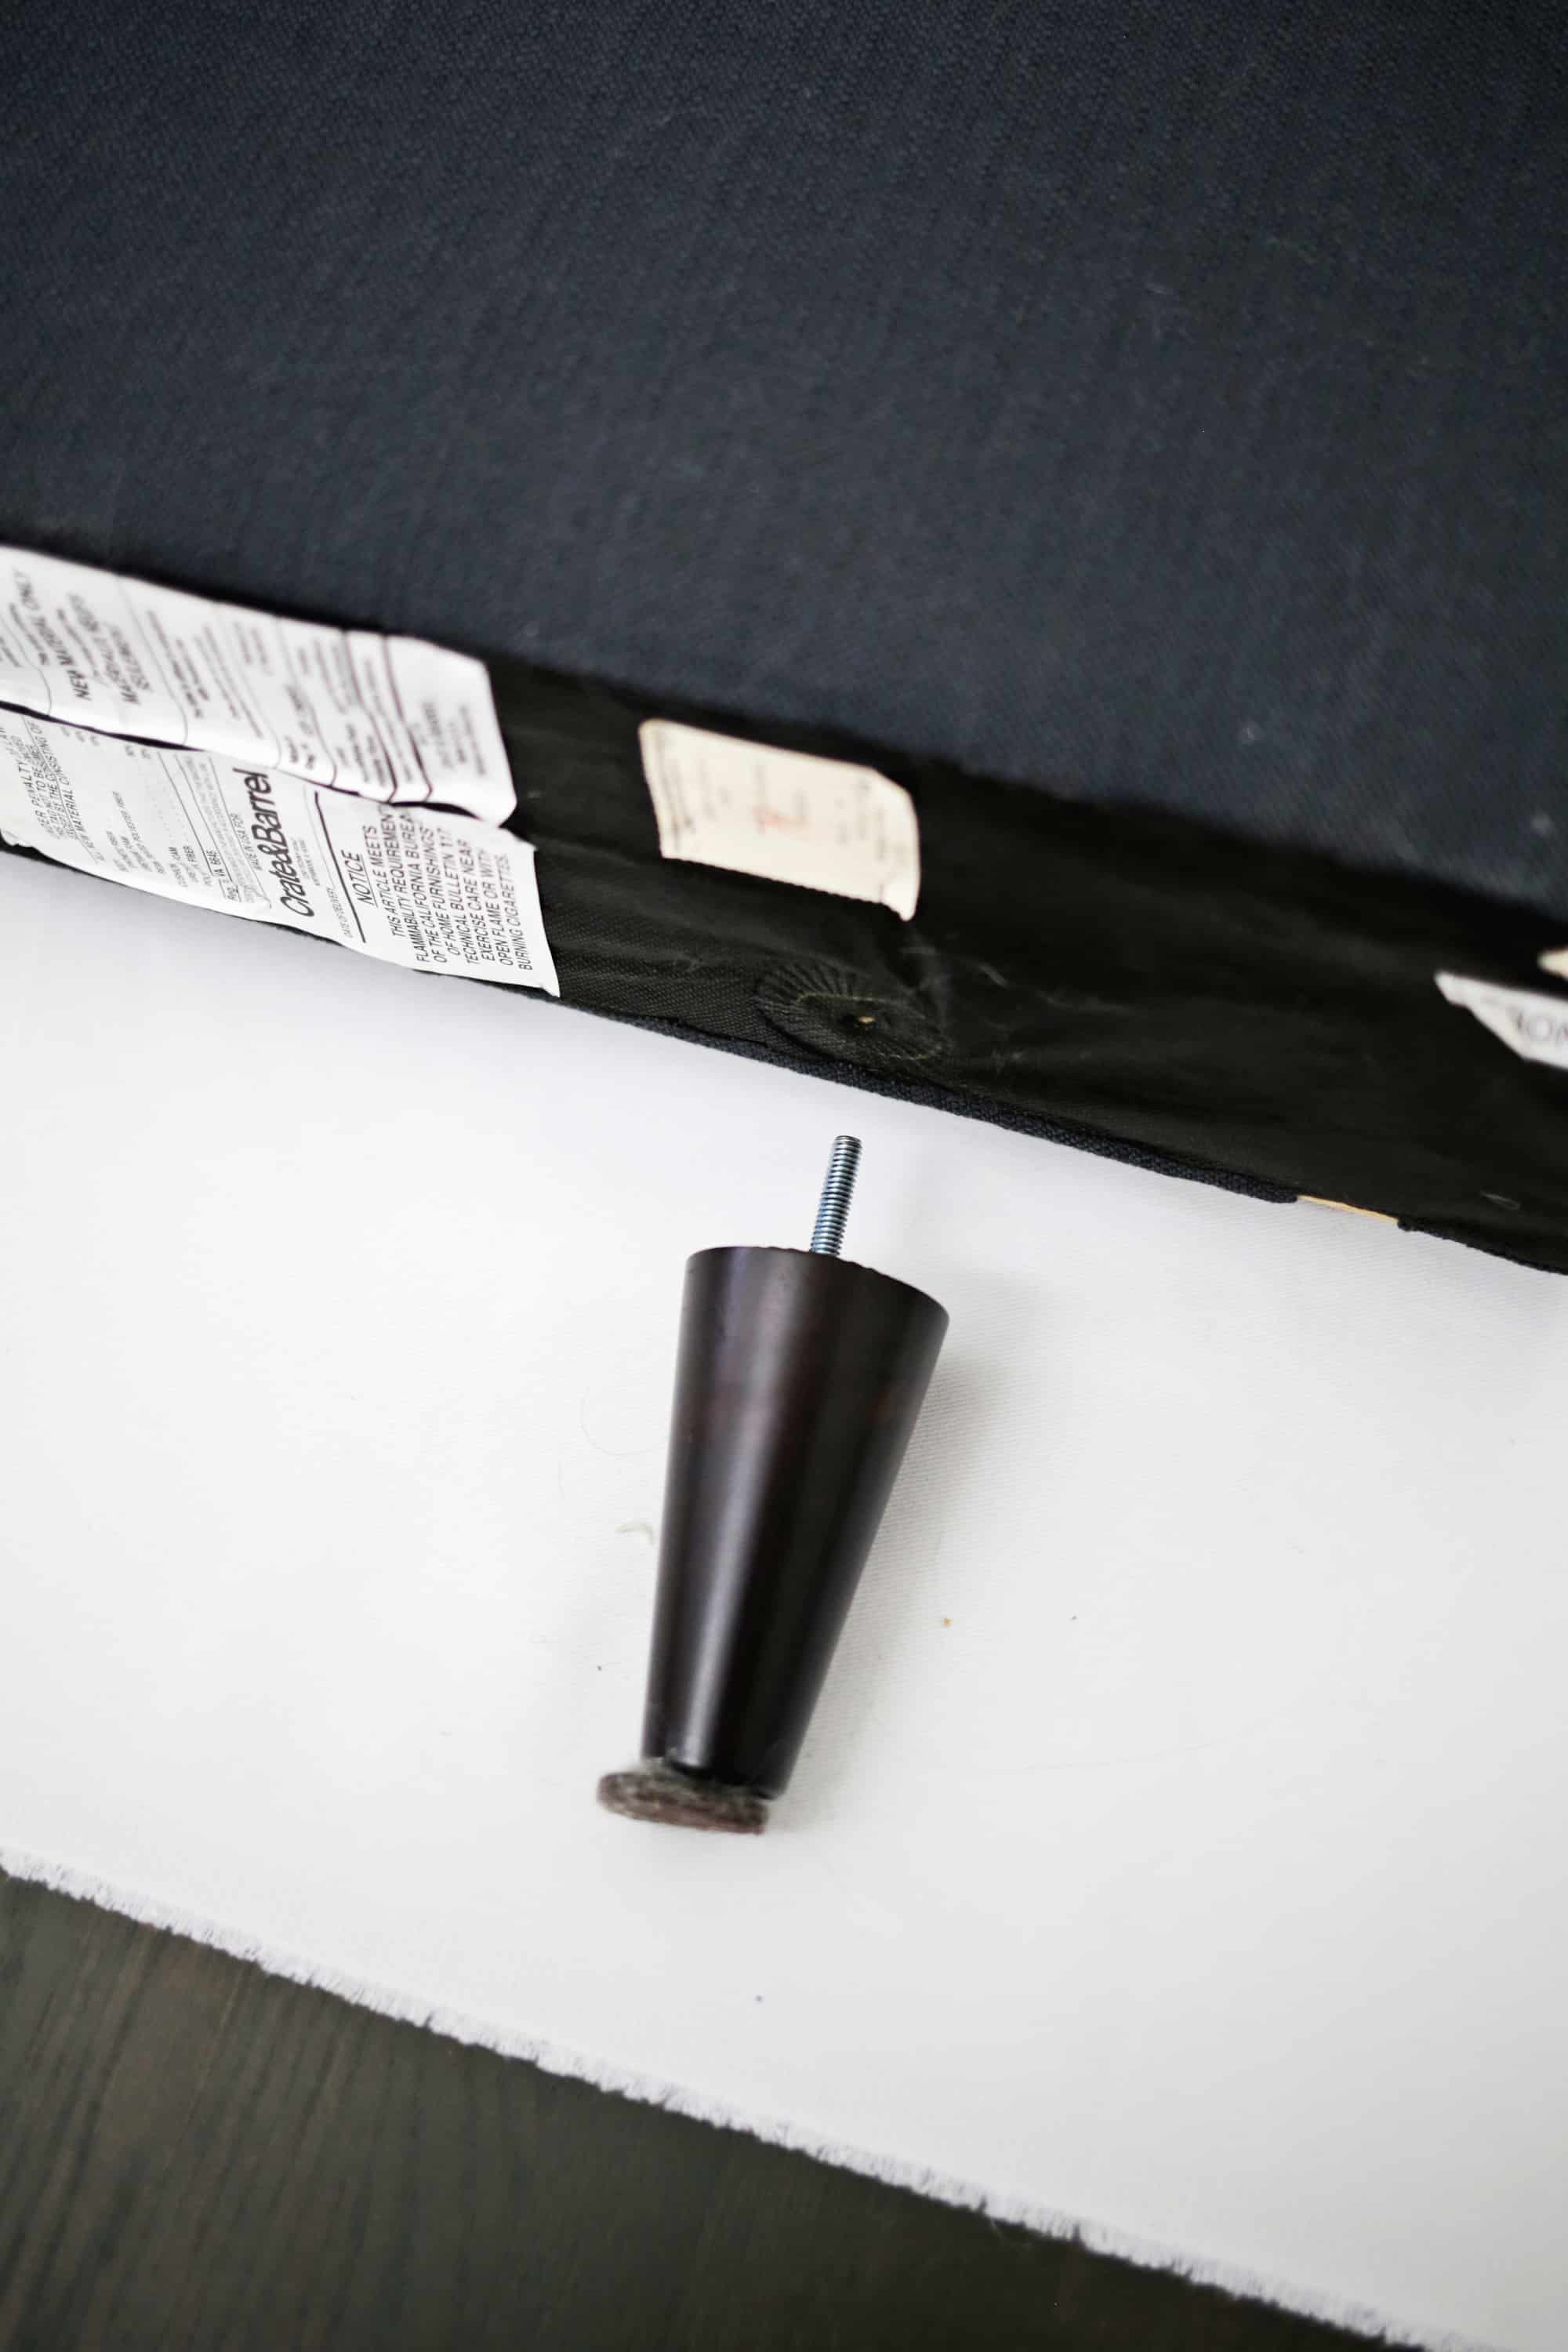
I additionally unscrewed the legs from the header and footer and made a word of the place these holes have been positioned.
Your legs might have a plate they connect to or simply go immediately into the wooden, so take away the plate if there may be one there.
The Stitching Choice
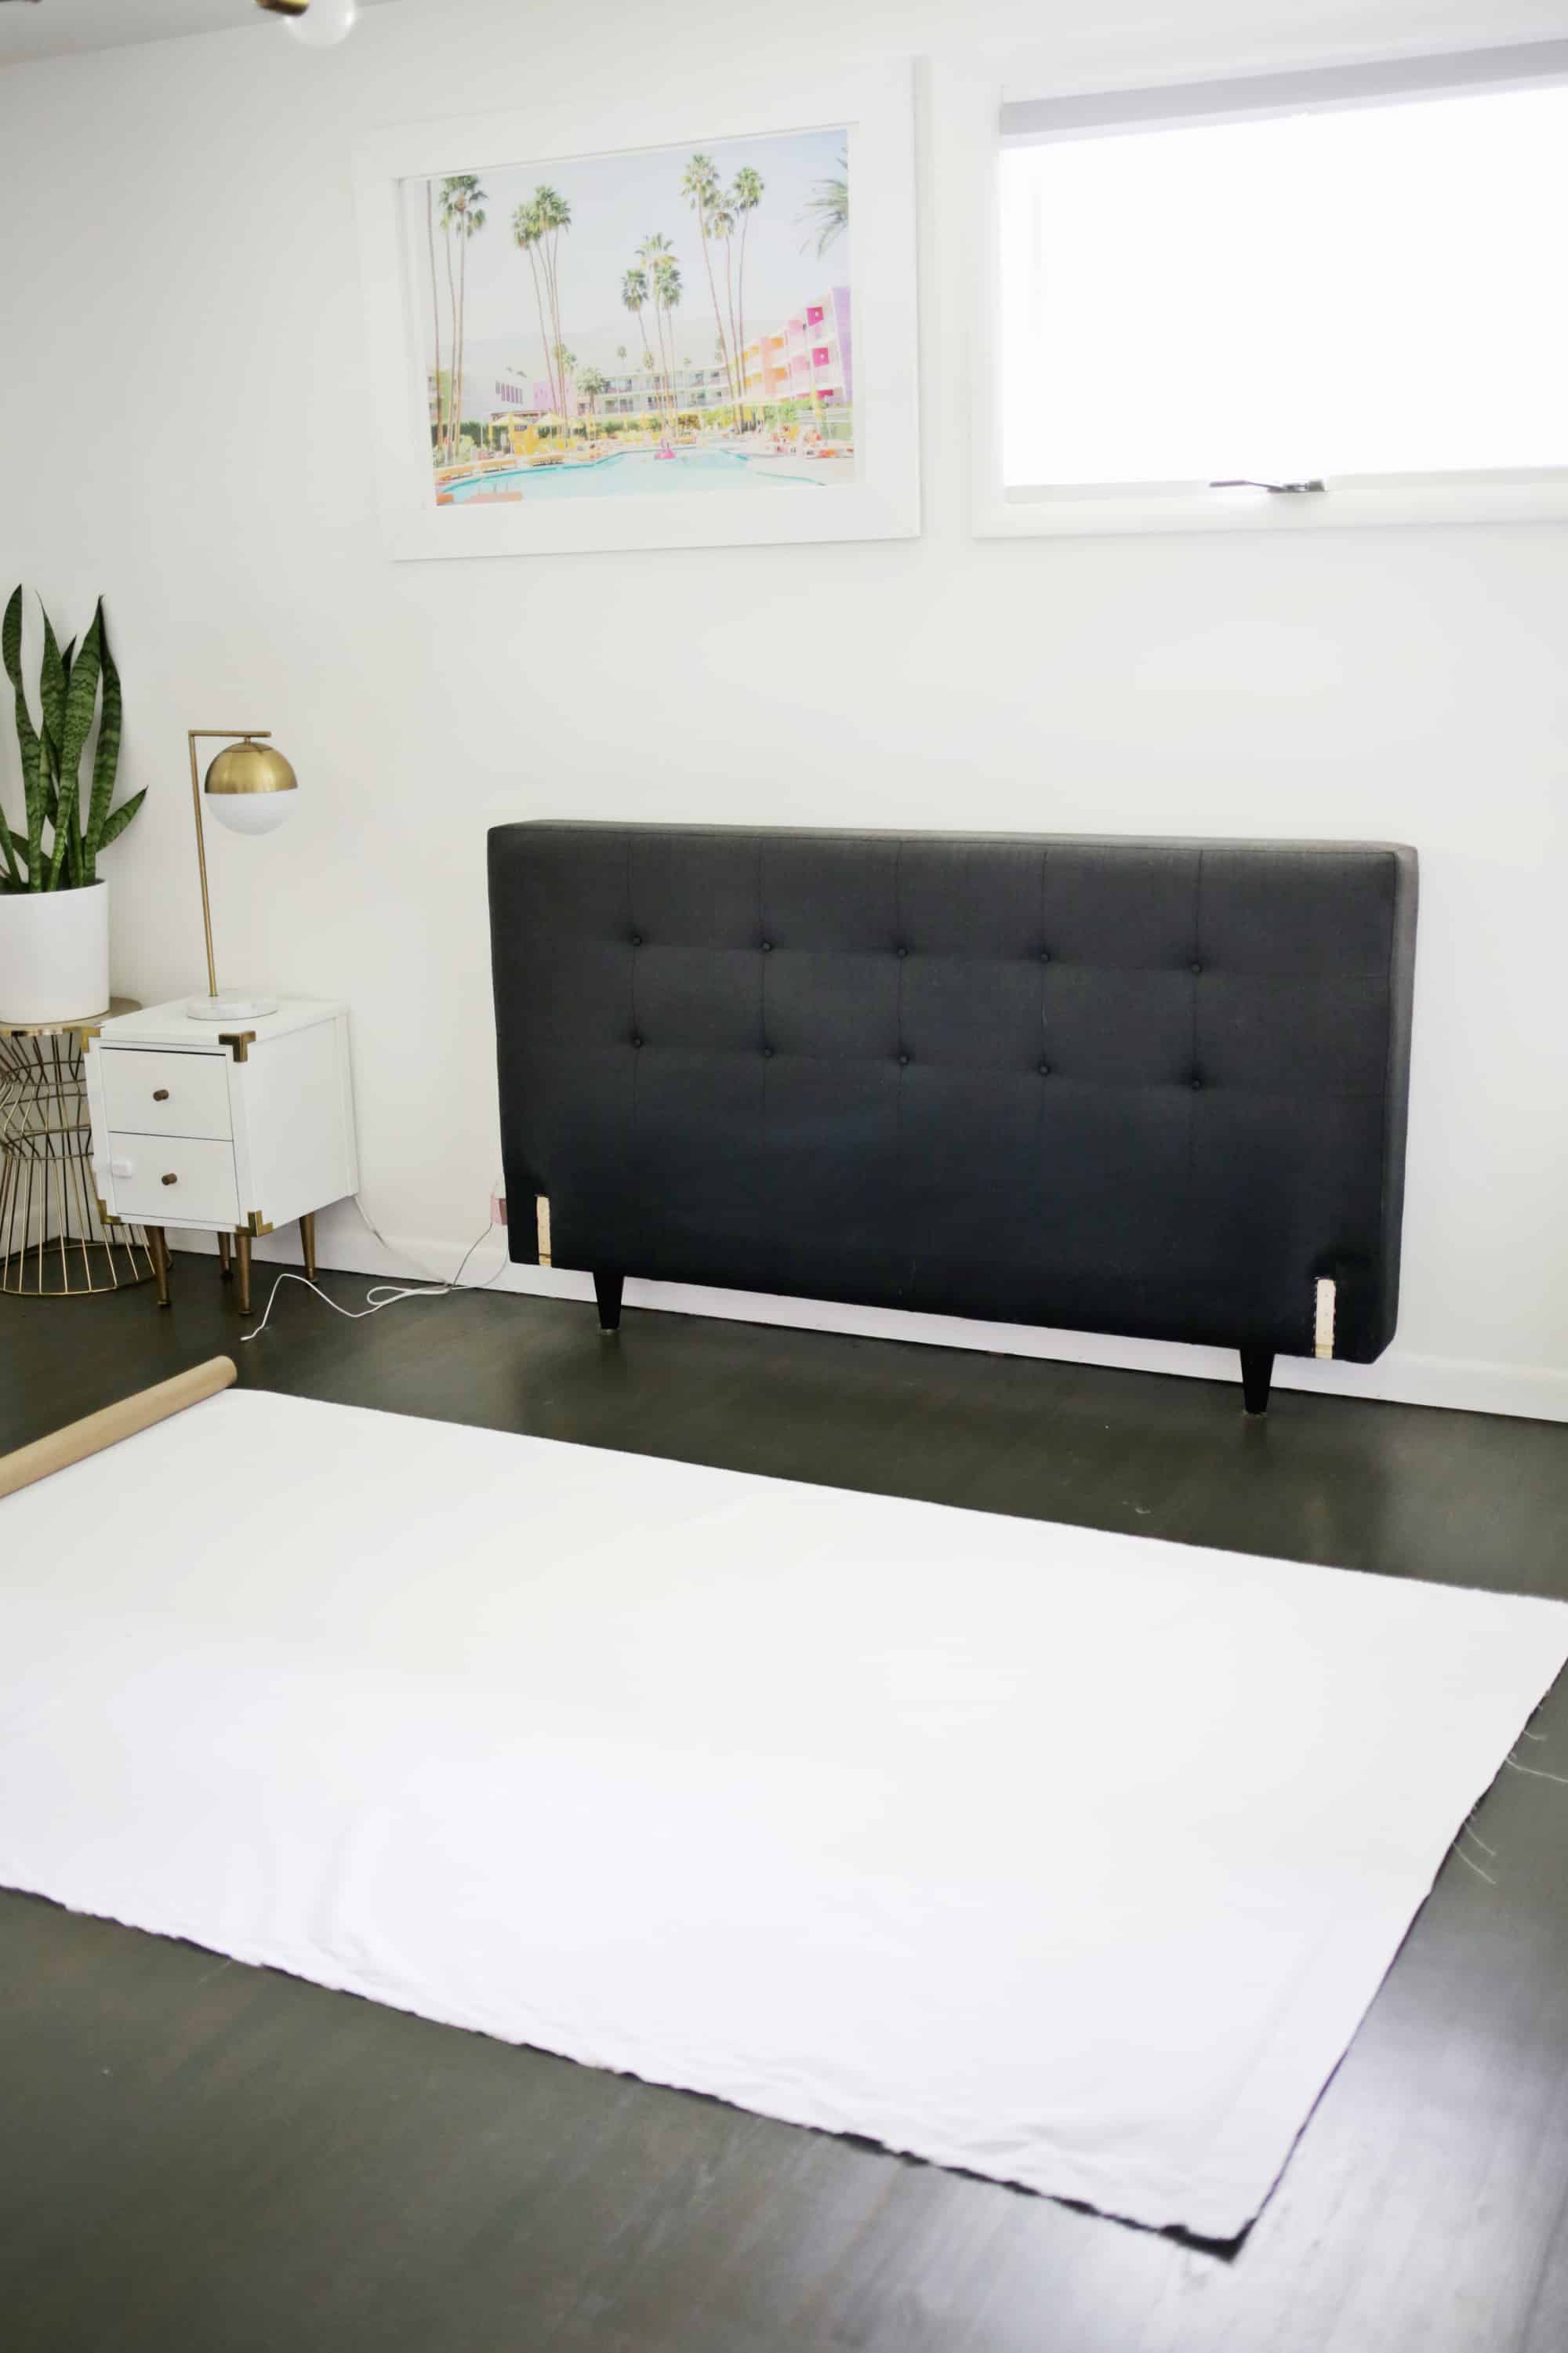
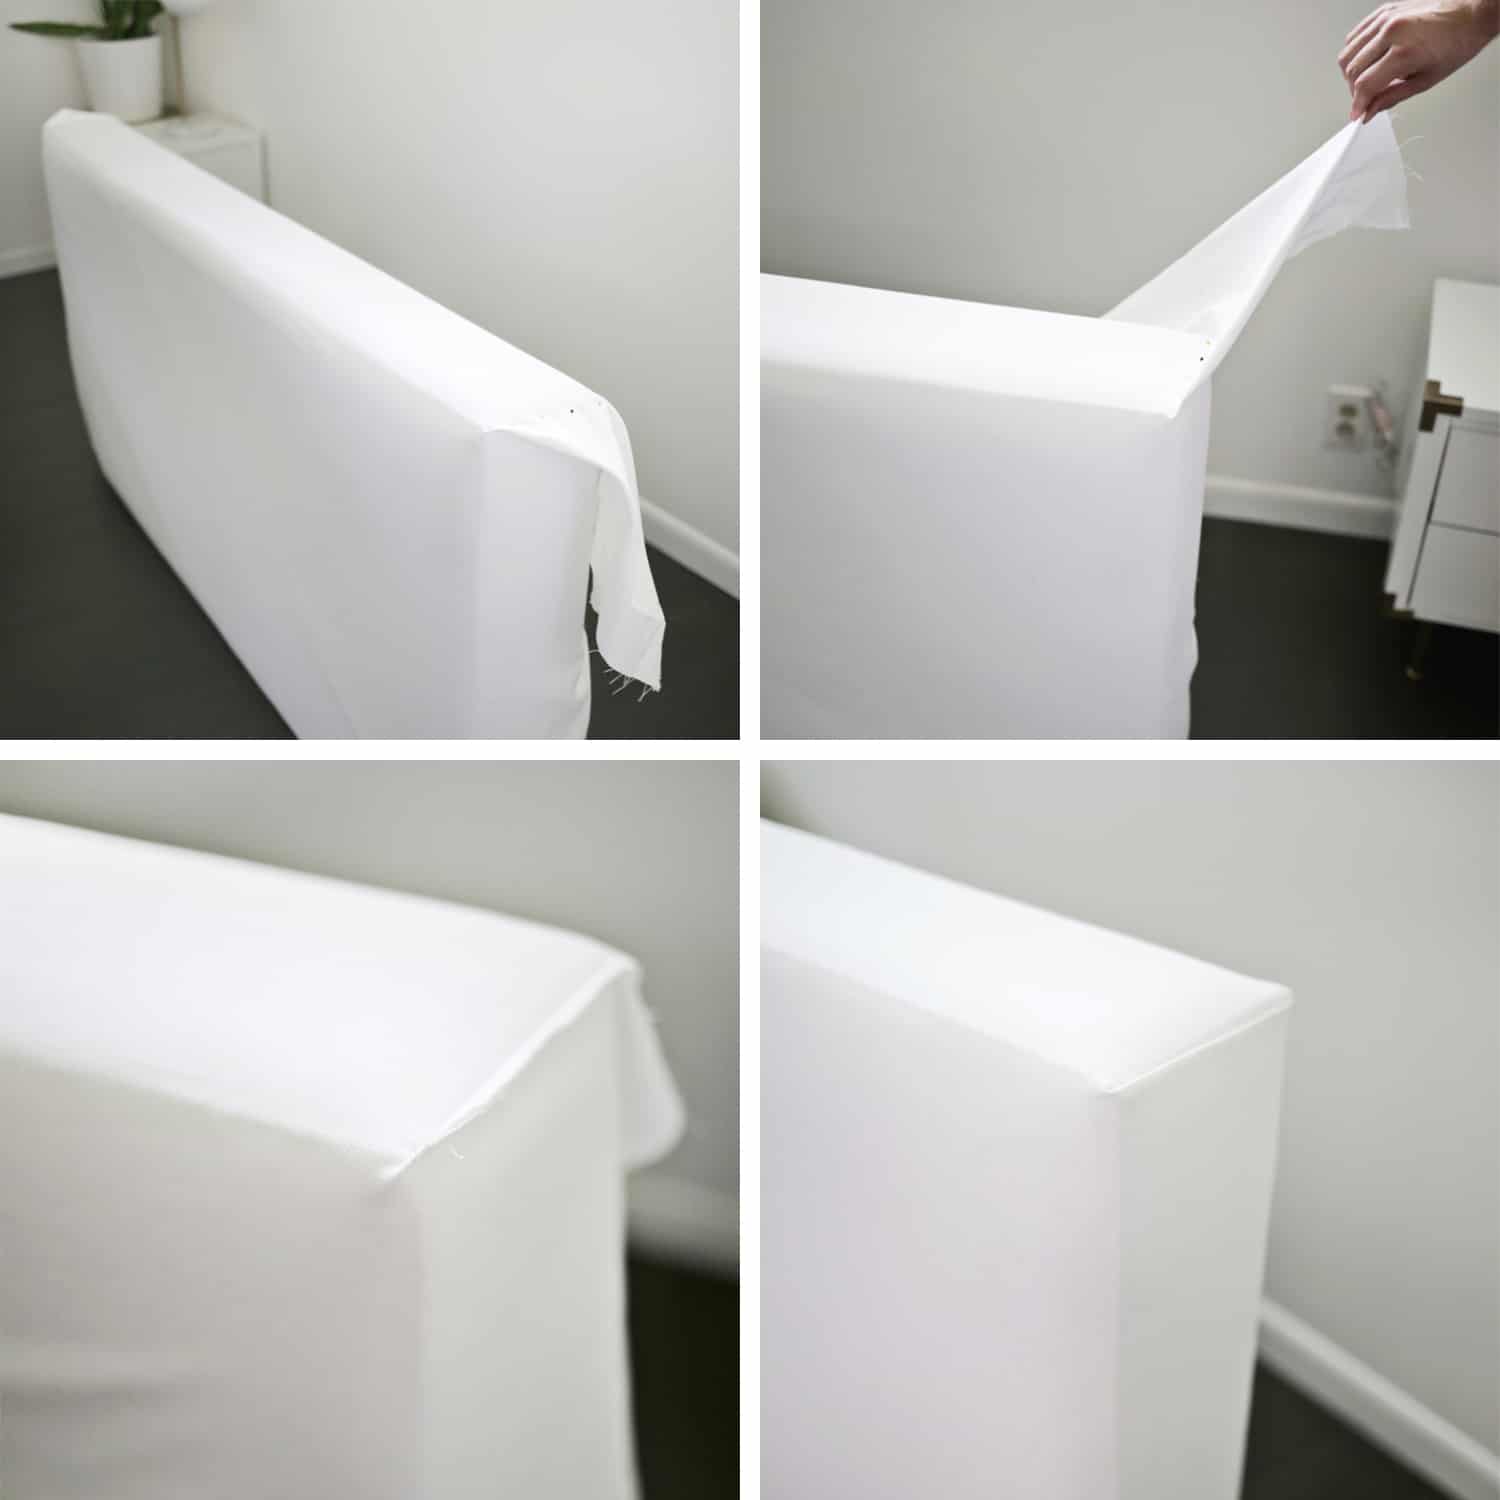
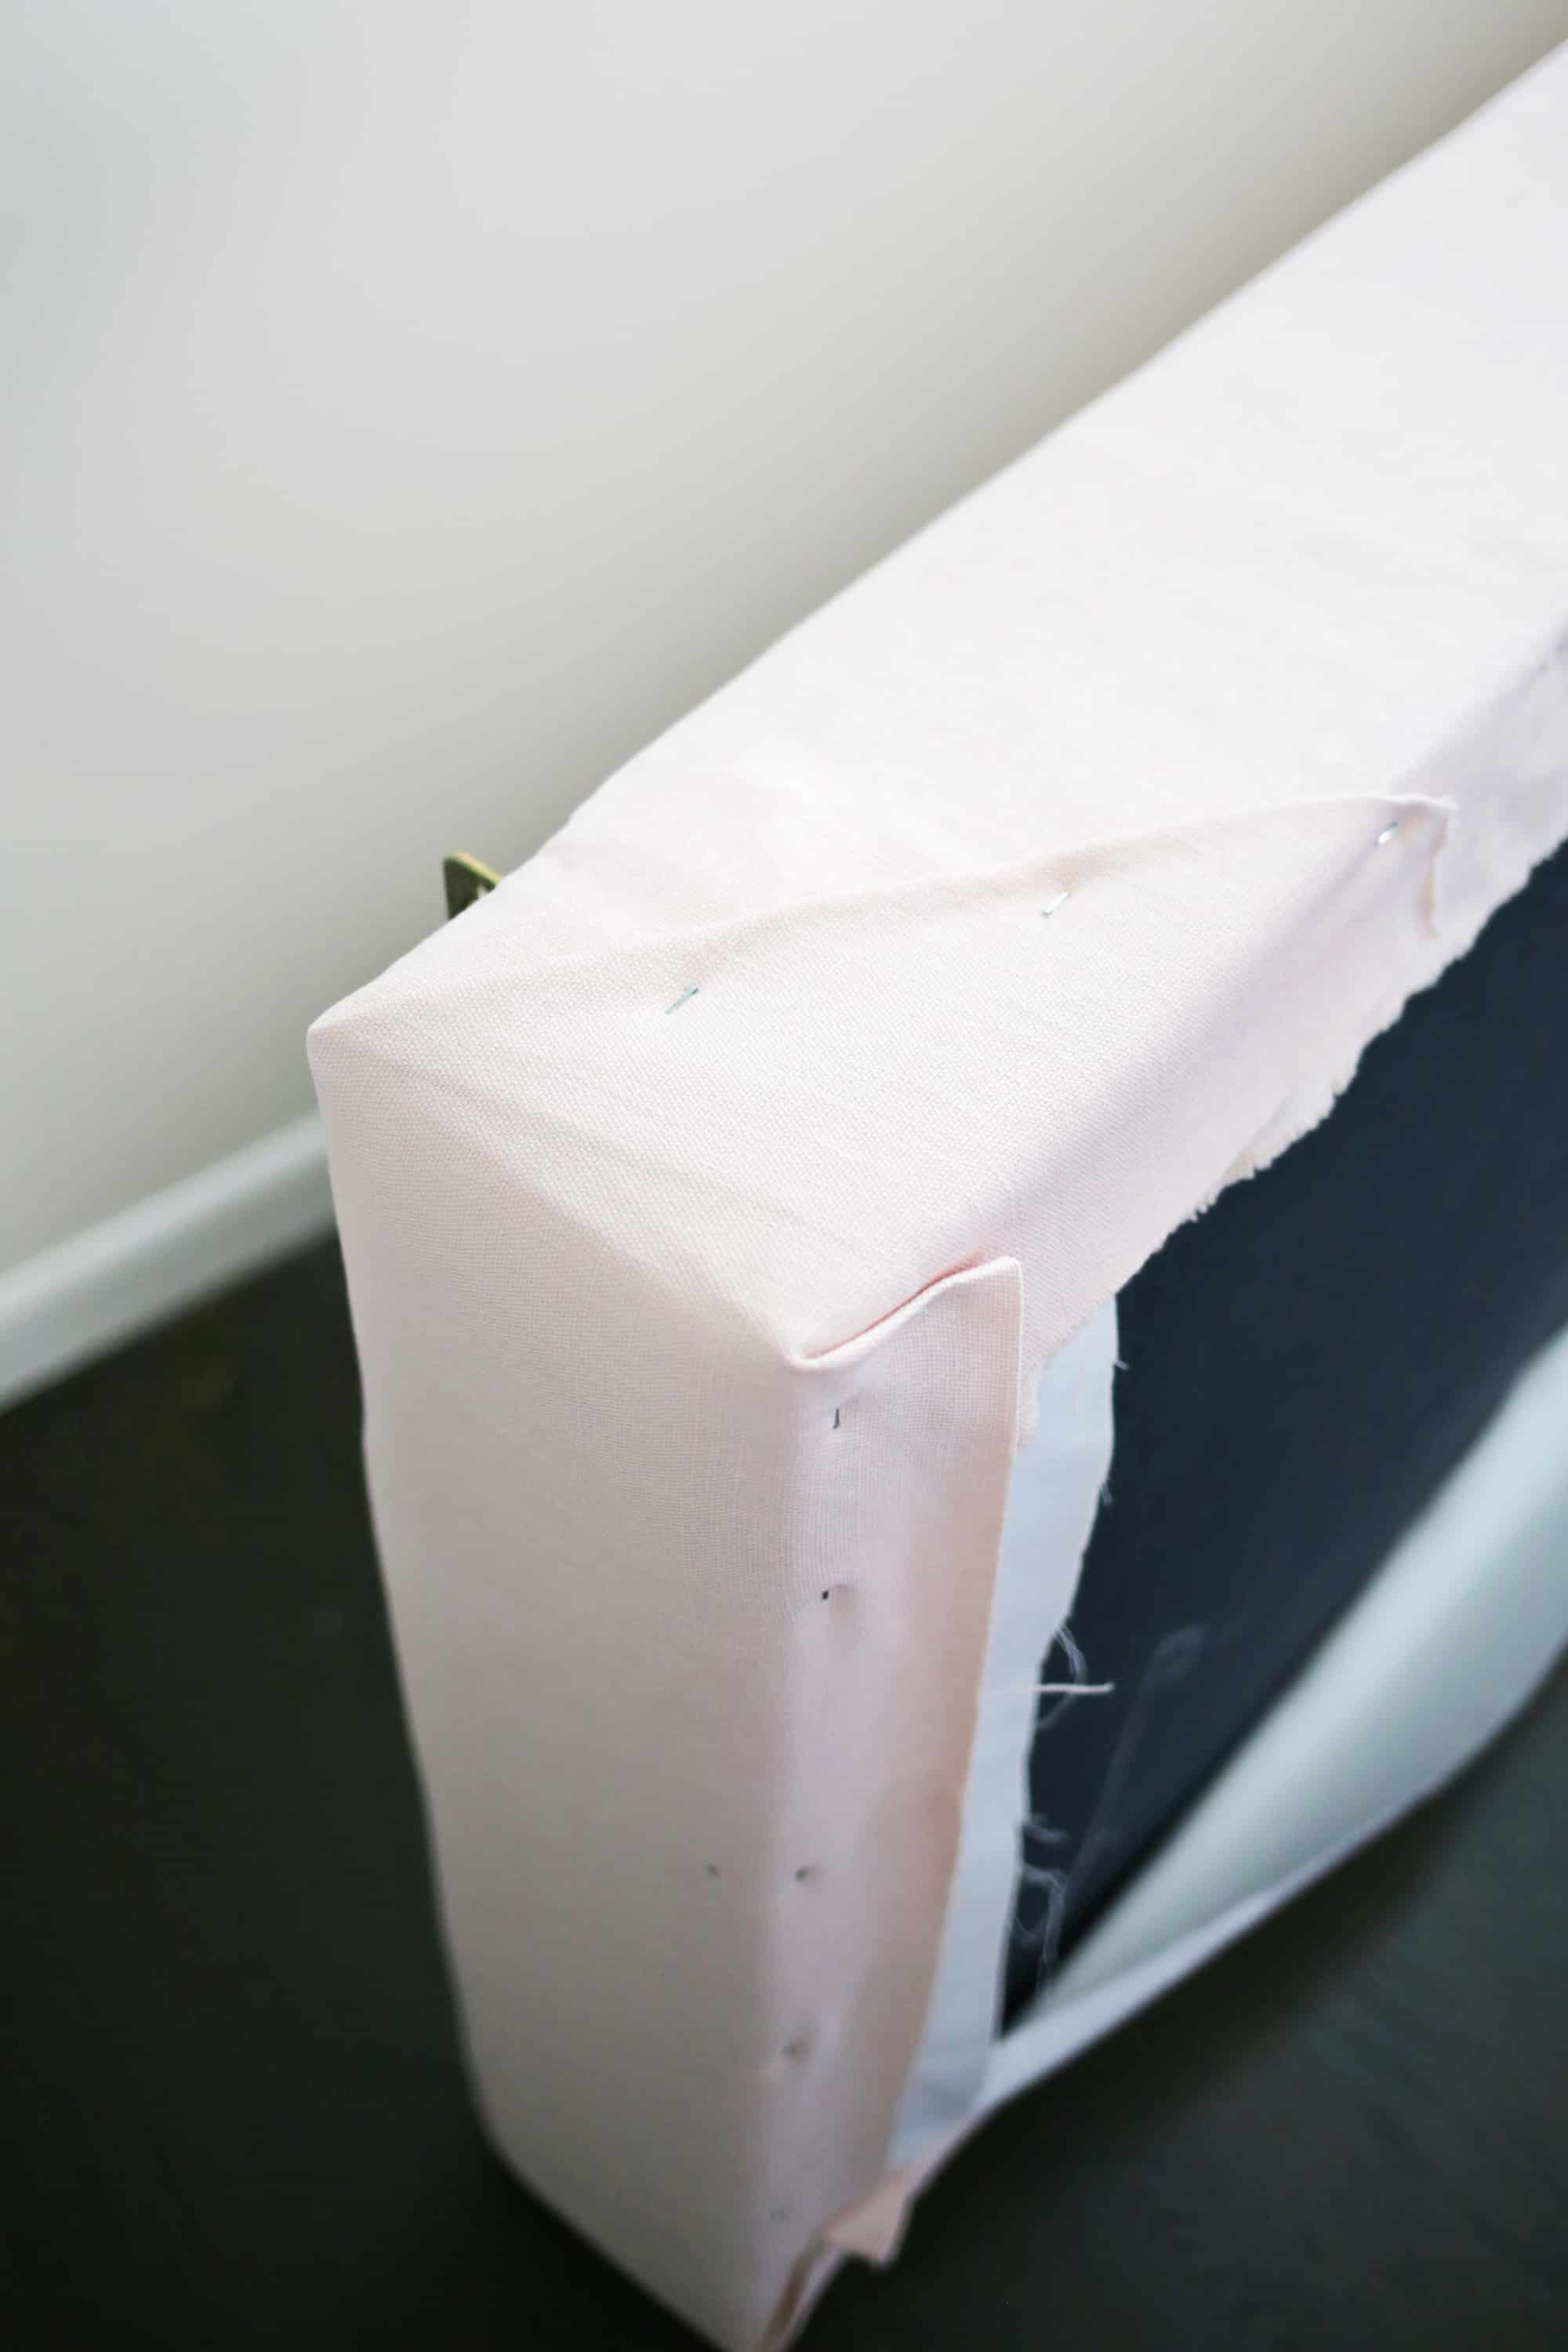
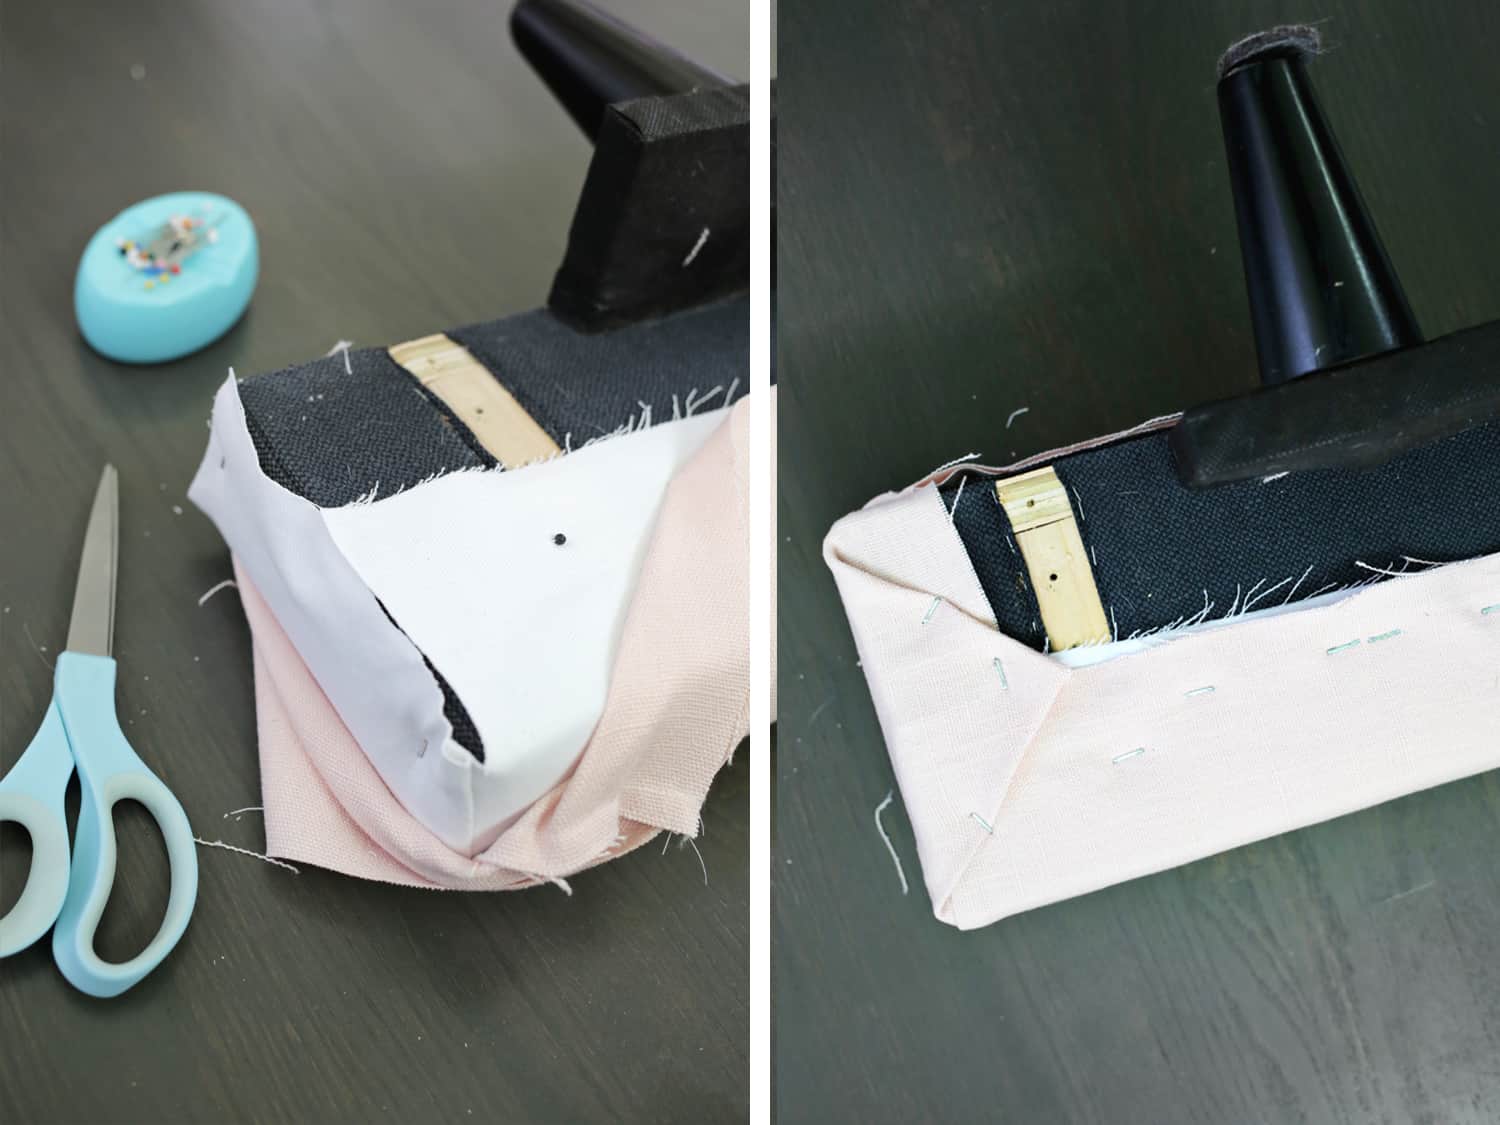
I laid the headboard onto a bit of my white material (with the best aspect of the material going through the headboard) that was large enough to wrap the headboard, and wrapped and pinned the material across the again. You’ll want to get the material easy and tight.
The small part of stitching that I did was on the prime nook of every aspect of the headboard. I smoothed out the material and pinned the nook collectively in order that the perimeters got here collectively properly (such as you see within the prime two frames.) Repeat that smoothing and pinning with the alternative aspect.
Subsequent, I eliminated the pins that have been holding the material on the headboard, eliminated the material from the headboard, and sewed down that line the place the nook pins have been and lower the surplus.
Then, I attempted the duvet again on the headboard to see the way it match and pinched and sewed somewhat extra material if it didn’t match very snugly.
As soon as I had the match proper, I turned the material proper aspect out and put it again on in order that I had the good sewn nook that you just see within the final body.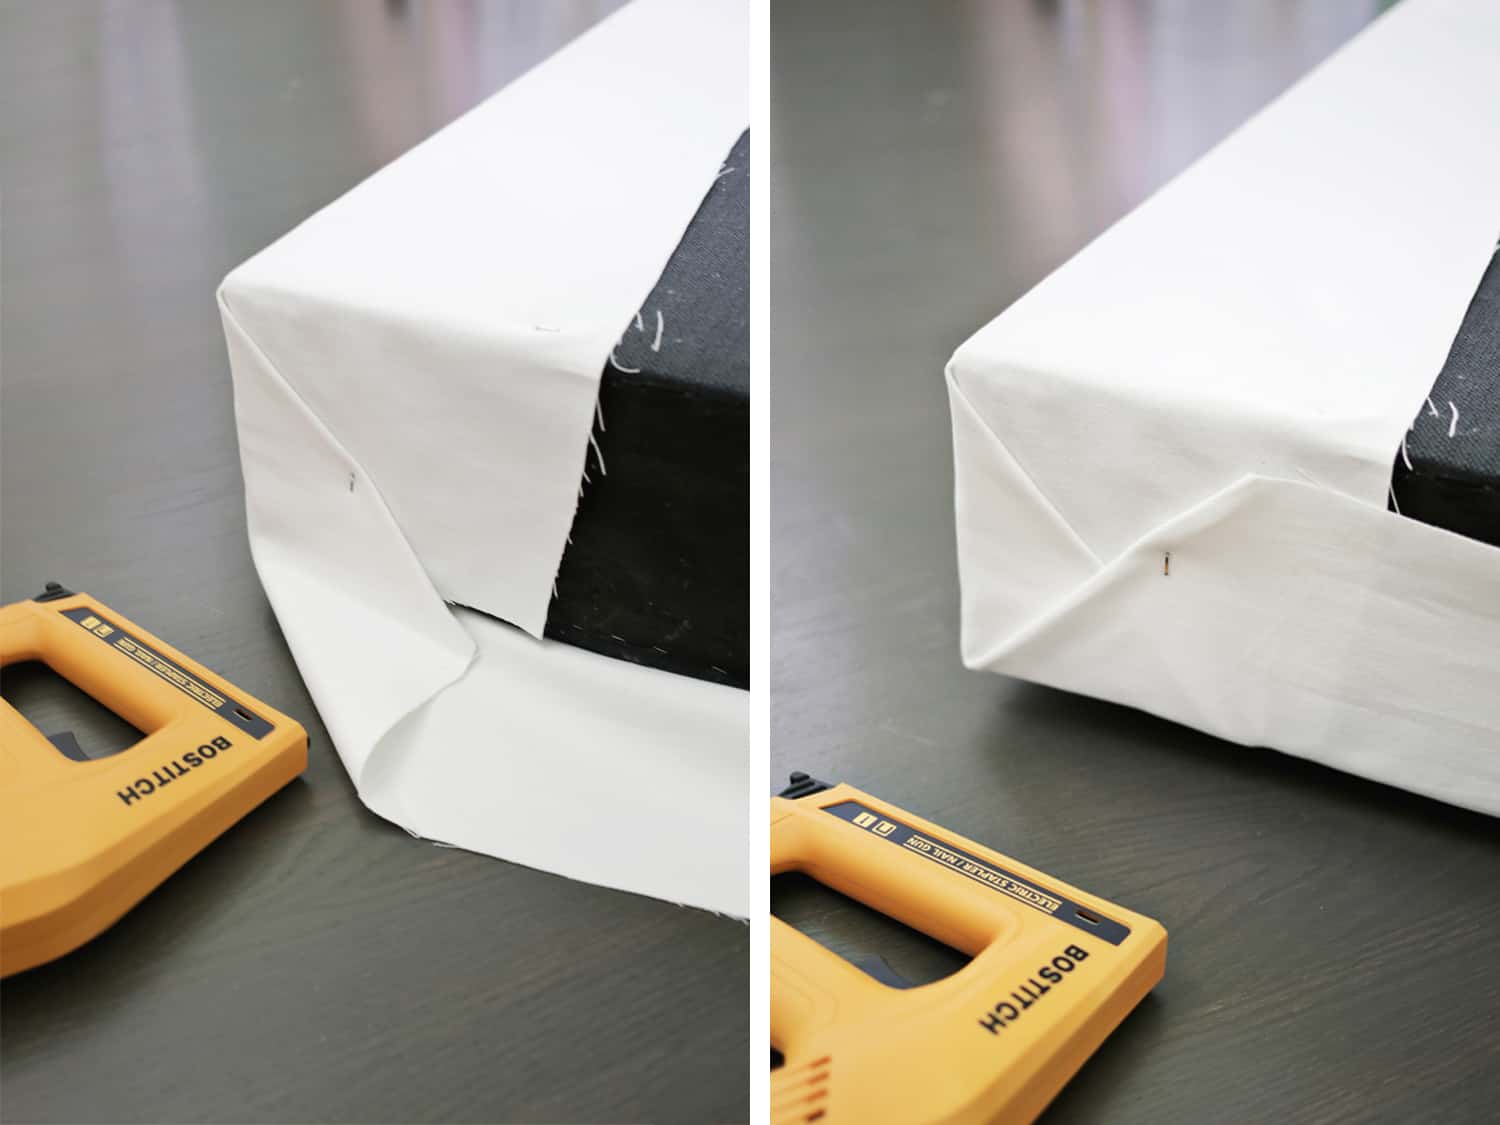
The No-Sew Choice
For those who don’t wish to be bothered by stitching, you possibly can lay your headboard in your material (with the best aspect going through outwards) and wrap your corners like you would wrap a nice present and staple in place!
The above two images are how I wrapped the underside of the headboard, so the one distinction is that you just’ll wish to be sure to have sufficient material size to have that open aspect (within the first image) come all the way in which up and over the again. That approach, you possibly can staple it on the again the place it received’t be seen in any respect.
I did the short stitching choice on the prime two corners of the headboard and the footboard to make them look further clear, however I wrapped all the opposite edges such as you see above.
Simply be continuously interested by what edges will probably be seen and which will probably be hidden underneath the mattress, and so forth., so you understand which edges needs to be completely lined.
And if you’re utilizing two layers of cloth and doing the new-sew choice, I’d layer the materials on prime of one another along with your foremost material on the underside and the best aspect going through the ground. Then, wrap them across the corners on the similar time moderately than one after the other.
Take care to easy them rather well earlier than putting your headboard on prime, however doing them collectively ought to provide you with a much less cumbersome fold than when you did them individually.
As soon as your sides are wrapped and the material is smoothed and pinned to the again, use your staple gun to safe your material in place on the again/backside of your headboard.
You’ll wish to staple into one thing arduous moderately than simply an space of froth or one thing, so really feel round for the picket body underneath your material and staple your material safe to that down all sides.
I like to begin in the course of every part and have one particular person easy and maintain the material tight whereas the opposite staples each 5-6″. When you attain one finish, return to the center and full the opposite aspect.
You could often attain a spot that’s actually arduous wooden the place your staple gun doesn’t fairly go all the way in which in and that’s OK.
You possibly can strive one other spot close by or hammer your staple flat, and so long as most of it went in it should maintain. Trim any extra material as wanted.

As soon as I had my headboard wrapped and protecting the white material, I repeated the method (with the pink material) of pinning the corners, stitching, and stapling the material in place.
You’ll solely should do it as soon as although when you don’t want the white beneath.
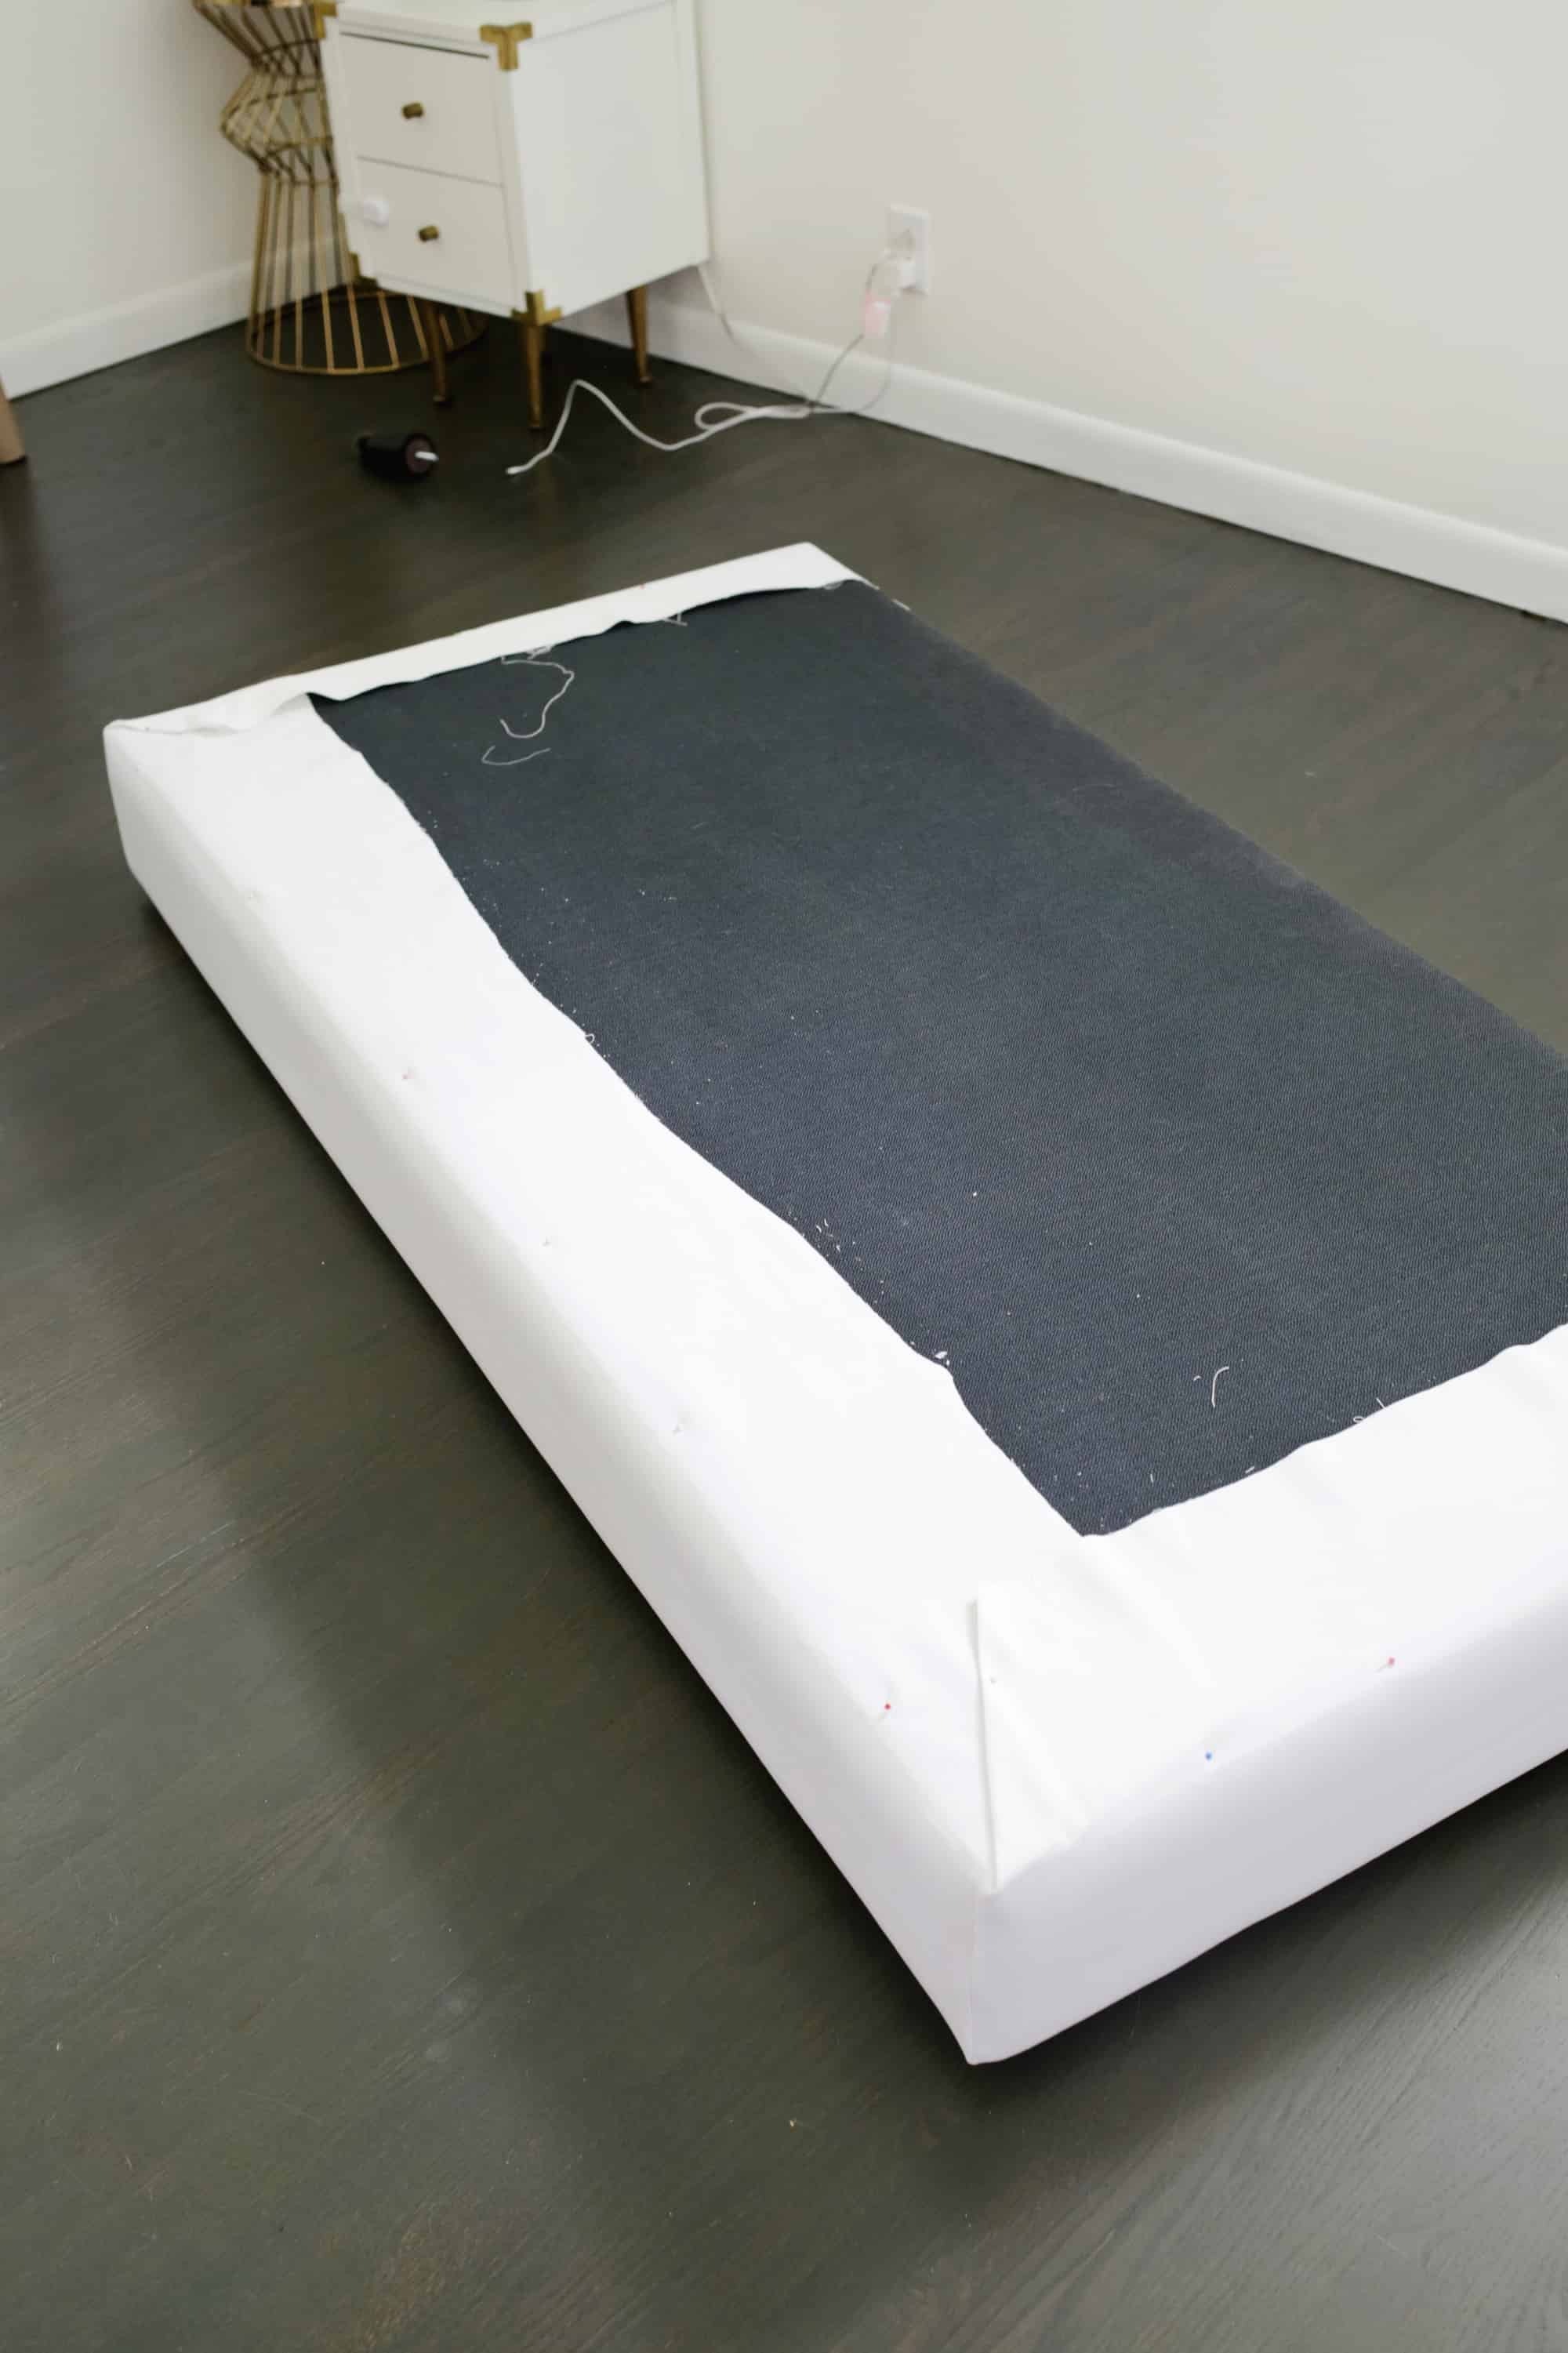
 Right here’s what the underside aspect appears like from the again with each layers stapled!
How Do I Put the {Hardware} Again On?
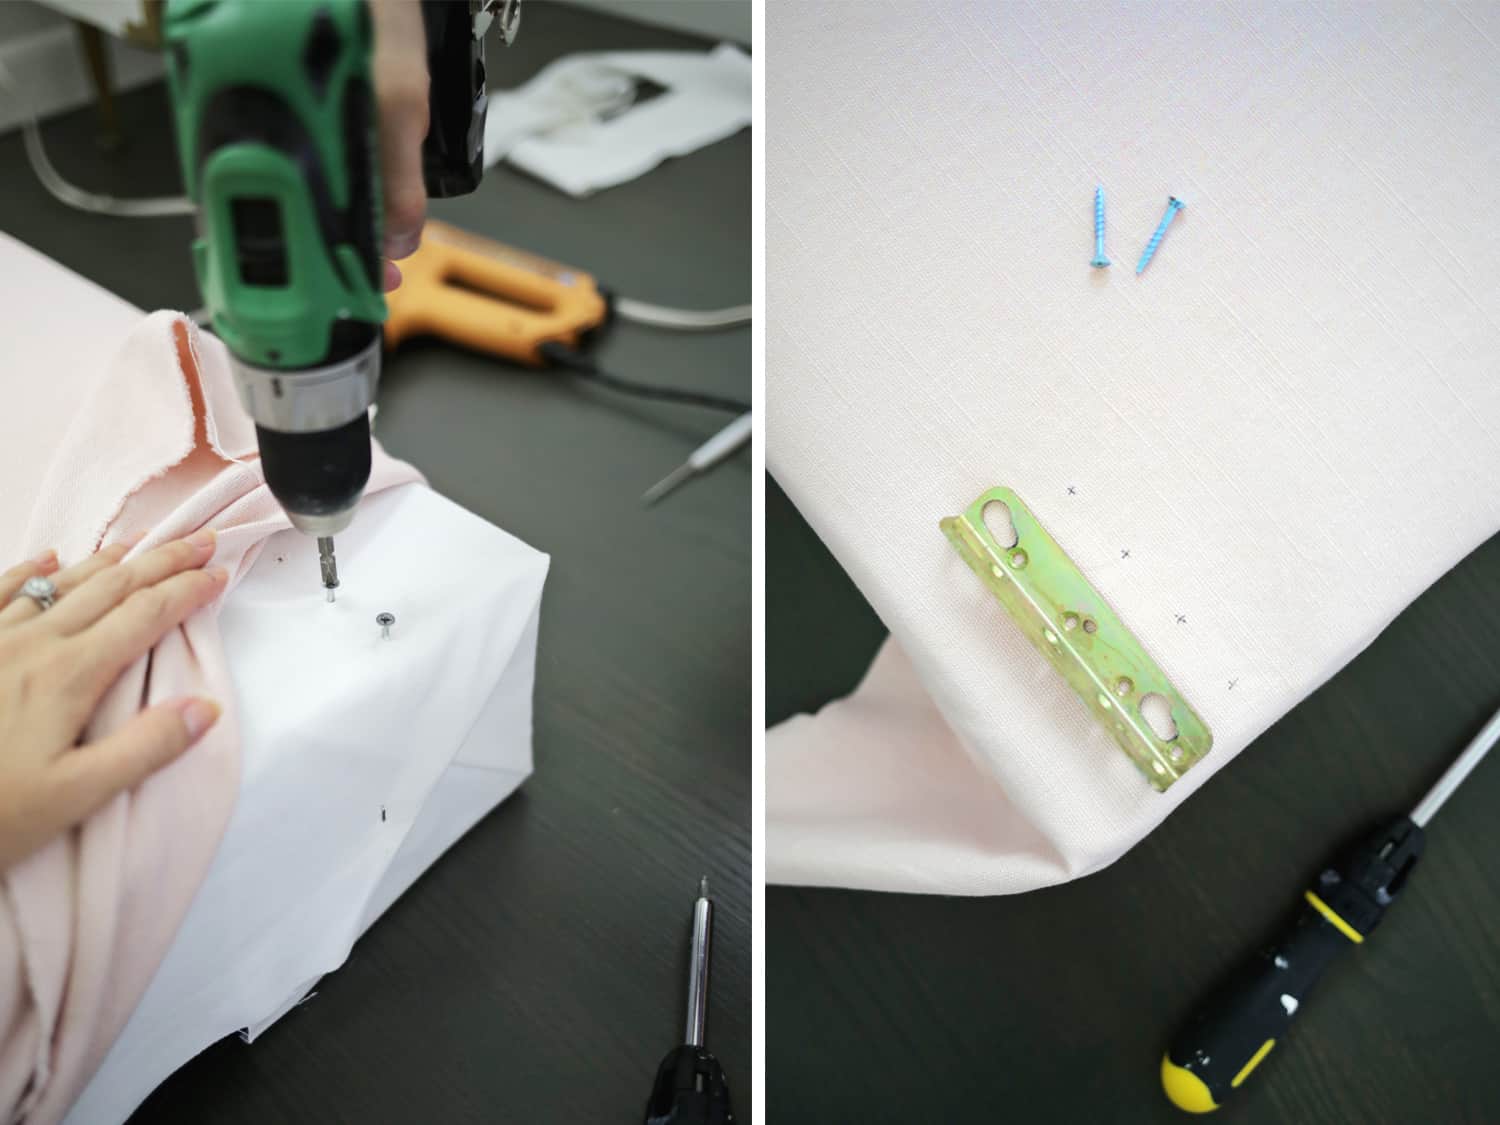
To place the {hardware} again on, we poked across the spots the place we knew the holes have been (based mostly on our measurements we took earlier than taking them off) with a pin or an axe till we discovered the holes. Then, we drilled our screws again in to create holes within the material.
It’s somewhat tougher to seek out the holes with two layers of cloth, so we discovered the holes by way of one layer and put the screws in and took them out once more.
This made the holes simpler to seek out (and mark on the second layer) so we might put the {hardware} again on excessive of the material. We used the identical technique for connecting the legs again on.
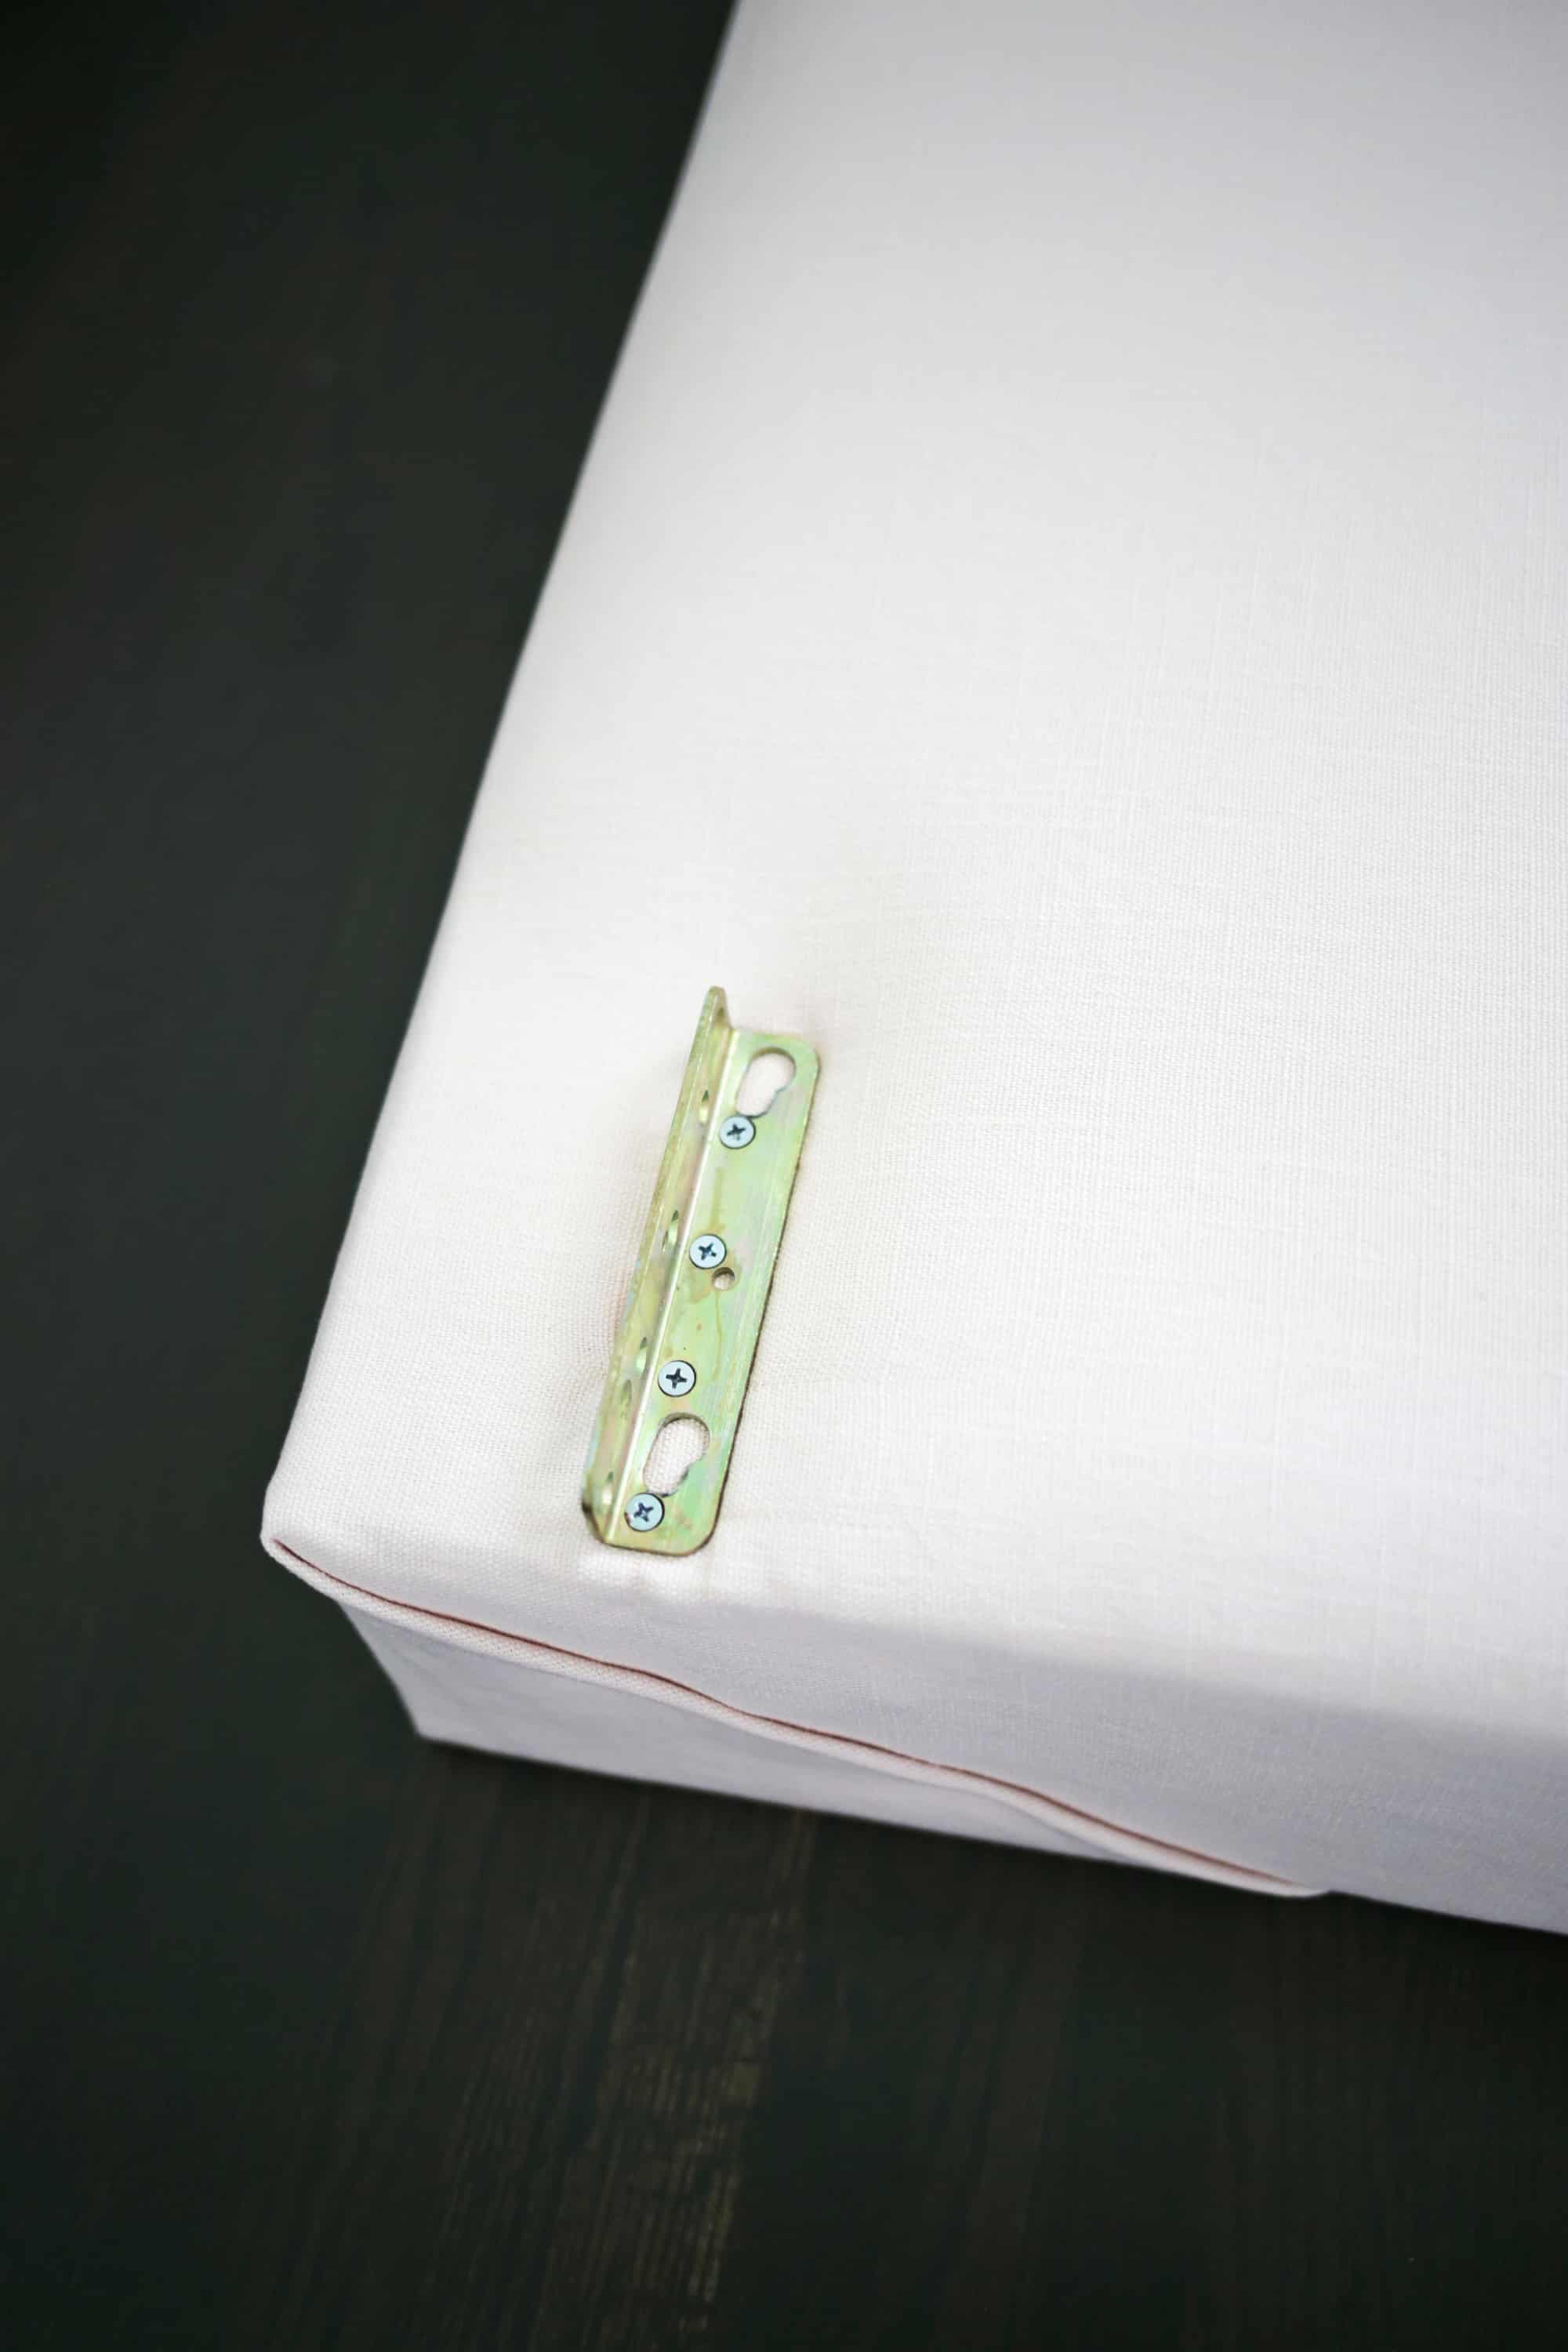 See? All prepared to hook up with the opposite items!
At this level, I simply repeated the method of laying out material that was large enough for my part, wrapping every bit, and stapling it in place.
I discovered it simpler to do the 2 sides with each material layers directly since I used to be merely folding and stapling these corners.
However then, I did the headboard and footboard with the white and pink layers individually since I used to be stitching these prime corners and that saved the material easy.
Tip: If you’re utilizing two layers of cloth, trim extra material off the beneath layer to get a cleaner, much less cumbersome nook fold (like I did with the white material) above.

What if the Staples Don’t Go By way of the Material?
For those who come to a extremely arduous spot within the wooden the place your staple gun can’t get by way of, you should use small nails to tack that part in place.
As soon as all of your items are lined, reattach all of your {hardware} and legs and put your new mattress again collectively!
For the reason that material made the mattress somewhat thicker in some spots, it was useful to depart the screws out about 1/4″ when placing the {hardware} again on. That approach, you possibly can match the items collectively extra simply after which tighten the screws as soon as the body was again collectively once more.
Reattach the backbone center a part of your mattress and also you’re prepared for the mattress and covers!


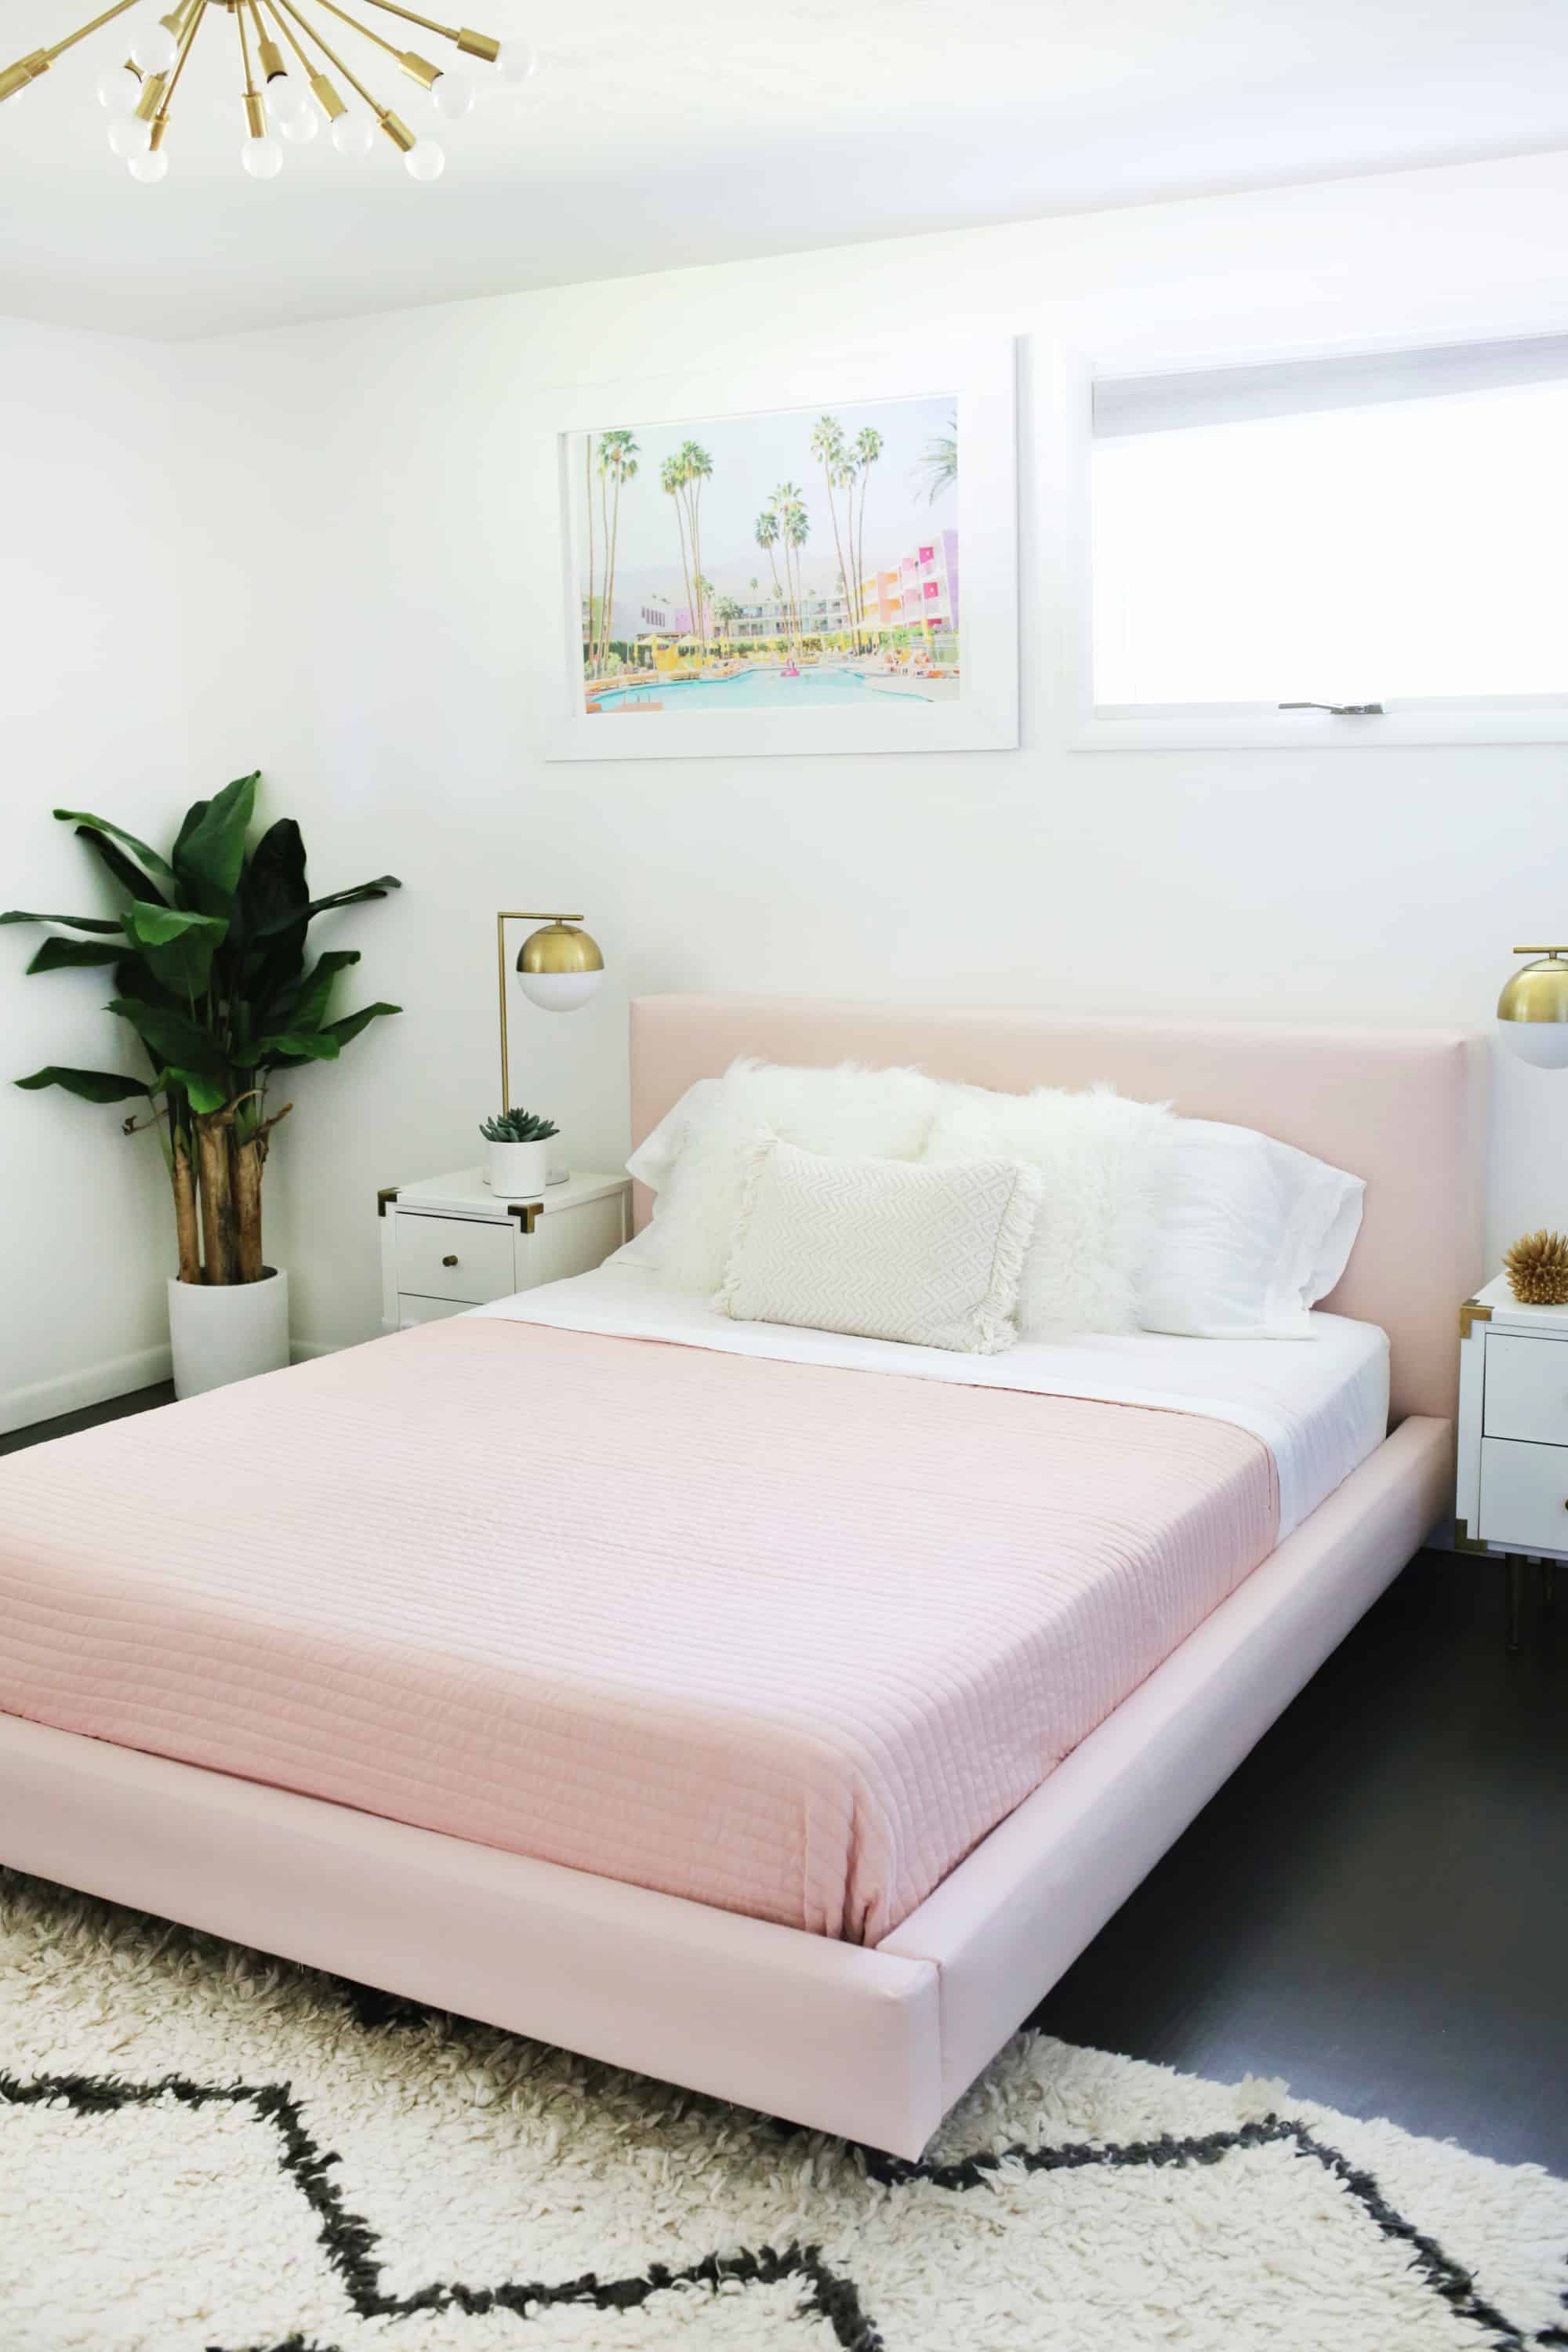
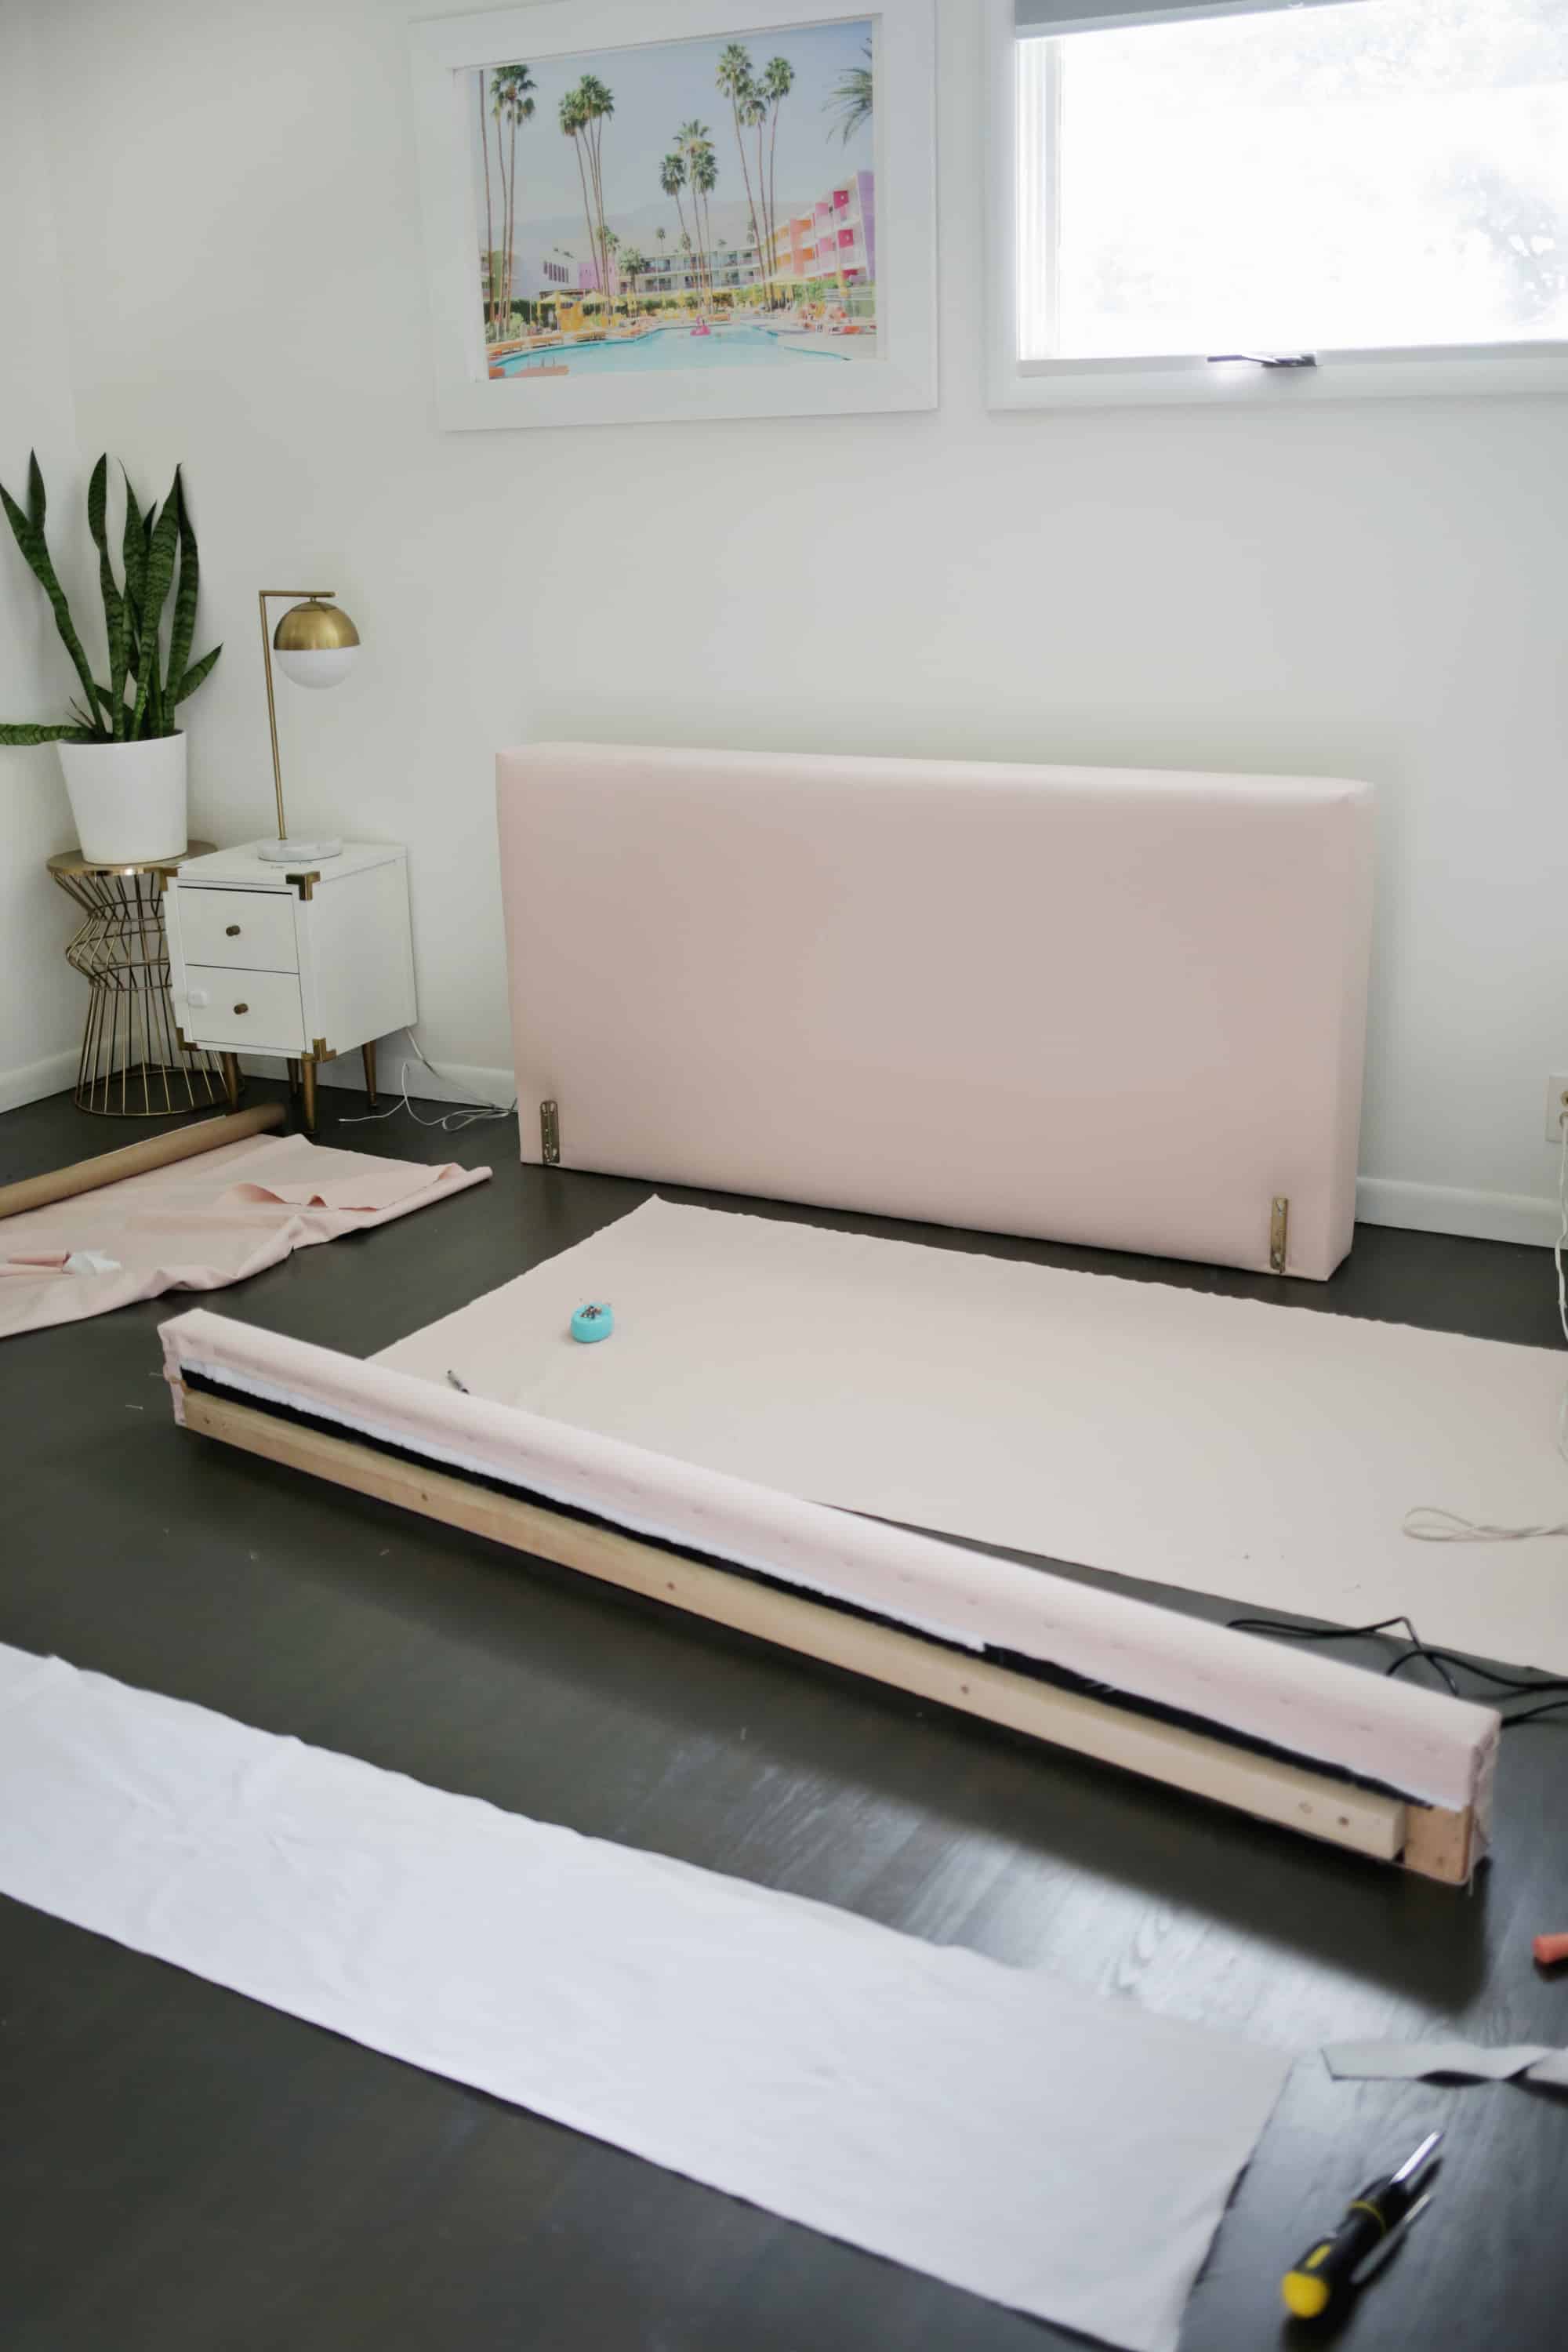
I’ve to say, I felt fairly good about this venture, however it got here out so a lot better than I ever anticipated! I’d be shocked if I noticed this in another person’s home and so they informed me they’d recovered it.
This easy technique did take away the tufted look that the headboard had earlier than, however I prefer it higher that approach because it appears extra trendy.
In case your headboard has tufts that you just wish to maintain, use further material to cover some buttons within the new colour, discover the buttons underneath the material, and use a curved needle to stitch the buttons onto the highest of the prevailing buttons for extra of a tufted look.
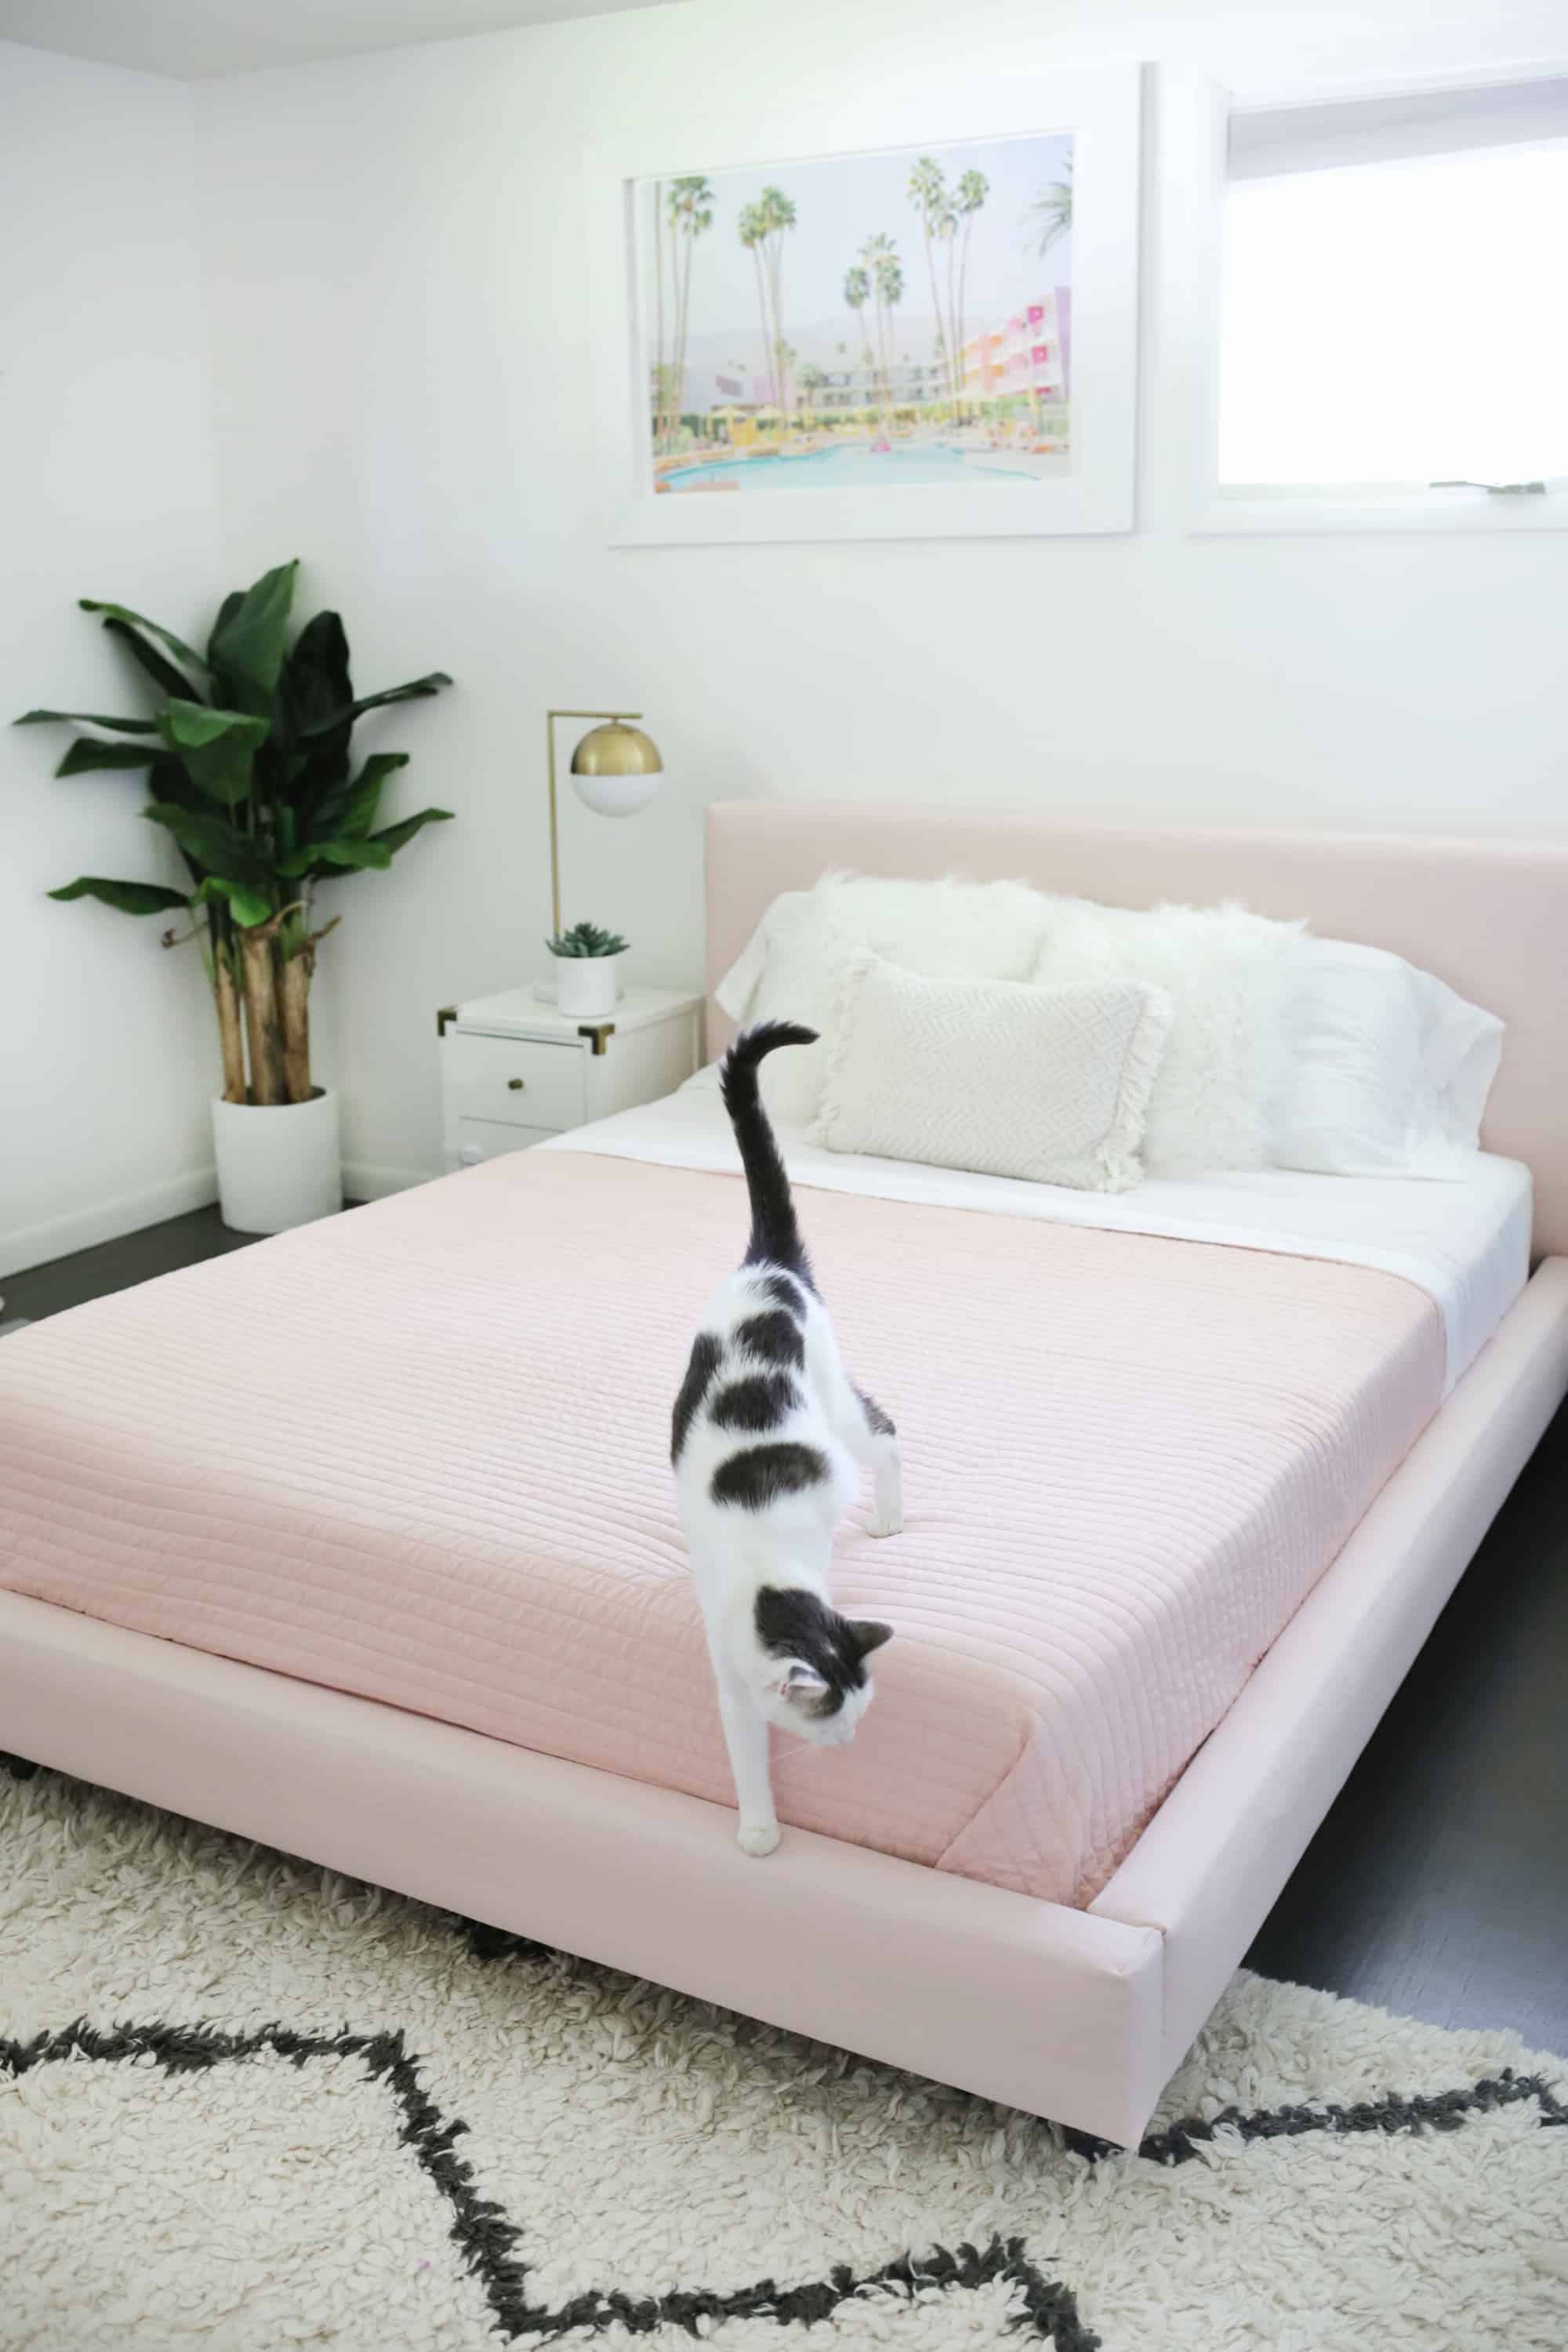
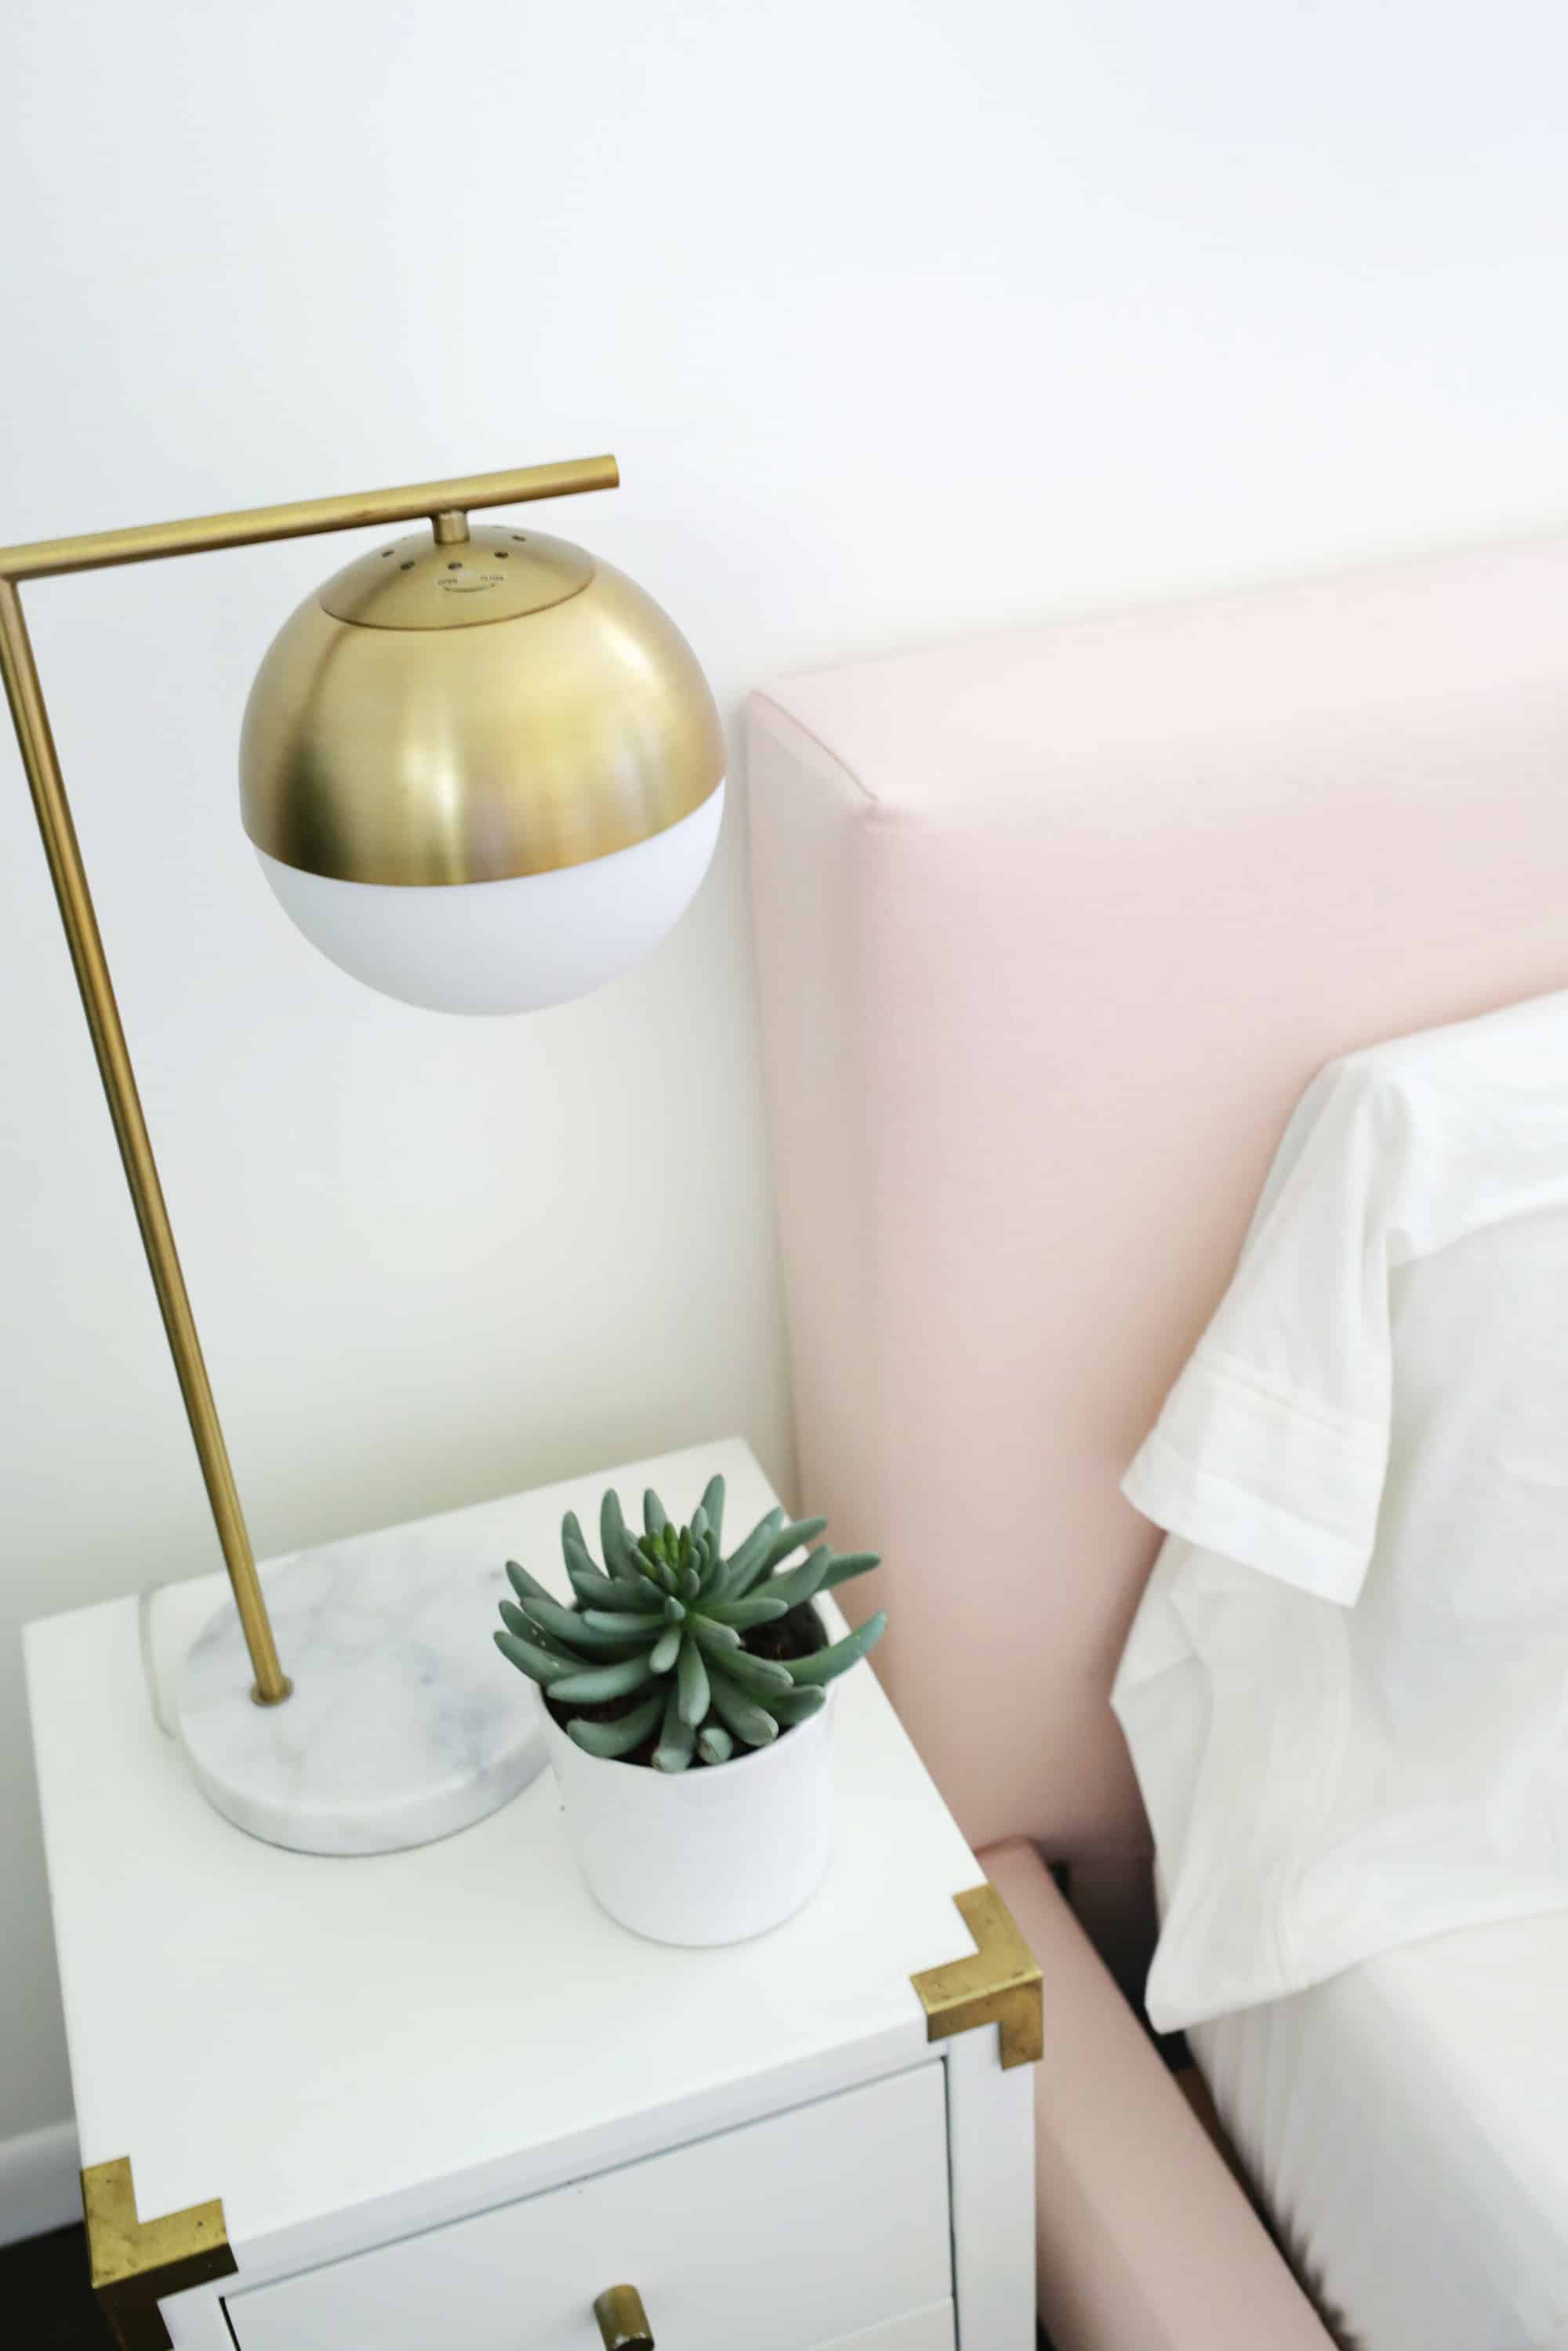
The pink appears so cute under that Palm Springs print over the mattress and with the globe lights on the white nightstands (related lights and nightstands right here).
General, I like this earlier than/after and you possibly can truly seize a staple remover sooner or later when you ever wish to get well once more in one other colour. Hope this DIY helps you give your bed room a funds makeover, too!
P.S. You possibly can see how my bedroom finally came together and the rest of my home tours here! xo. Laura
Reupholster Your Mattress Body in One Afternoon
The way to get well your mattress in in the future!
- vast bolt upholstery or multi-use material in your colour of alternative vast sufficient to cowl your headboard and be wrapped across the again (the material I selected was 54″ vast). I used about 5.5 yards for my mattress
- vast bolt white material as an underlayment non-compulsory, however useful in case you have skinny major material and are going from a darkish mattress to a lightweight mattress
-
Take aside the items of your mattress body
-
As soon as we had taken aside every of the rails (and eliminated that picket backbone half within the center that holds the mattress up) we additionally took off the connecting {hardware} on every part too. Ensure to label the place every bit goes and what route it faces so you possibly can put it again collectively on the finish. I additionally recommend jotting down a fast measurement of the place the {hardware} is linked on every board so you possibly can simply discover that spot once more if you find yourself protecting that space with material (like 8″ in from the skin edge and 1/2″ up from the underside sort of measurements).
-
I additionally unscrewed the legs as properly from the header and footer and made a word of the place these holes are positioned too. Your legs might have a plate they connect to or simply go immediately into the wooden, so take away the plate if there may be one there.
-
THE SEWING OPTION: Subsequent, I laid the headboard onto a bit of my white material (with the best aspect of the material going through the headboard) that was large enough to wrap the headboard and wrapped and pinned the material across the again making an attempt to get the material easy and tight. The small part of stitching that I did was on the prime nook of every aspect of the headboard. I smoothed out the material and pinned the nook collectively in order that the perimeters got here collectively properly such as you see within the prime two frames. Repeat that smoothing and pinning with the alternative aspect.
-
Subsequent, I eliminated the pins that have been holding the material on the headboard, eliminated the material from the headboard and sewed down that line the place the nook pins have been and lower the surplus. I then tried the duvet again on the headboard once more to see the way it match and pinched and sewed somewhat extra material if it didn’t match very snugly. As soon as I had the match proper, I turned the material proper aspect out and put it again on in order that I had the good sewn nook that you just see within the final body.
-
THE NO-SEW OPTION: For those who don’t wish to be bothered by stitching, you possibly can lay your headboard in your material (with the best aspect going through outwards) and wrap your corners like you would wrap a nice present and staple in place! The above two images are how I wrapped the underside of the headboard so the one distinction is that you just’ll wish to be sure to have sufficient material size to have that open aspect within the first image come all the way in which up and over the again so you possibly can staple it on the again the place it received’t be seen in any respect.I did the short stitching choice on the prime two corners of the headboard and the footboard to make them look further clear, however I wrapped all the opposite edges such as you see above. Simply be continuously interested by what edges will probably be seen and which will probably be hidden underneath the mattress, and so forth., so you understand which edges needs to be completely lined.And if you’re utilizing two layers of cloth and doing the new-sew choice, I’d layer the materials on prime of one another along with your foremost material on the underside and the best aspect going through the ground, and wrap them across the corners on the similar time moderately than one after the other. Take care to easy them rather well earlier than putting your headboard on prime, however doing them collectively ought to provide you with a much less cumbersome fold than when you did them individually.
-
Once your sides are wrapped in whichever way you choose and the fabric is smoothed and pinned to the back, use your staple gun to secure your fabric in place on the back/bottom of your headboard. You’ll want to staple into something hard rather than just an area of foam or something, so feel around for the wooden frame under your fabric and staple your fabric secure to that down each side. I like to start in the middle of each section and have one person smooth and hold the fabric tight while the other staples every 5-6″. Once you reach one end, go back to the middle and complete the other side. You may occasionally reach a spot that’s really hard wood where your staple gun doesn’t quite go all the way in and that’s OK. You can try another spot nearby or hammer your staple flat, and as long as most of it went in it will hold. Trim any excess fabric as needed.
-
So, once I had my headboard wrapped and covering the white fabric, I repeated the process with the pink fabric of pinning the corners, sewing, and stapling the fabric in place. You’ll only have to do it once though if you don’t need the white underneath.
-
To put the hardware back on, we poked around the spots where we knew the holes were (based on our measurements we took before taking them off) with a pin or an awl until we found the holes and drilled our screws back in to create holes in the fabric. It’s a little harder to find the holes with two layers of fabric, so we found the holes through one layer, put the screws in and took them out again, and that made the holes easier to find and mark on the second layer so we could put the hardware back on over the top of the fabric. Do the same thing for connecting the legs back on as well.
-
Basically, at this point, I just repeated the process of laying out fabric that was big enough for my section, wrapping each piece, and stapling in place. I found it easier to do the two sides with both fabric layers at once since I was simply folding and stapling those corners, but then I did the headboard and footboard with the white and pink layers separately since I was sewing those top corners and that kept the fabric smooth.
-
A little tip if you are doing two layers of fabric is that you can trim excess fabric off the underneath layer to get a cleaner, less bulky corner fold like I did with the white above. Also, if you come to a really hard spot in the wood where your staple gun just can’t get through, you can use small nails to tack that section in place.
-
Once all your pieces are covered, reattach all your hardware and legs and put your new bed back together! Since the fabric made the bed a little thicker in some spots, it was helpful to leave the screws out about 1/4″ when putting the hardware back on. That way, you could fit the pieces together more easily and then tighten the screws once the frame was back together again. Reattach the spine middle part of your bed and you’re ready for the mattress and covers!


