
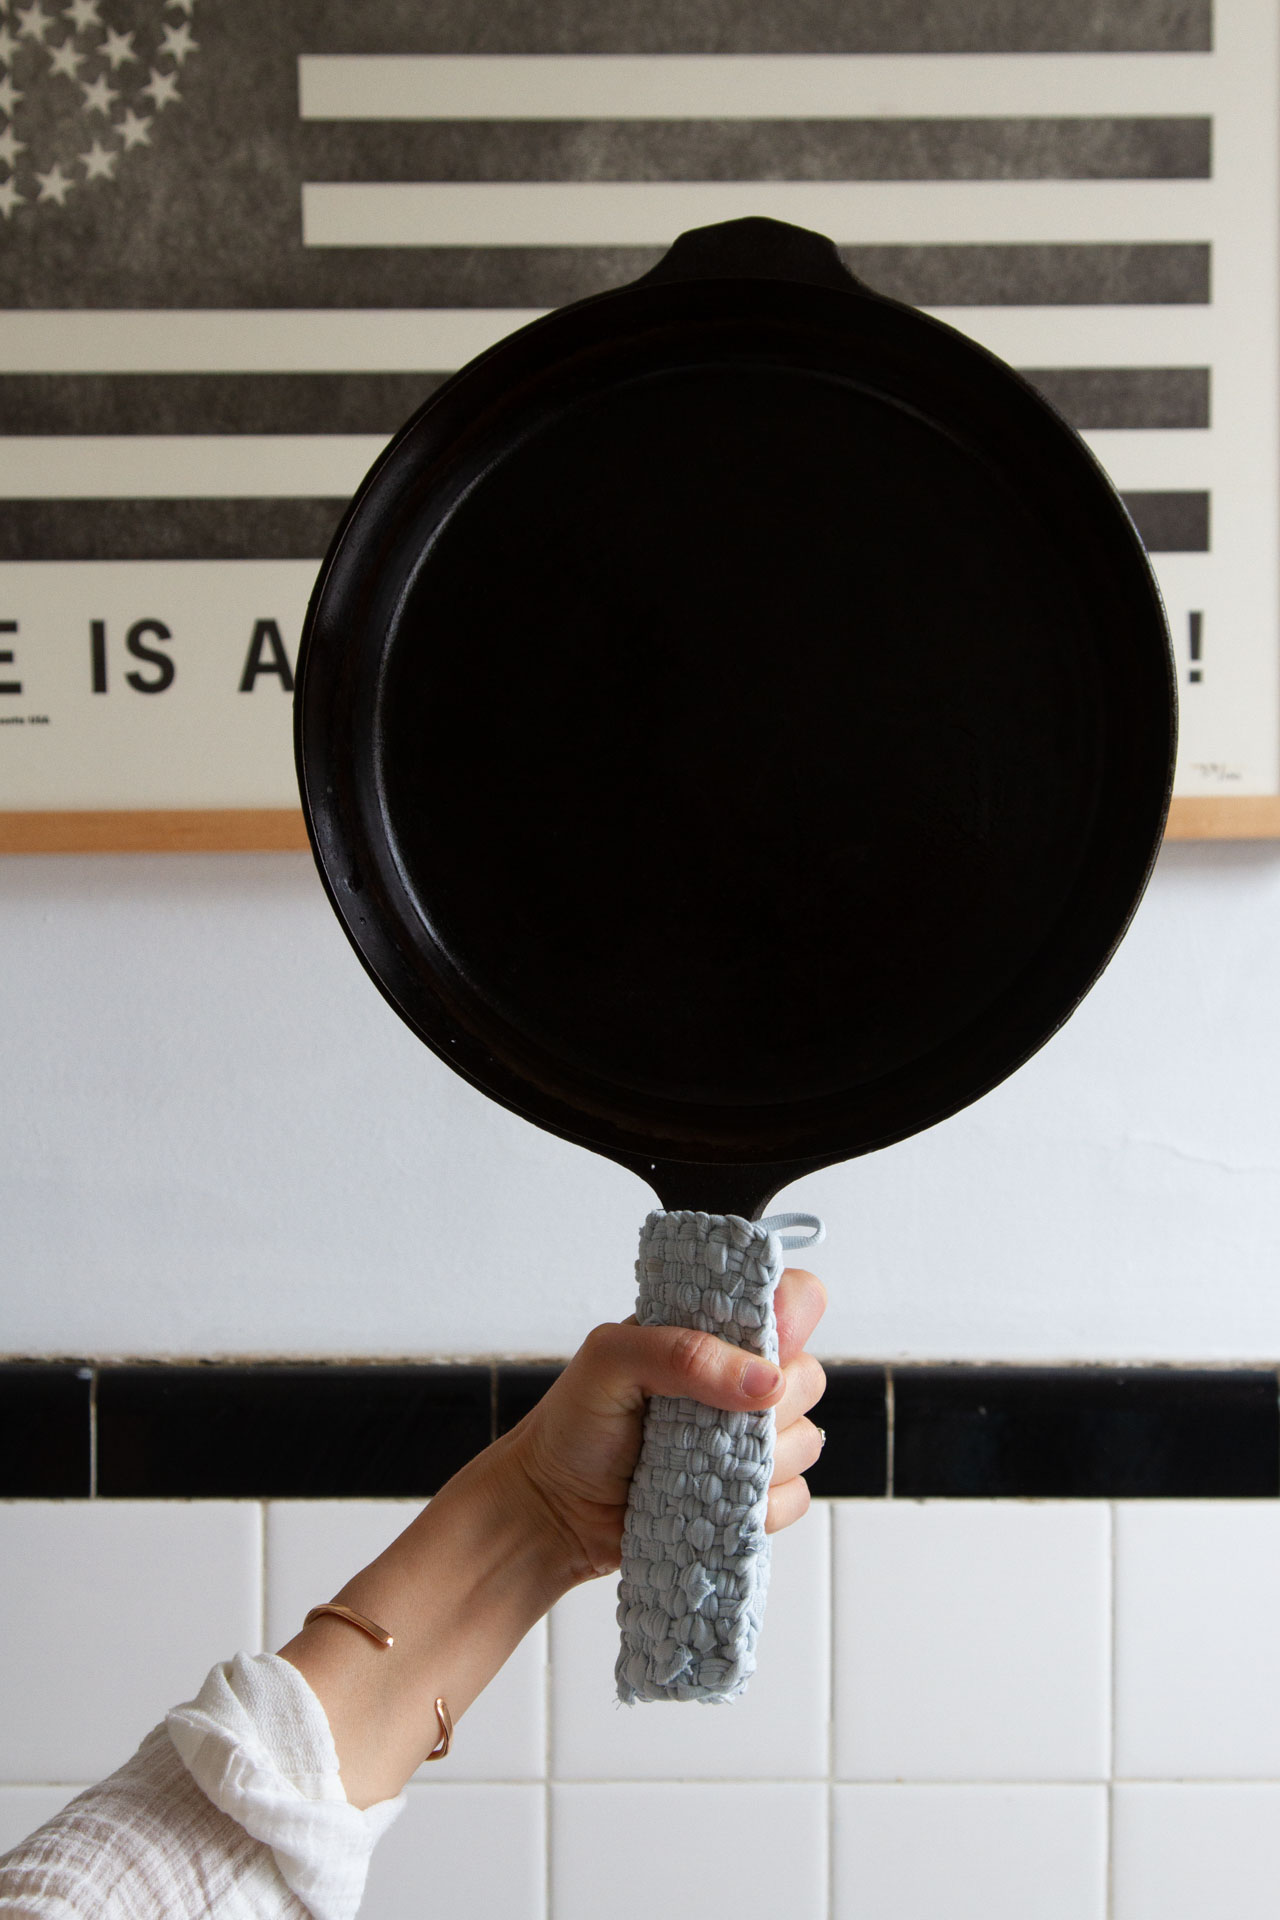
Recycled legging leg potholders is a little bit of a mouthful, however that’s what these are. Within the case that any of you might have offspring like mine, you’ll be aware of the astonishingly brief life cycle of youngsters’s leggings. They arrive brand-new and filled with promise, they’re trashed someday between the primary and third journey to the playground. The knees rip, the knees are mended, the knees rip once more, they usually briefly take a flip as bike shorts earlier than the crotch grows holes, after which there’s no coming again.

Why don’t I gown my youngsters in heartier stuff that may higher stand up to the wilds of rooftop playgrounds and New York Metropolis pavement? Properly, you strive reasoning with a 5 yr outdated who desires to put on mushy pants solely. I’ll be taking Rose’s recommendation and turning our too-far-gone leggings into potholders.
Kids’s leggings, Rose factors out, create excellent weaving loops for classic potholder looms as they’re sometimes made out of knit jersey material, a cloth that won’t fray when lower and may simply stretch to accommodate a seven-inch loom of the kind you might need hanging round from your individual childhood.
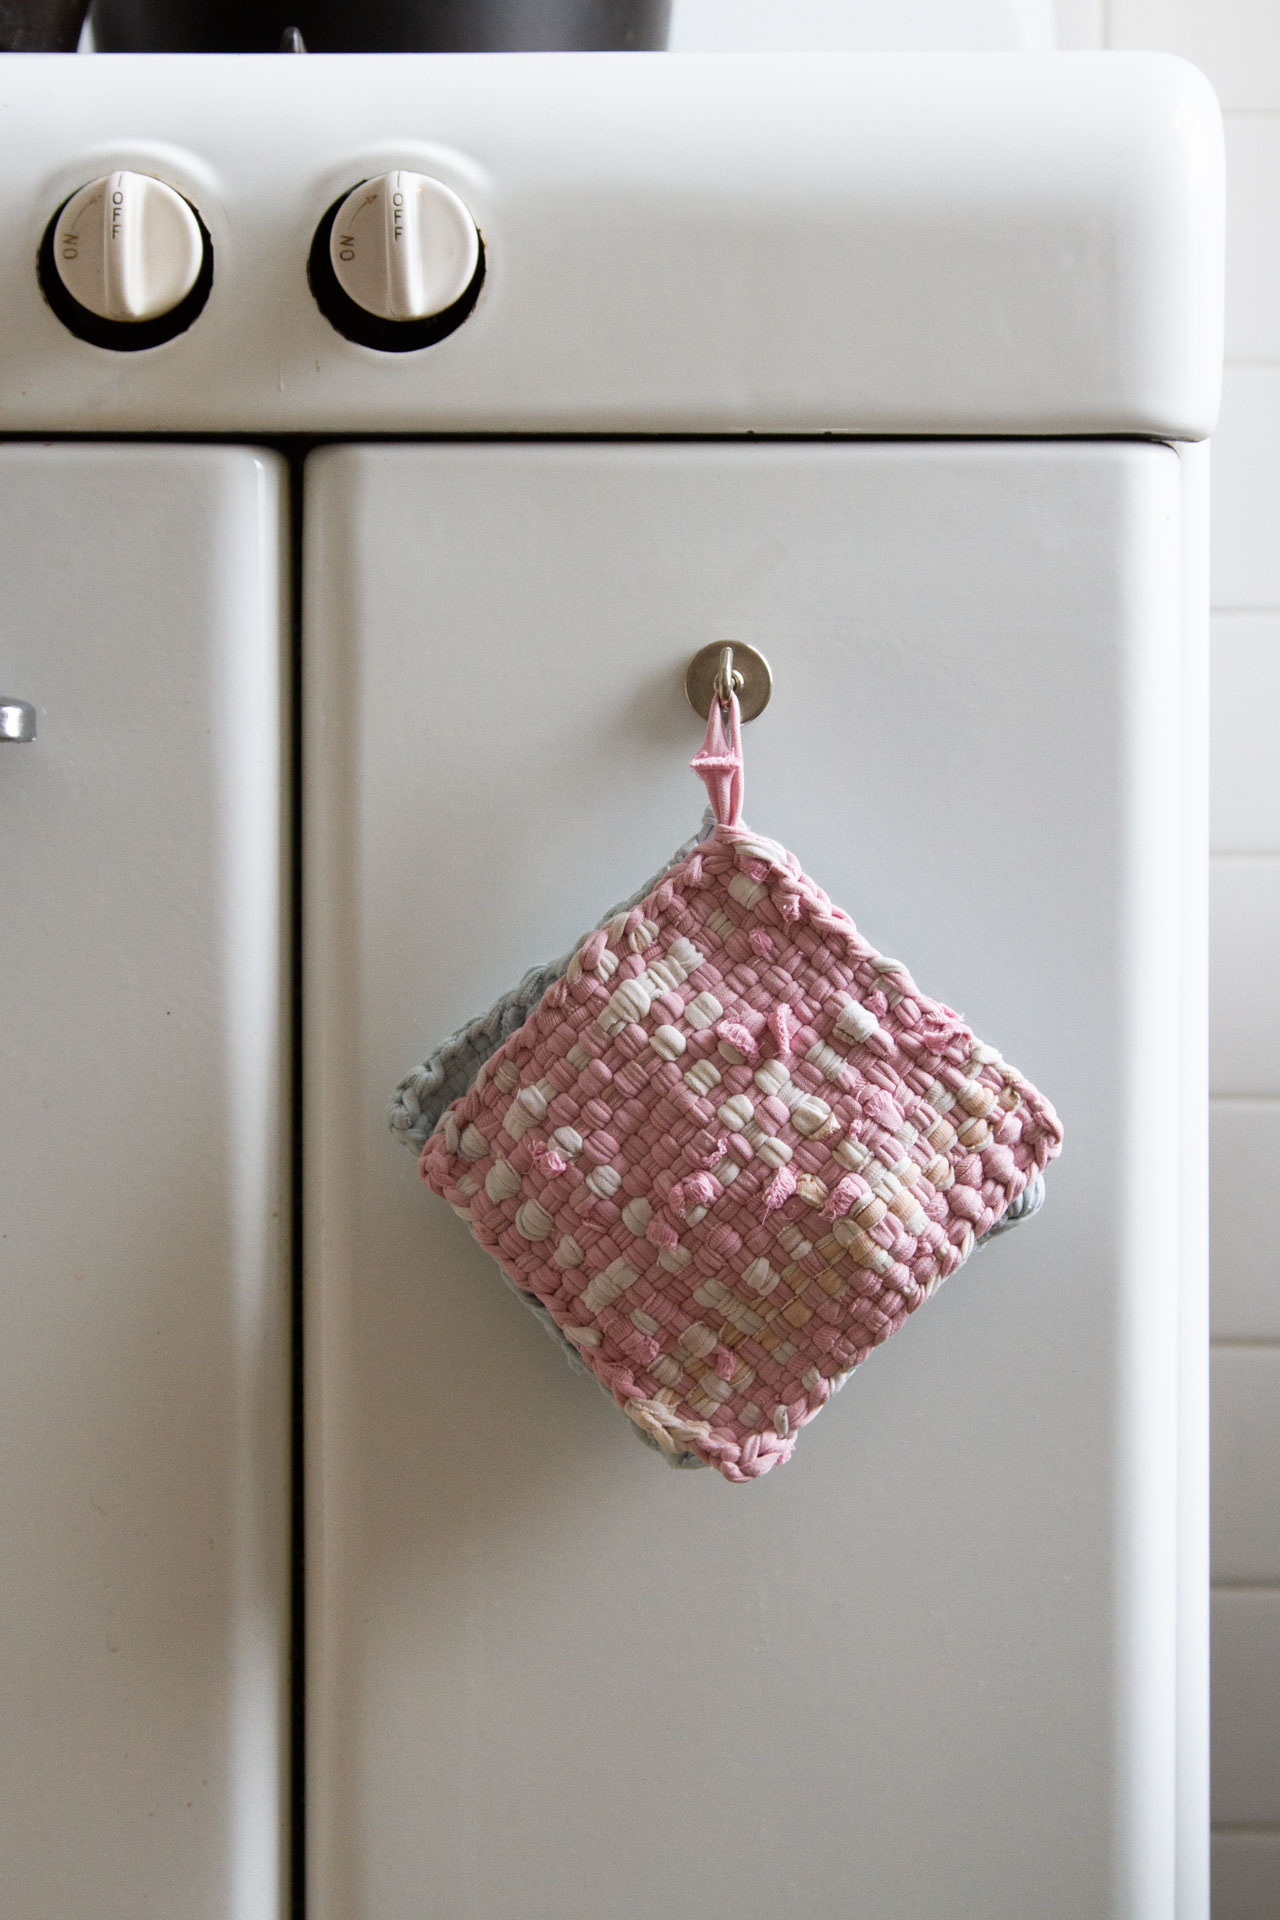
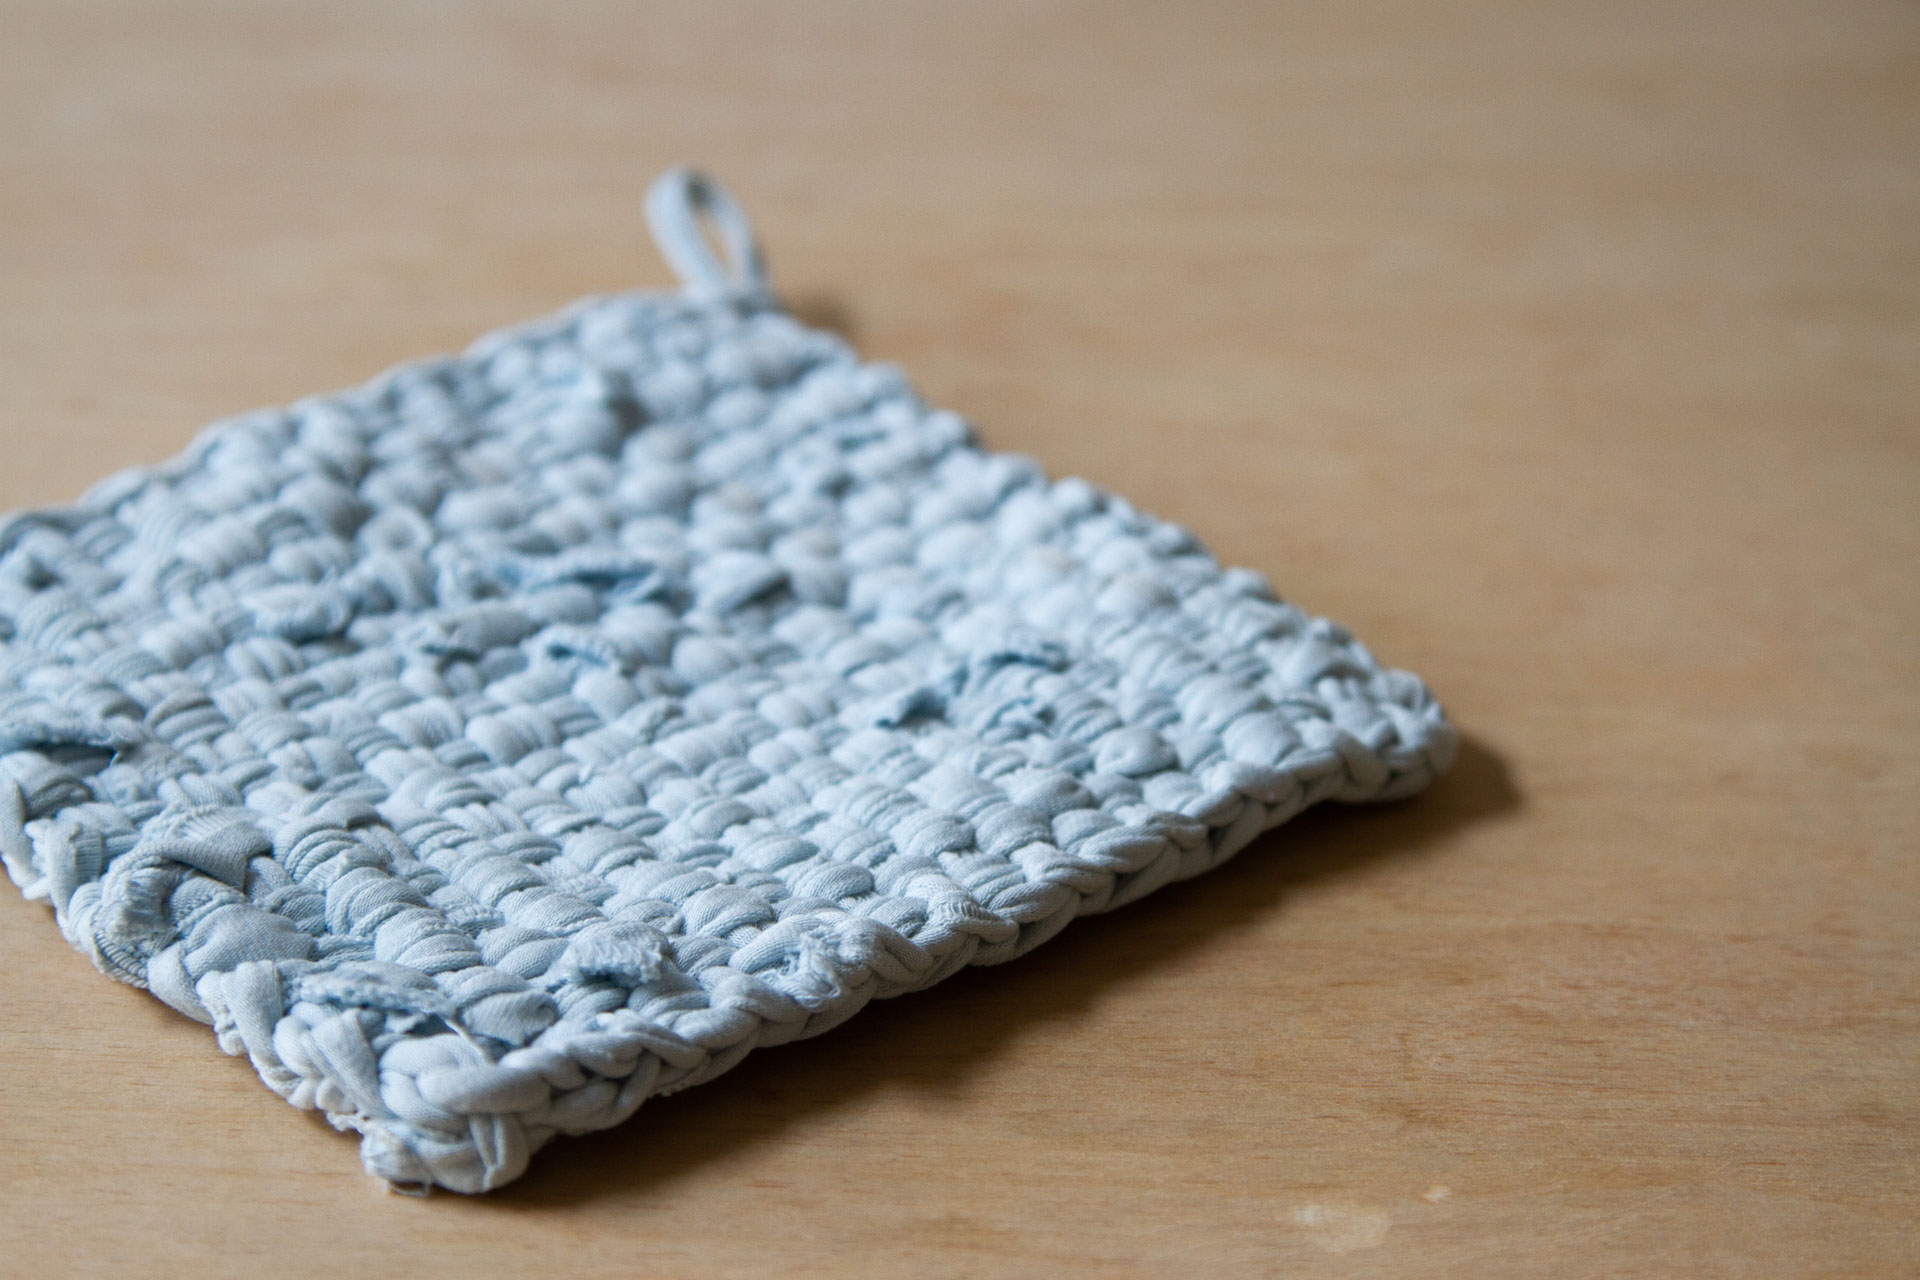
What’s type of exceptional about legging leg potholders is that the mixture of playground grime and the wobbly rolled edges of lower jersey manages to subdue even the flashiest child leggings into one thing that appears as mushy and homespun because it truly is. And naturally there’s the candy satisfaction of creating one thing new and helpful from what would in any other case find yourself within the landfill. Beneath are the step-by-step directions from Rose. As ever there can be extra movies and pictures on my Instagram page.
Provides:
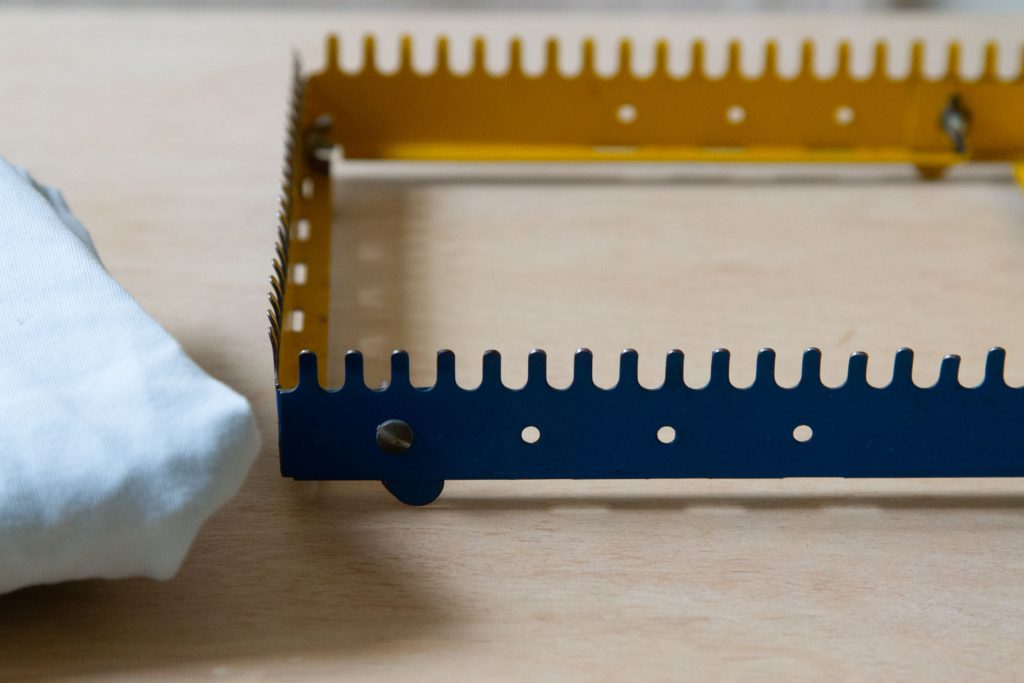
+ 7-inch potholder loom and hook (the above is a now-vintage loom belonging to Erin’s mother)
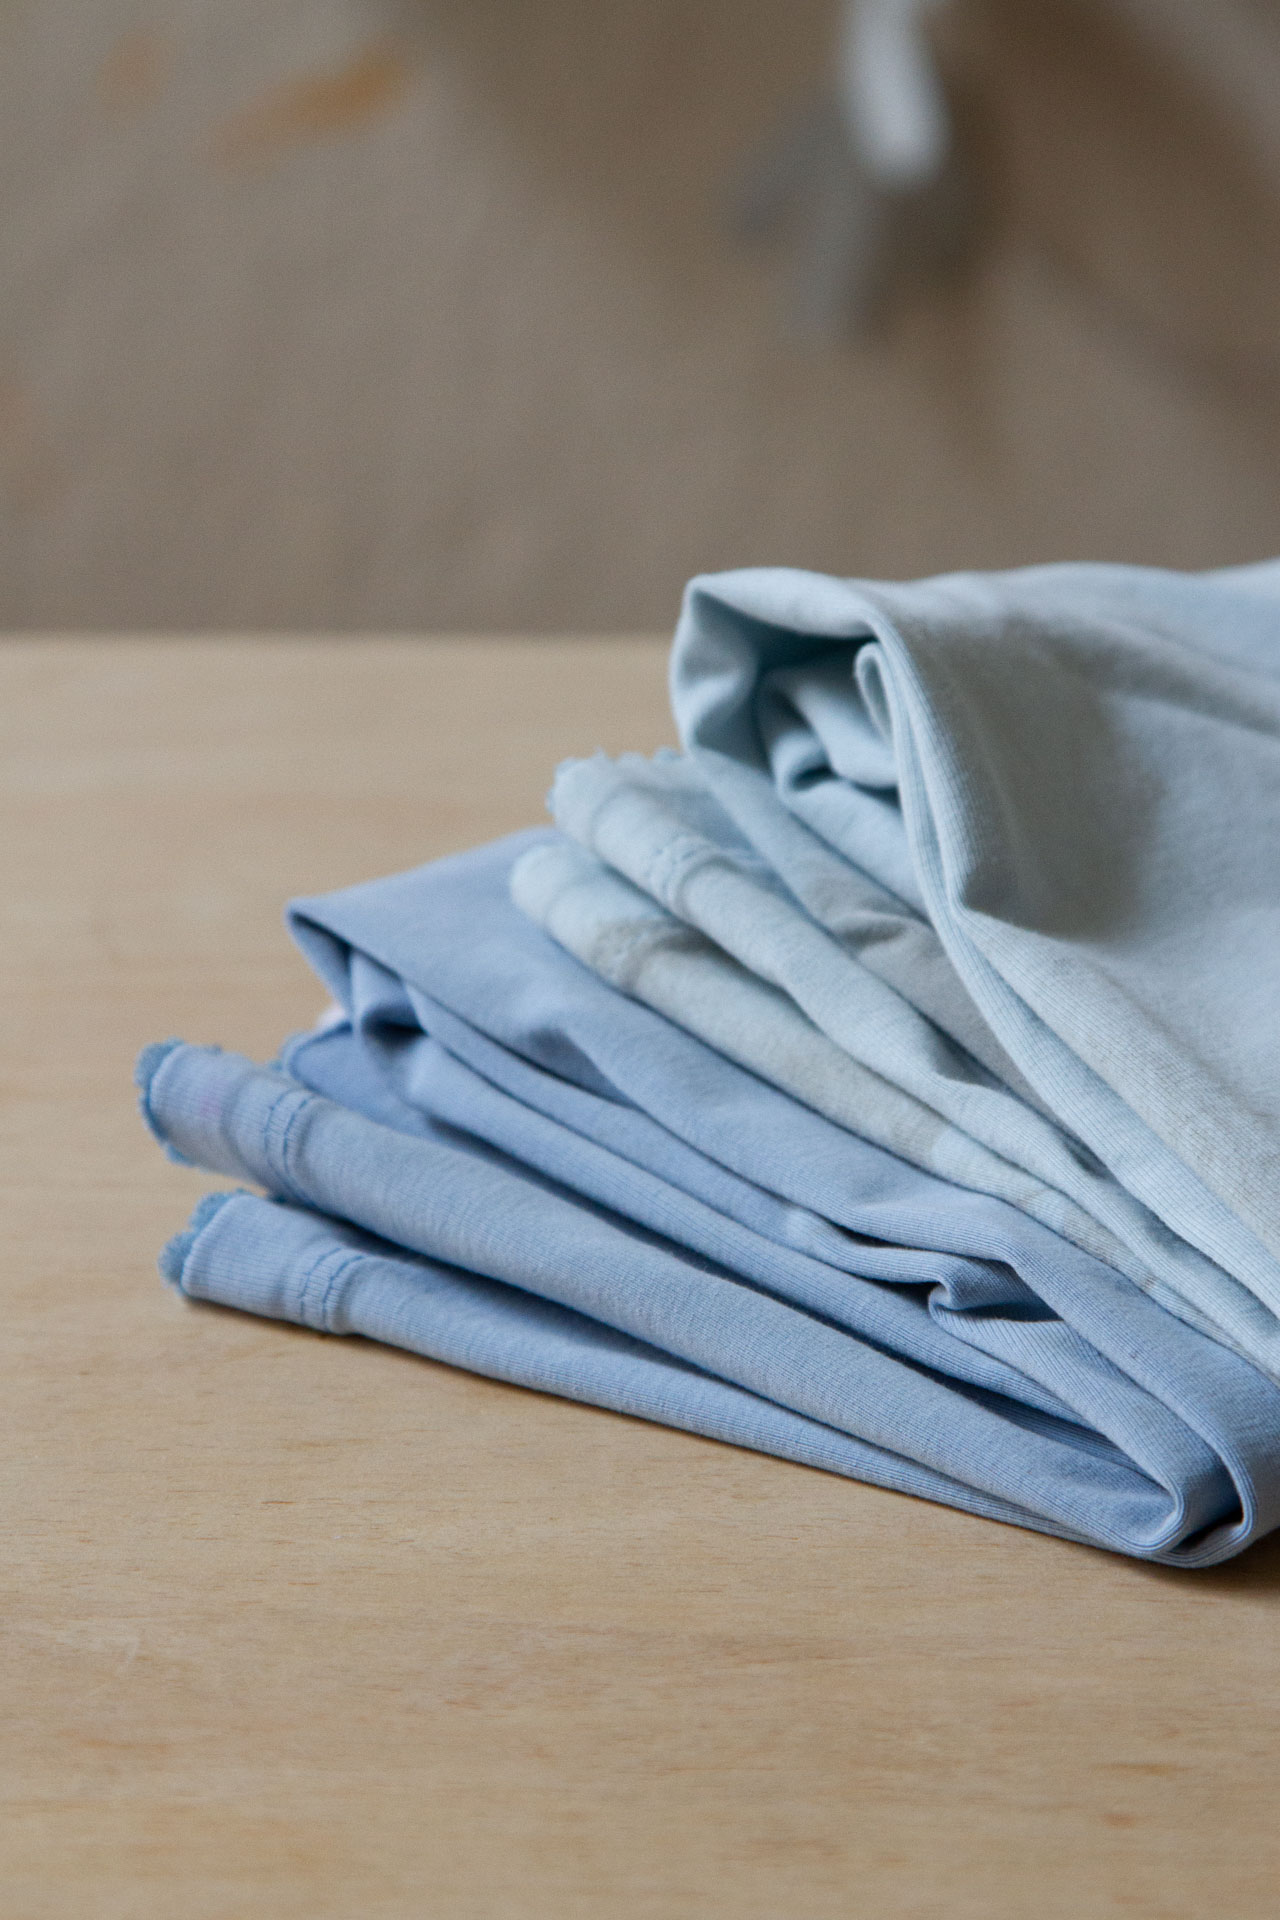
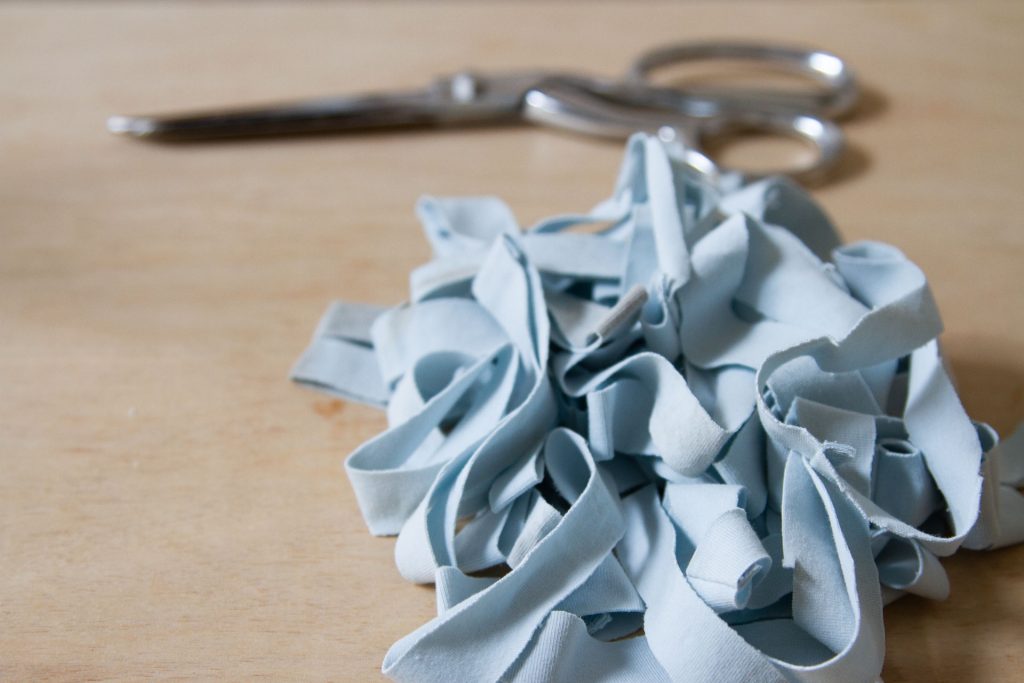
+ one small (clear) pair of used youngsters’s leggings (we used leggings starting from children’ measurement 4 to eight)*
+ a pointy pair of scissors
*As a substitute materials, you may also lower up tights and huge grownup socks, each of which have the added benefit of no sewn inseam. Observe: If utilizing clothes from an older youngster or grownup, a larger loom is likely to be mandatory.)
Directions:
Reducing the leggings into weaving loops:
+ Utilizing sharp scissors, lower off the sewn cuff.
+ Working in roughly ½” increments and ranging from the underside edge, lower width-wise by the pant leg, from one aspect to the opposite. It will create spherical material bands that may curl in barely as soon as lower.
+ Proceed to chop loops from the ankle all the way in which as much as the highest of the thigh. If there are rips within the leggings, merely lower across the gap when making your loops.
+ Repeat for the second leg. Relying on the scale of your loom you’ll need 36-40 loops. (Though it’s all the time good to have a couple of additional…simply in case.)
Observe: Dimension of the material rounds will depend upon the place on the pant leg they arrive from. You’ll want to alternate utilizing the large bands (loops lower across the thighs) with the slim ones (loops lower under the knees) whilst you weave to create a extra even, woven floor.
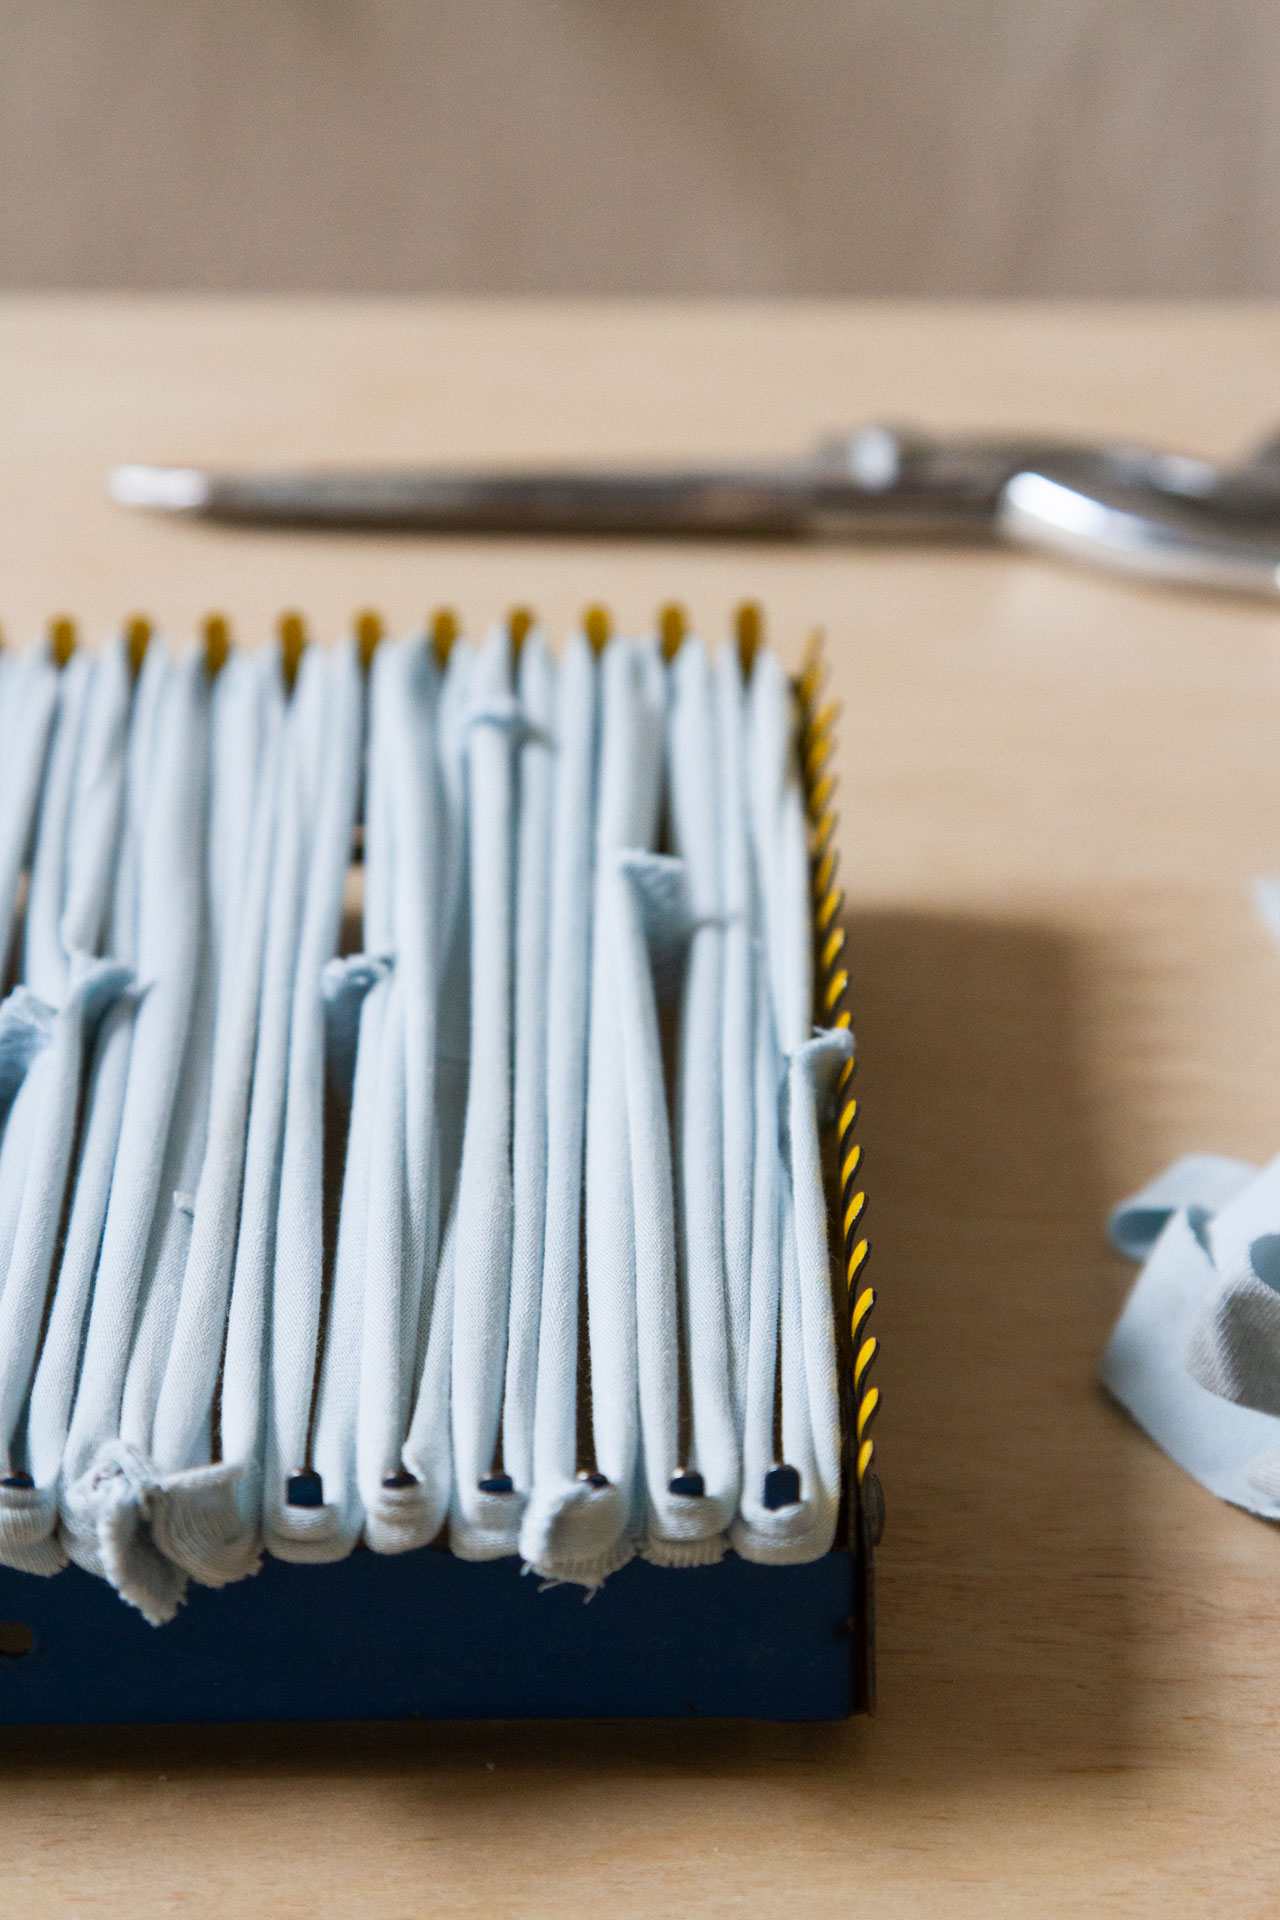
To arrange the loom (often known as your ‘warp’):
+ Place your lower loops from one peg immediately throughout the loom to the alternative peg.
+ As soon as all loops are stretched throughout the pegs you’ll start to weave (or create your ‘weft’).
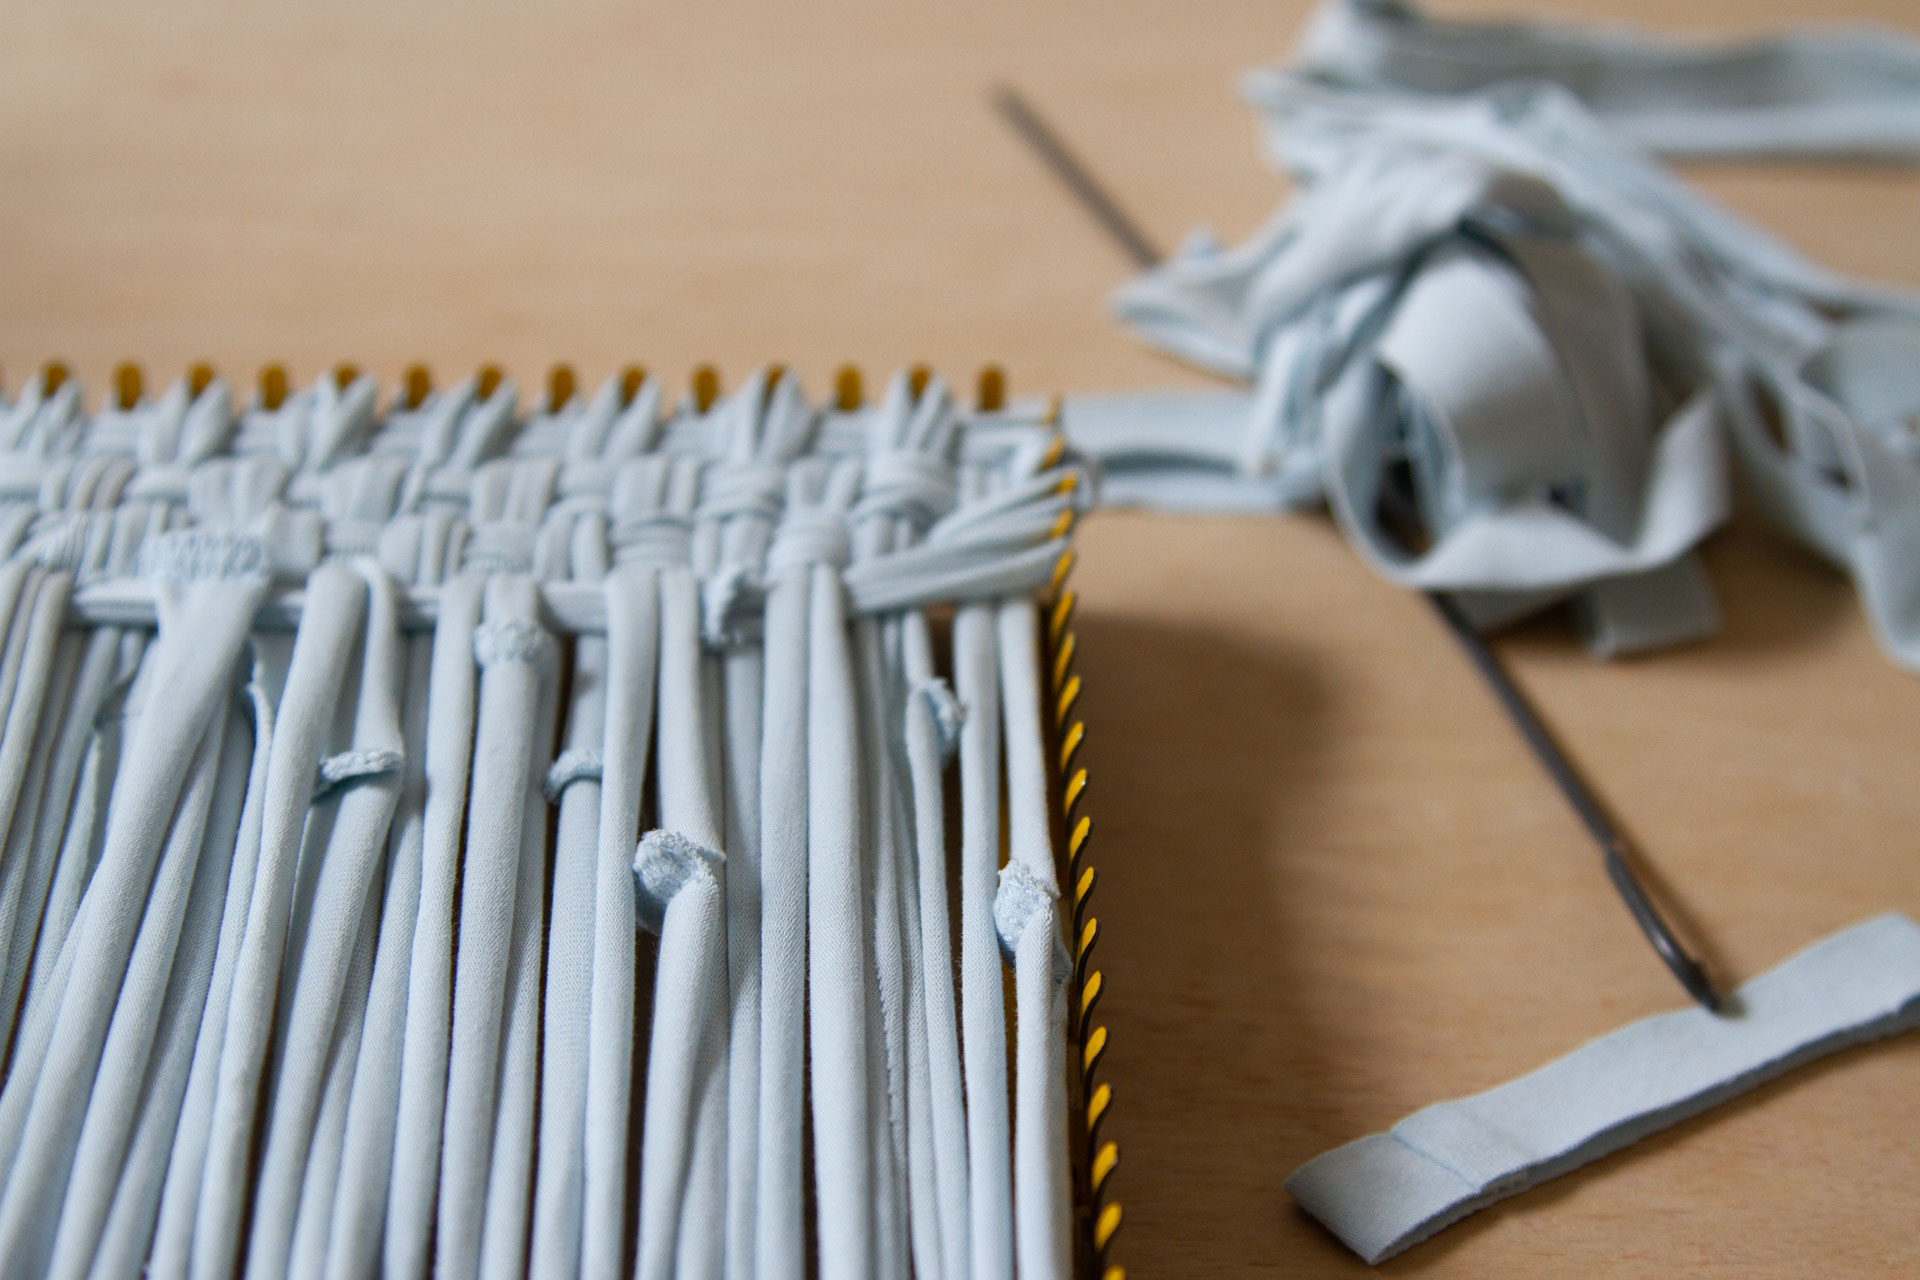
Weaving the pot holder:
+ Weave the steel hook alternating going over and underneath all of the loop strands from as soon as aspect of the loom to the opposite.
+ Place a cloth loop onto the hook and thoroughly pull the hook with the loop again by the warp. As you pull the hook and material again by the warp, safe the top of the looped material onto the primary peg. As soon as the hook reaches the alternative aspect, safe the loop to the primary peg on that aspect.
+ For the subsequent row, reverse the weave, going underneath the place the earlier loop was over, and over the place the earlier loop was underneath. Once more, connect a cloth loop on the hook and pull the hook with the loop again by to the opposite aspect. Fasten the ends of the material loop to the second pegs on all sides of the loom (immediately beneath the earlier loop).
+ Proceed to weave, till all the pegs are crammed, ensuring to alternate the weave on every row till you full each row.
To complete the potholder:
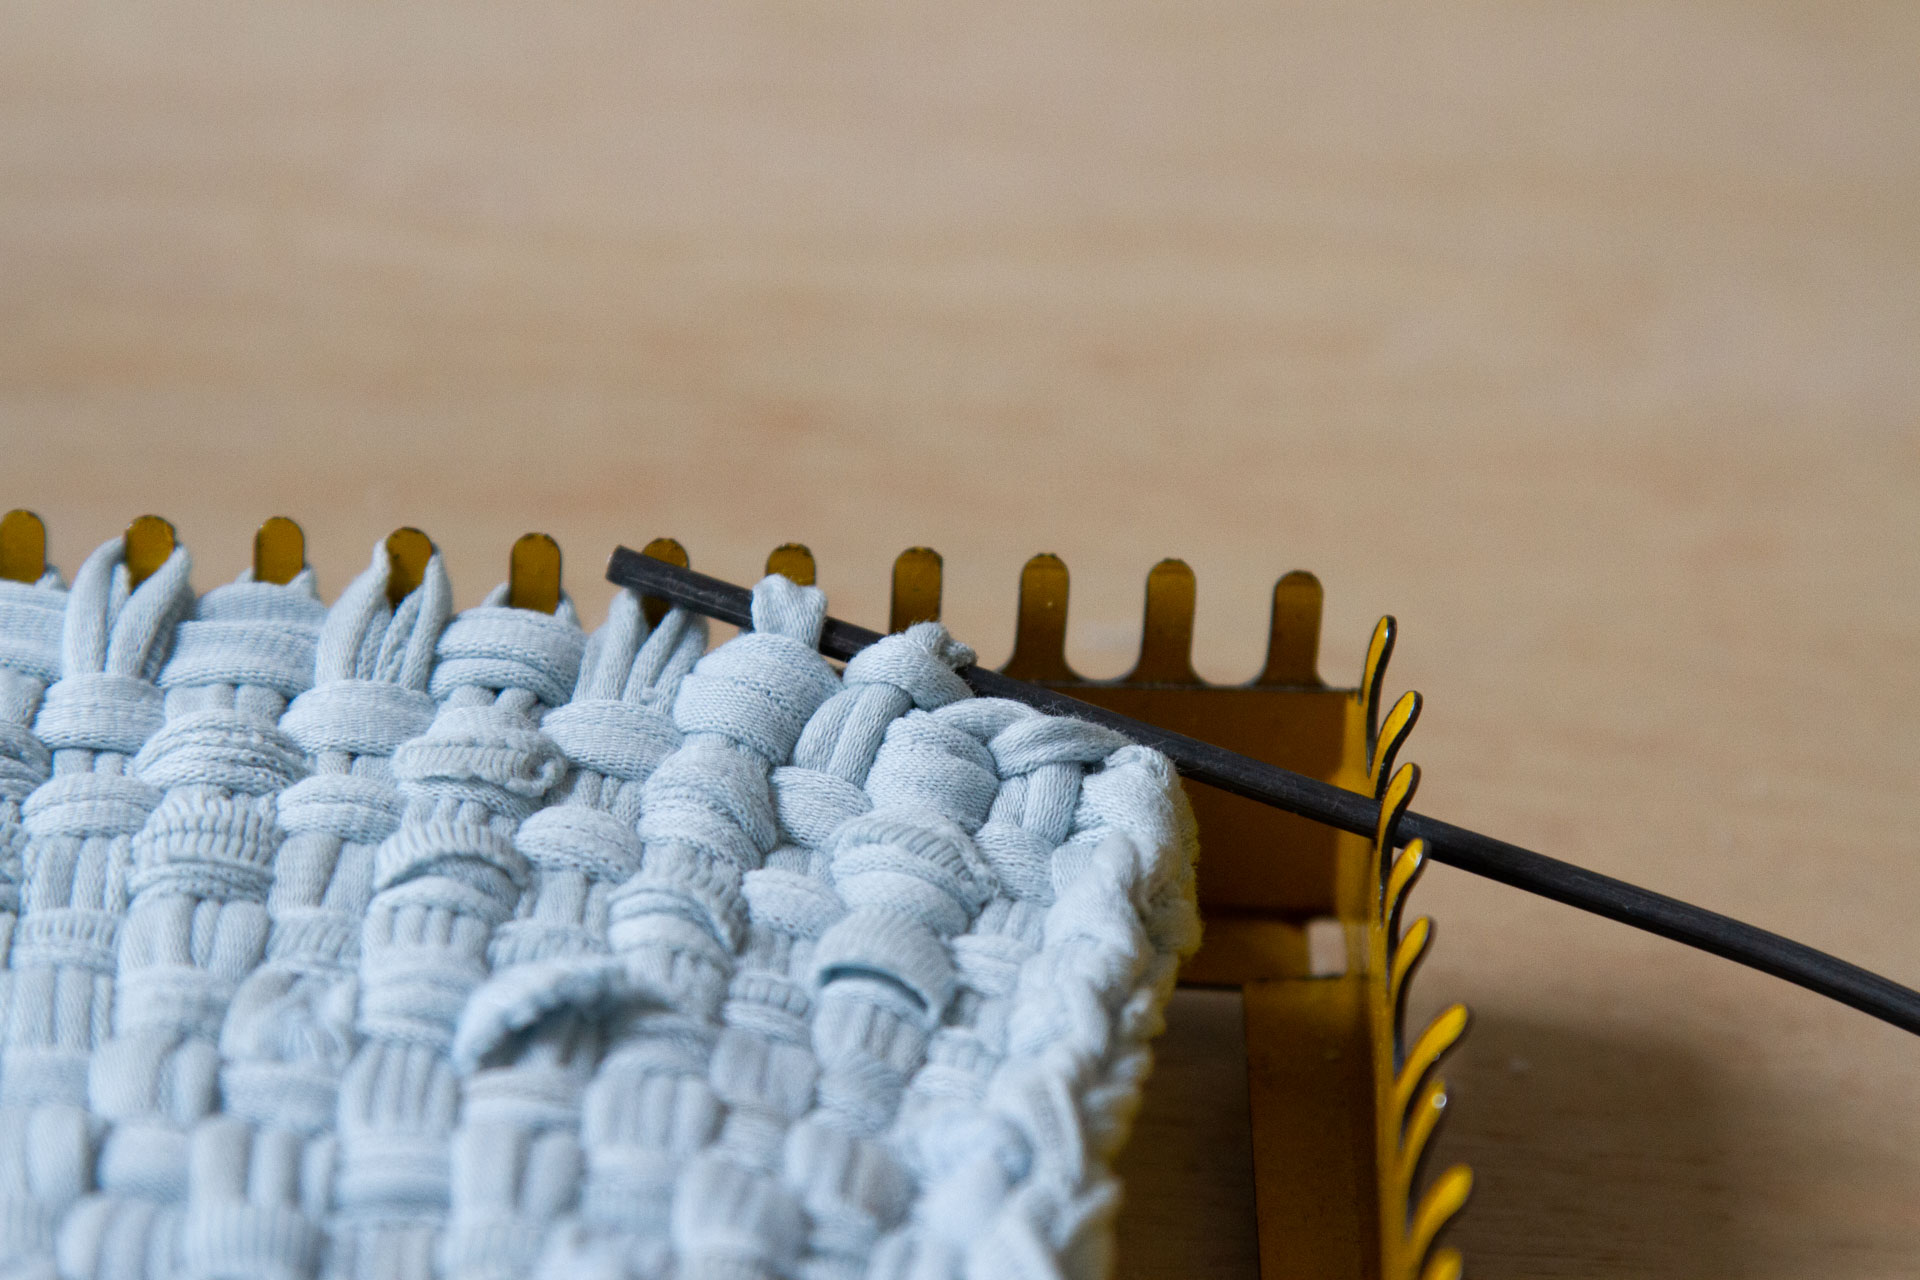
+ Beginning on a nook edge, take the final loop (earlier than the nook edge) off the peg, and cross the next loop (the primary loop after the nook edge) by the primary one. Launch the primary loop as soon as the second is handed by.
+ Subsequent take the third loop and cross it by the second loop, releasing the second loop as soon as the third loop is thru.
+ Repeat till all of the loops have been feed by the earlier one. When you’ve got a small crochet hook, it will likely be useful right here, in any other case the straight finish of your steel weaving hook or your individual fingertips may even work.
+ If you attain the final two loops, cross the final loop by the earlier loop as you’ve carried out all through. Pull this final loop tightly in order that it extends from the remainder of the potholder; this can turn out to be the loop used to hold your potholder.
A couple of extra notes:
+ It’s good apply to rigorously press up the woven rows as you’re employed. It will create area for extra rows and make it simpler to get your hook instrument by the foundational loops.
+ The previous couple of rows of weaving might be troublesome! If wanted, you may rigorously unhook the warp (basis loops) separately to rigorously tuck every loop individually over or underneath.
+ The sewn hem on every loop can be barely obvious within the ultimate pot holder. To create neat potholder edges, hold the sewn seam to the inside of the loom whereas weaving.
+ If going over underneath each particular person material strand is simply too troublesome, strive a barely thicker weave by going over and underneath each two loops. This can be simpler to weave however will create a smaller potholder as you’ll be binding off two loops at a time within the ultimate stage.
+ Do not forget that each the enjoyment and the problem of working with reclaimed supplies is that no two pairs of worn out youngsters’s leggings can be precisely the identical. Anticipate to make some minor changes to the directions above, however largely, relaxation simpler realizing there’s life after leggings in spite of everything.

//
Because of Rose Pearlman for making ready this tutorial. Rose is an artist, instructor, and textile designer. With a background in advantageous arts and a love of nicely designed practical objects, her creations blur the traces between artwork and craft and pushes the boundaries with non-traditional strategies and supplies. Rose teaches month-to-month rug hooking workshops in and round her dwelling in NYC, and in addition welcomes commissions for considered one of a sort constructions in decor and residential furnishings. Her work has been featured in fiber magazines, galleries, and quite a few on-line design websites. Her e-book Modern Rug Hooking is out there wherever books are offered. Observe alongside together with her practical craft initiatives at @art_objects_ She lives in Brooklyn, NY together with her household.


