


Stitching a button is a kind of duties that most individuals might want to do sooner or later of their lives. If you’re not a “sewer” and the duty of attaching something with needle and thread appears daunting, don’t have any concern!
Whether or not you are attempting to stitch a daily button with holes or a shank button, listed below are simple steps to stitch your personal button. Even when one pops off proper earlier than you head out the door, you’ll have the abilities to get it again on very quickly.
Studying to stitch? Attempt these simple stitching initiatives!
Common flat buttons typically have two or 4 holes and lay flat with the stitching seen from the highest, whereas shank buttons have a loop on the underside so all of the stitching is hidden under the button. Shank buttons are additionally higher when you will have a thick buttonhole that wants some house below the button, like on a thick wool coat.
No particular needle is required to stitch on a button. If you’re utilizing a heavy thread, you’ll want to use a bigger needle that has a much bigger eye so you may thread the thread into the attention of the needle, however a daily hand stitching needle will work for nearly all buttons.
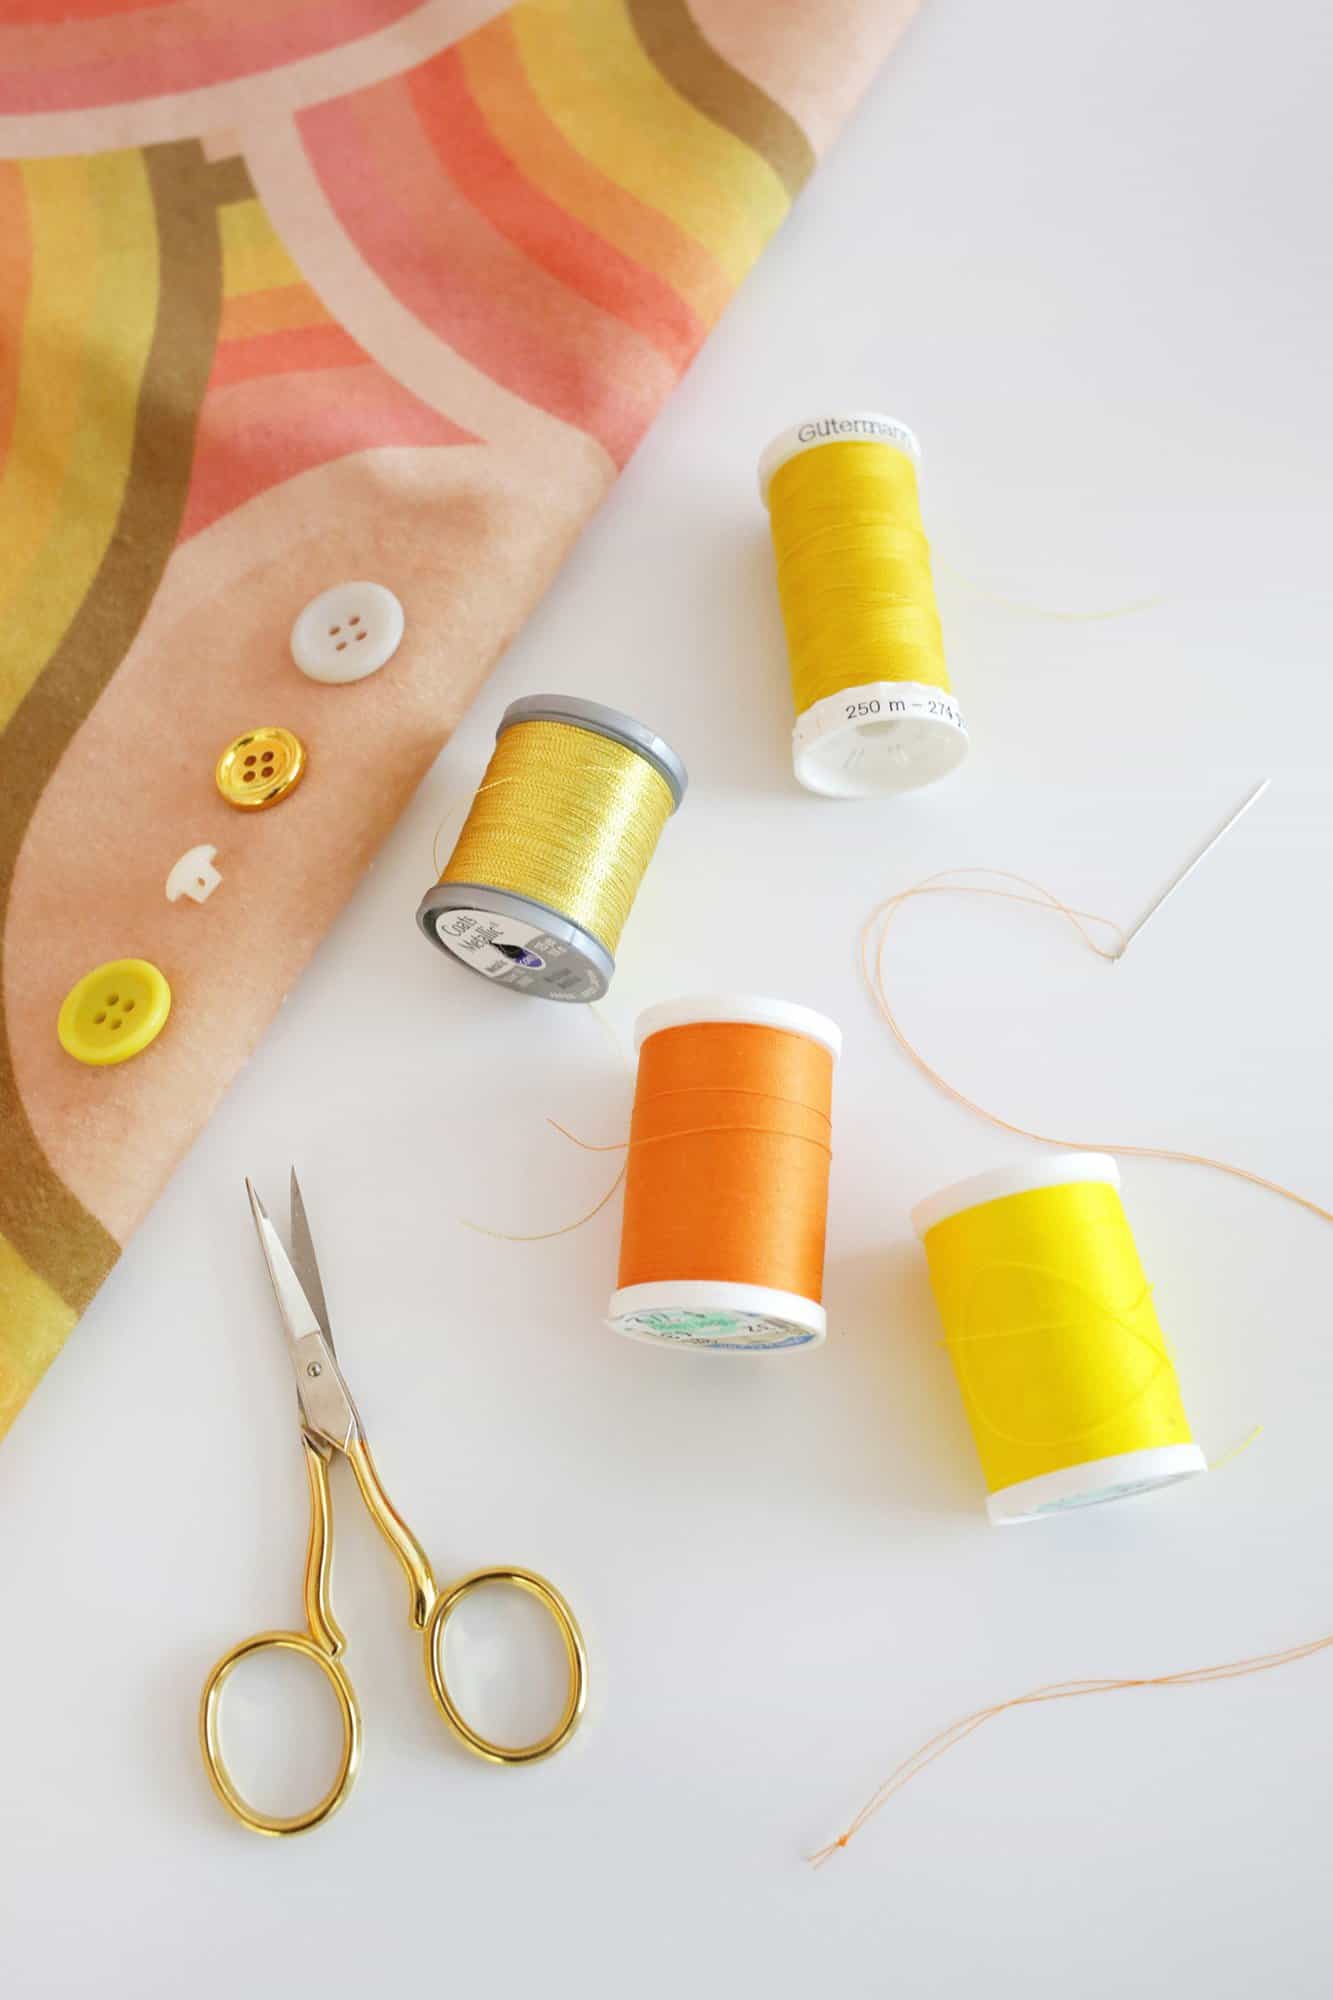
For many button stitching, all-purpose thread will work simply wonderful, though it’s your decision a heavy-duty thread for heavy coat buttons which might be used so much to button and unbutton the coat. In case your different buttons have a particular colour or ornamental thread that you just wish to match, take your merchandise to a stitching retailer and match the thread to what’s used on the remainder of your garment.
STEPS TO SEW A FLAT BUTTON (TWO OR FOUR HOLE):
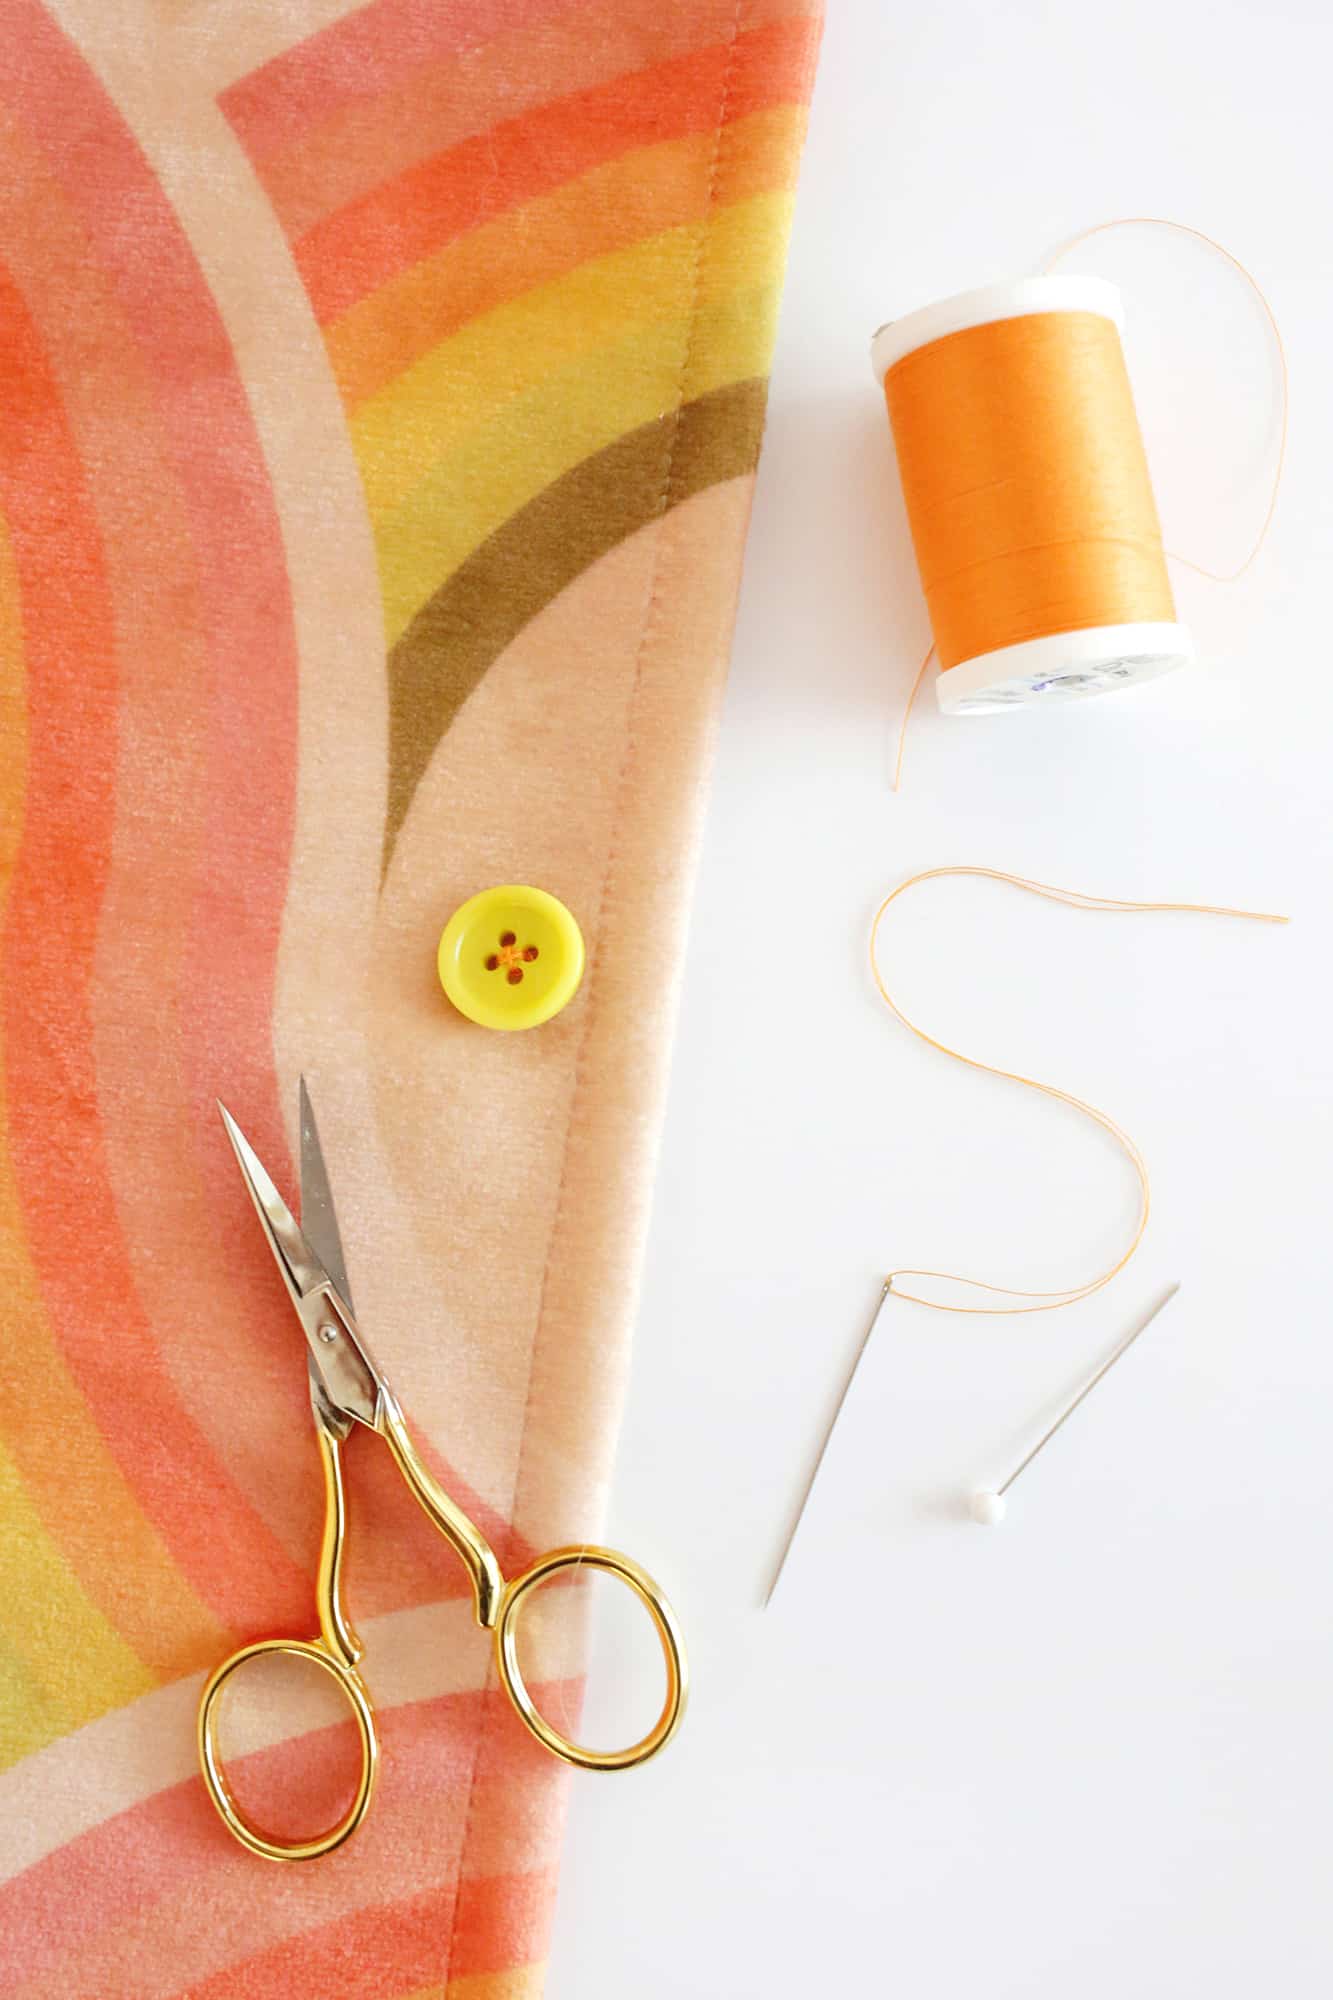
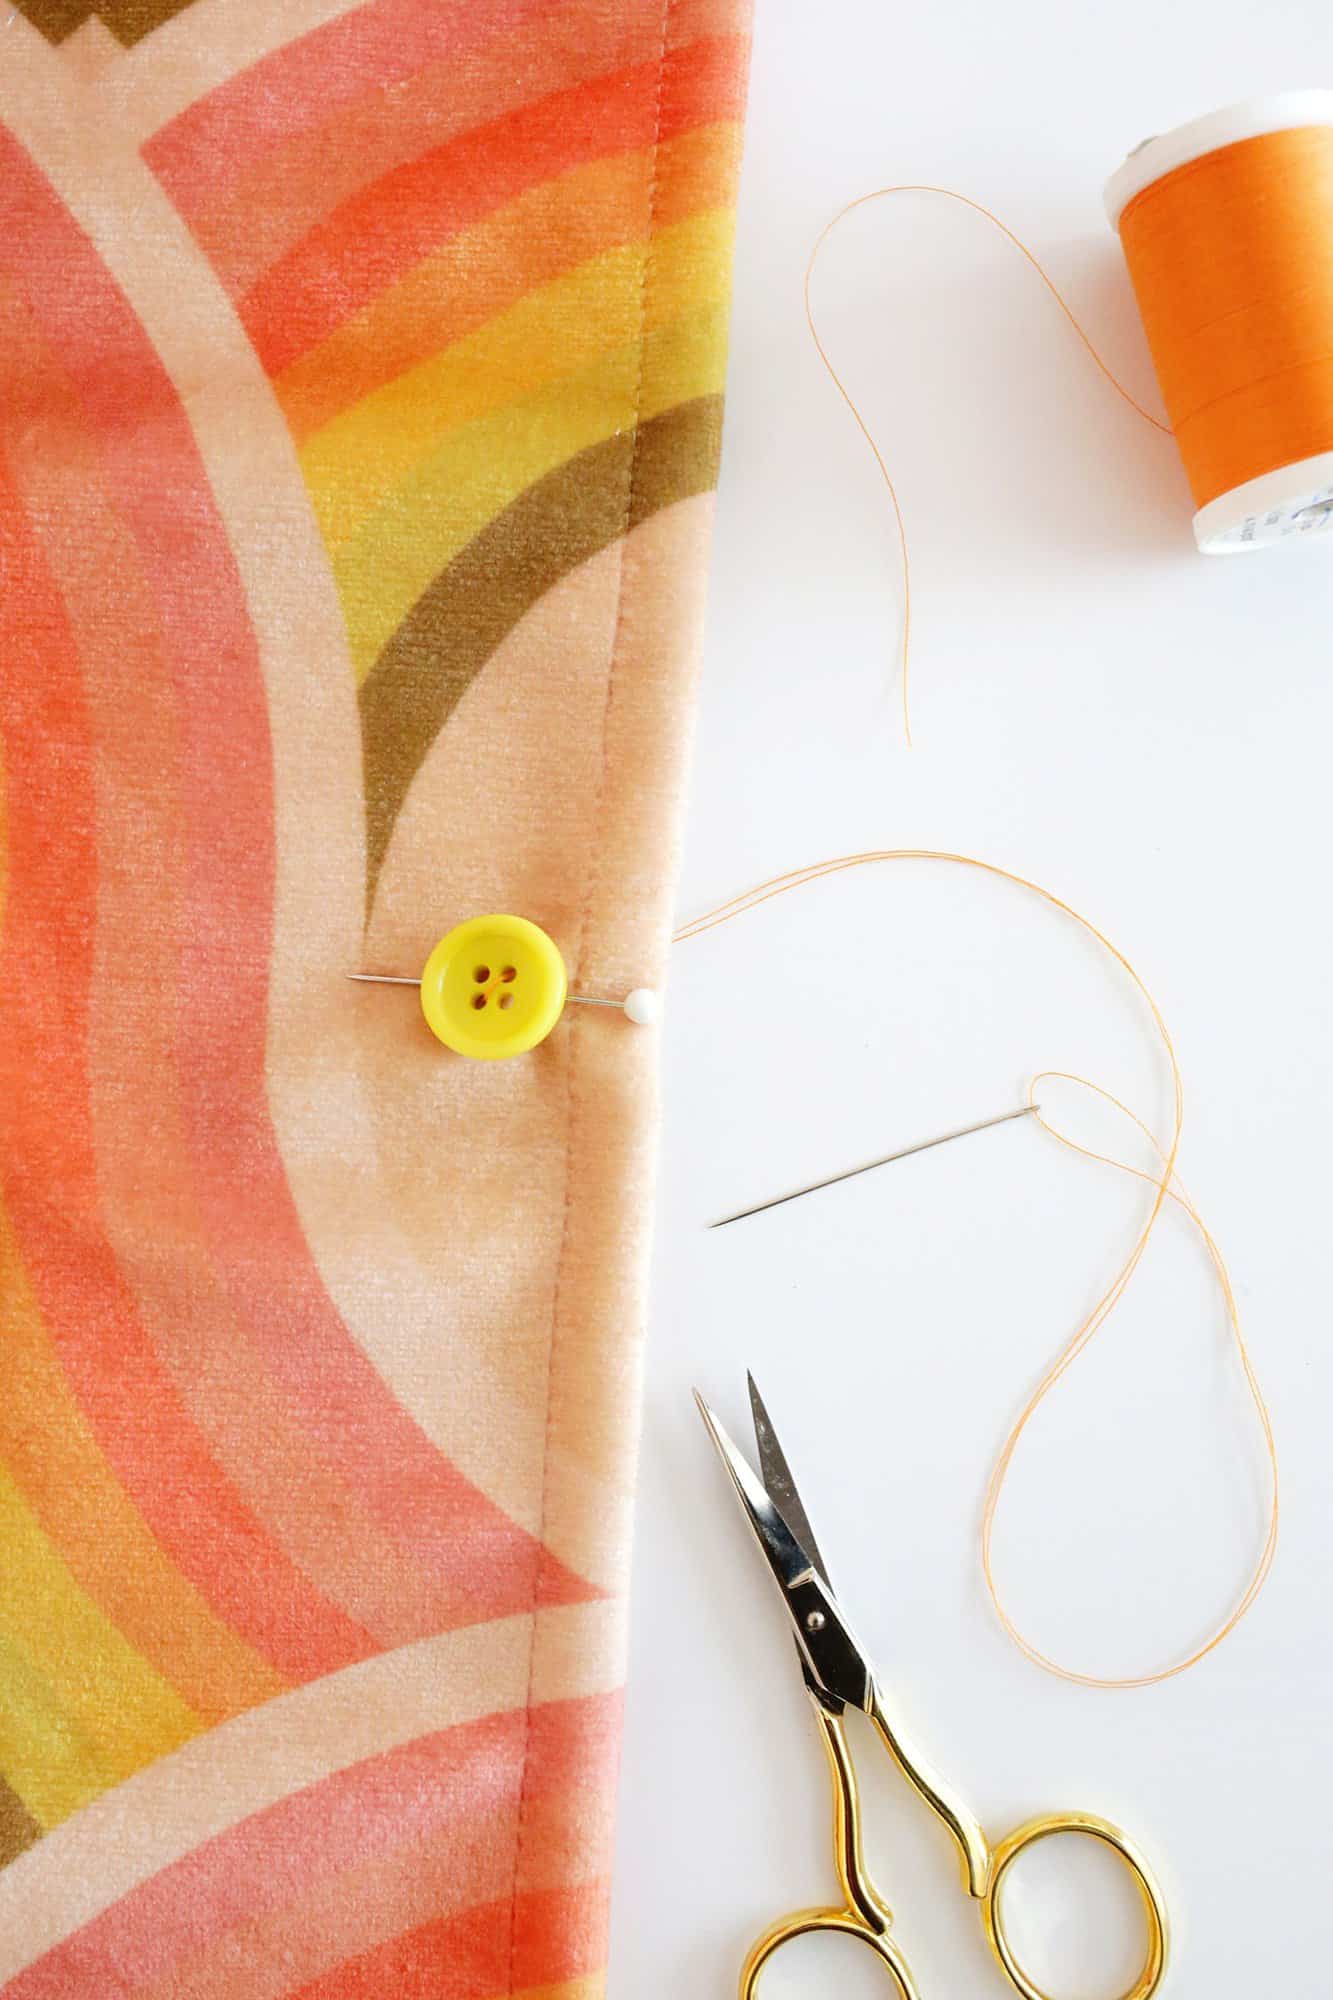
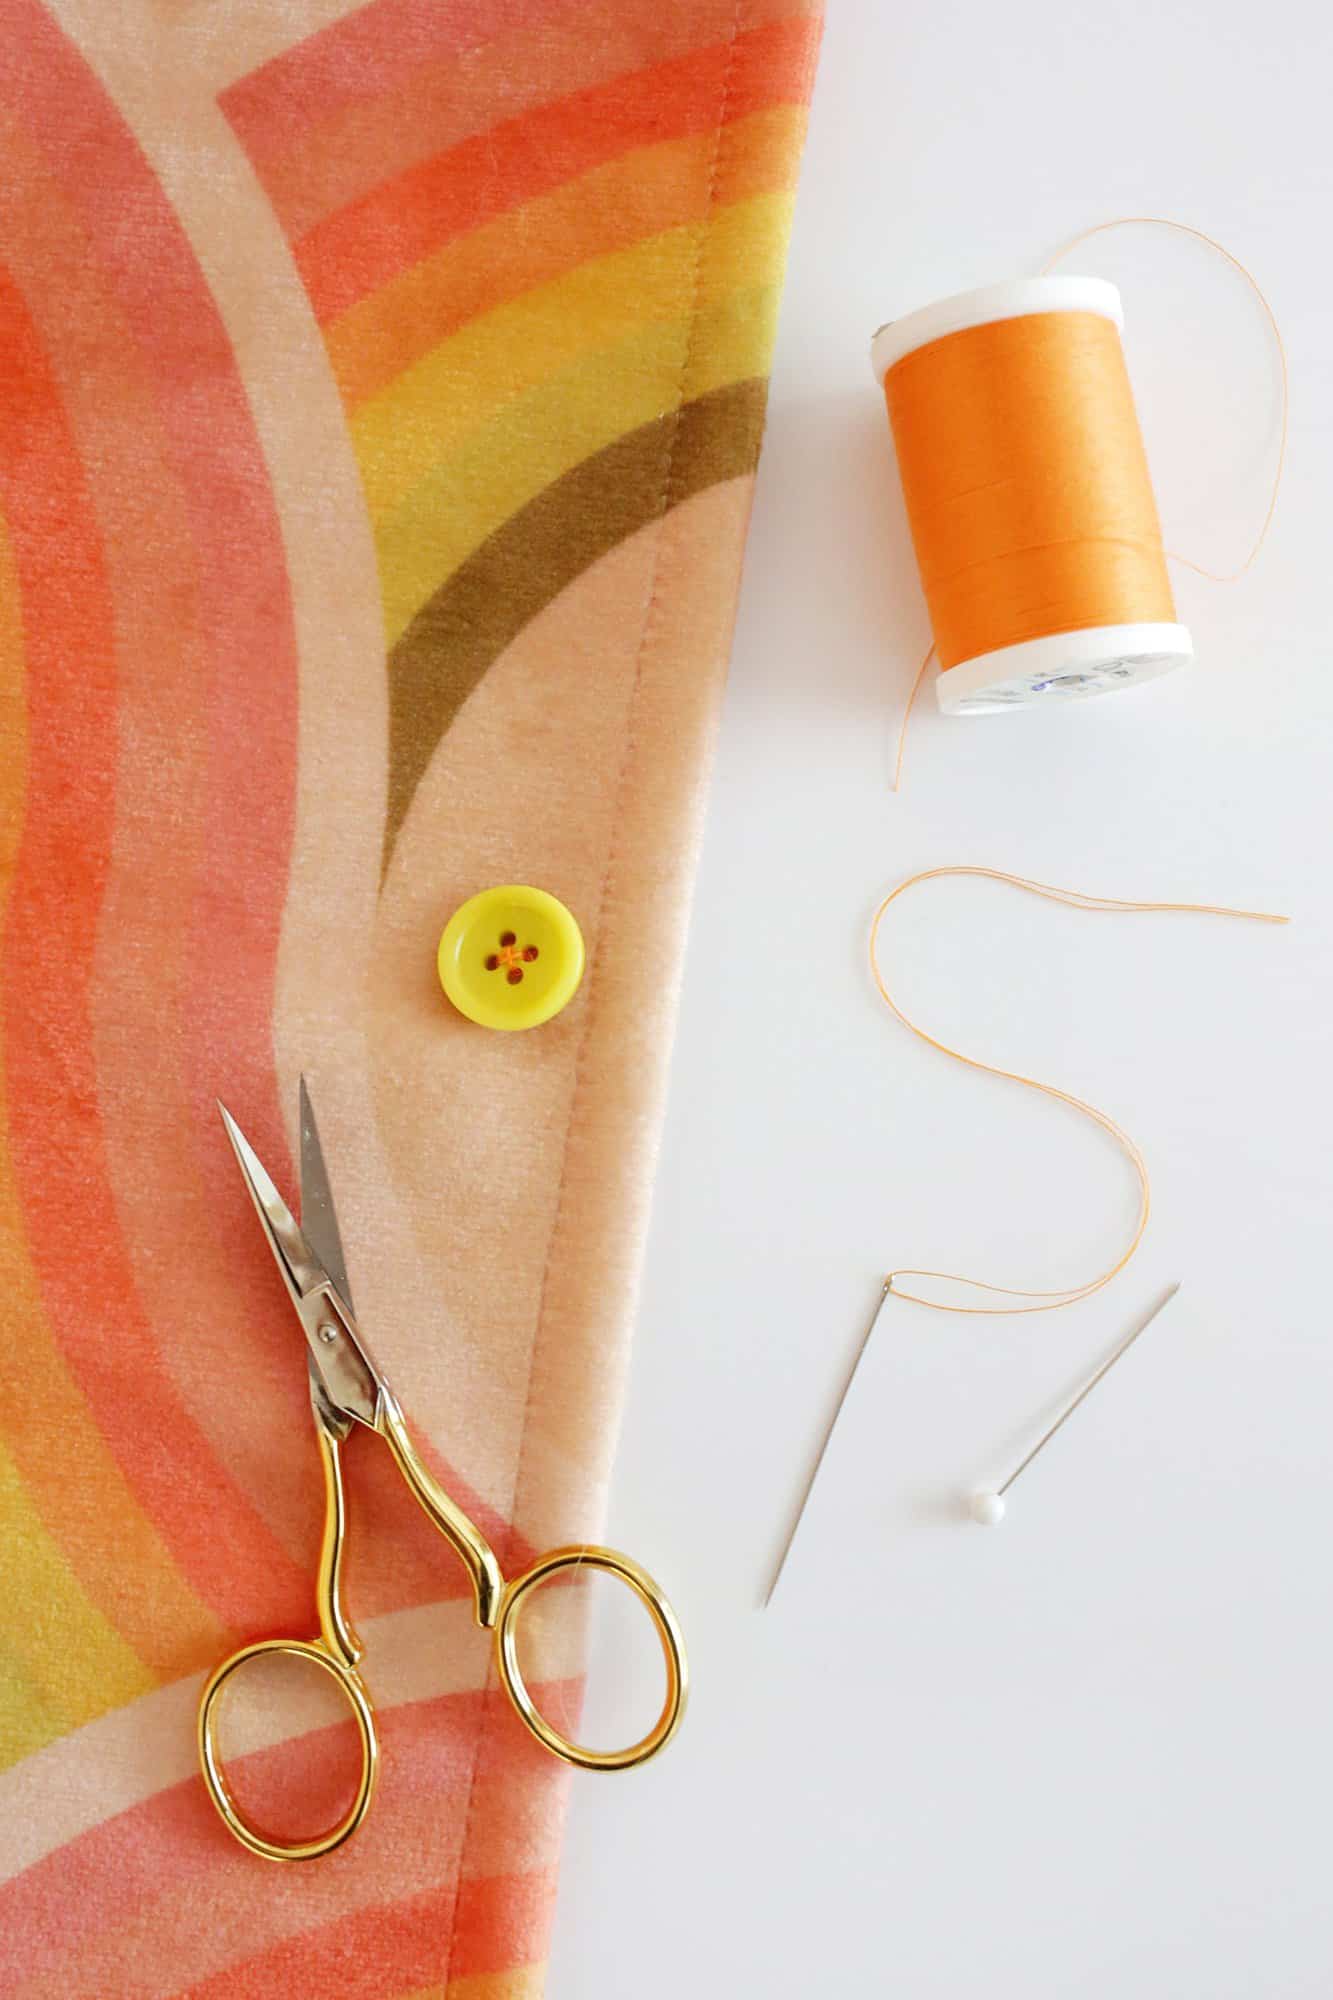
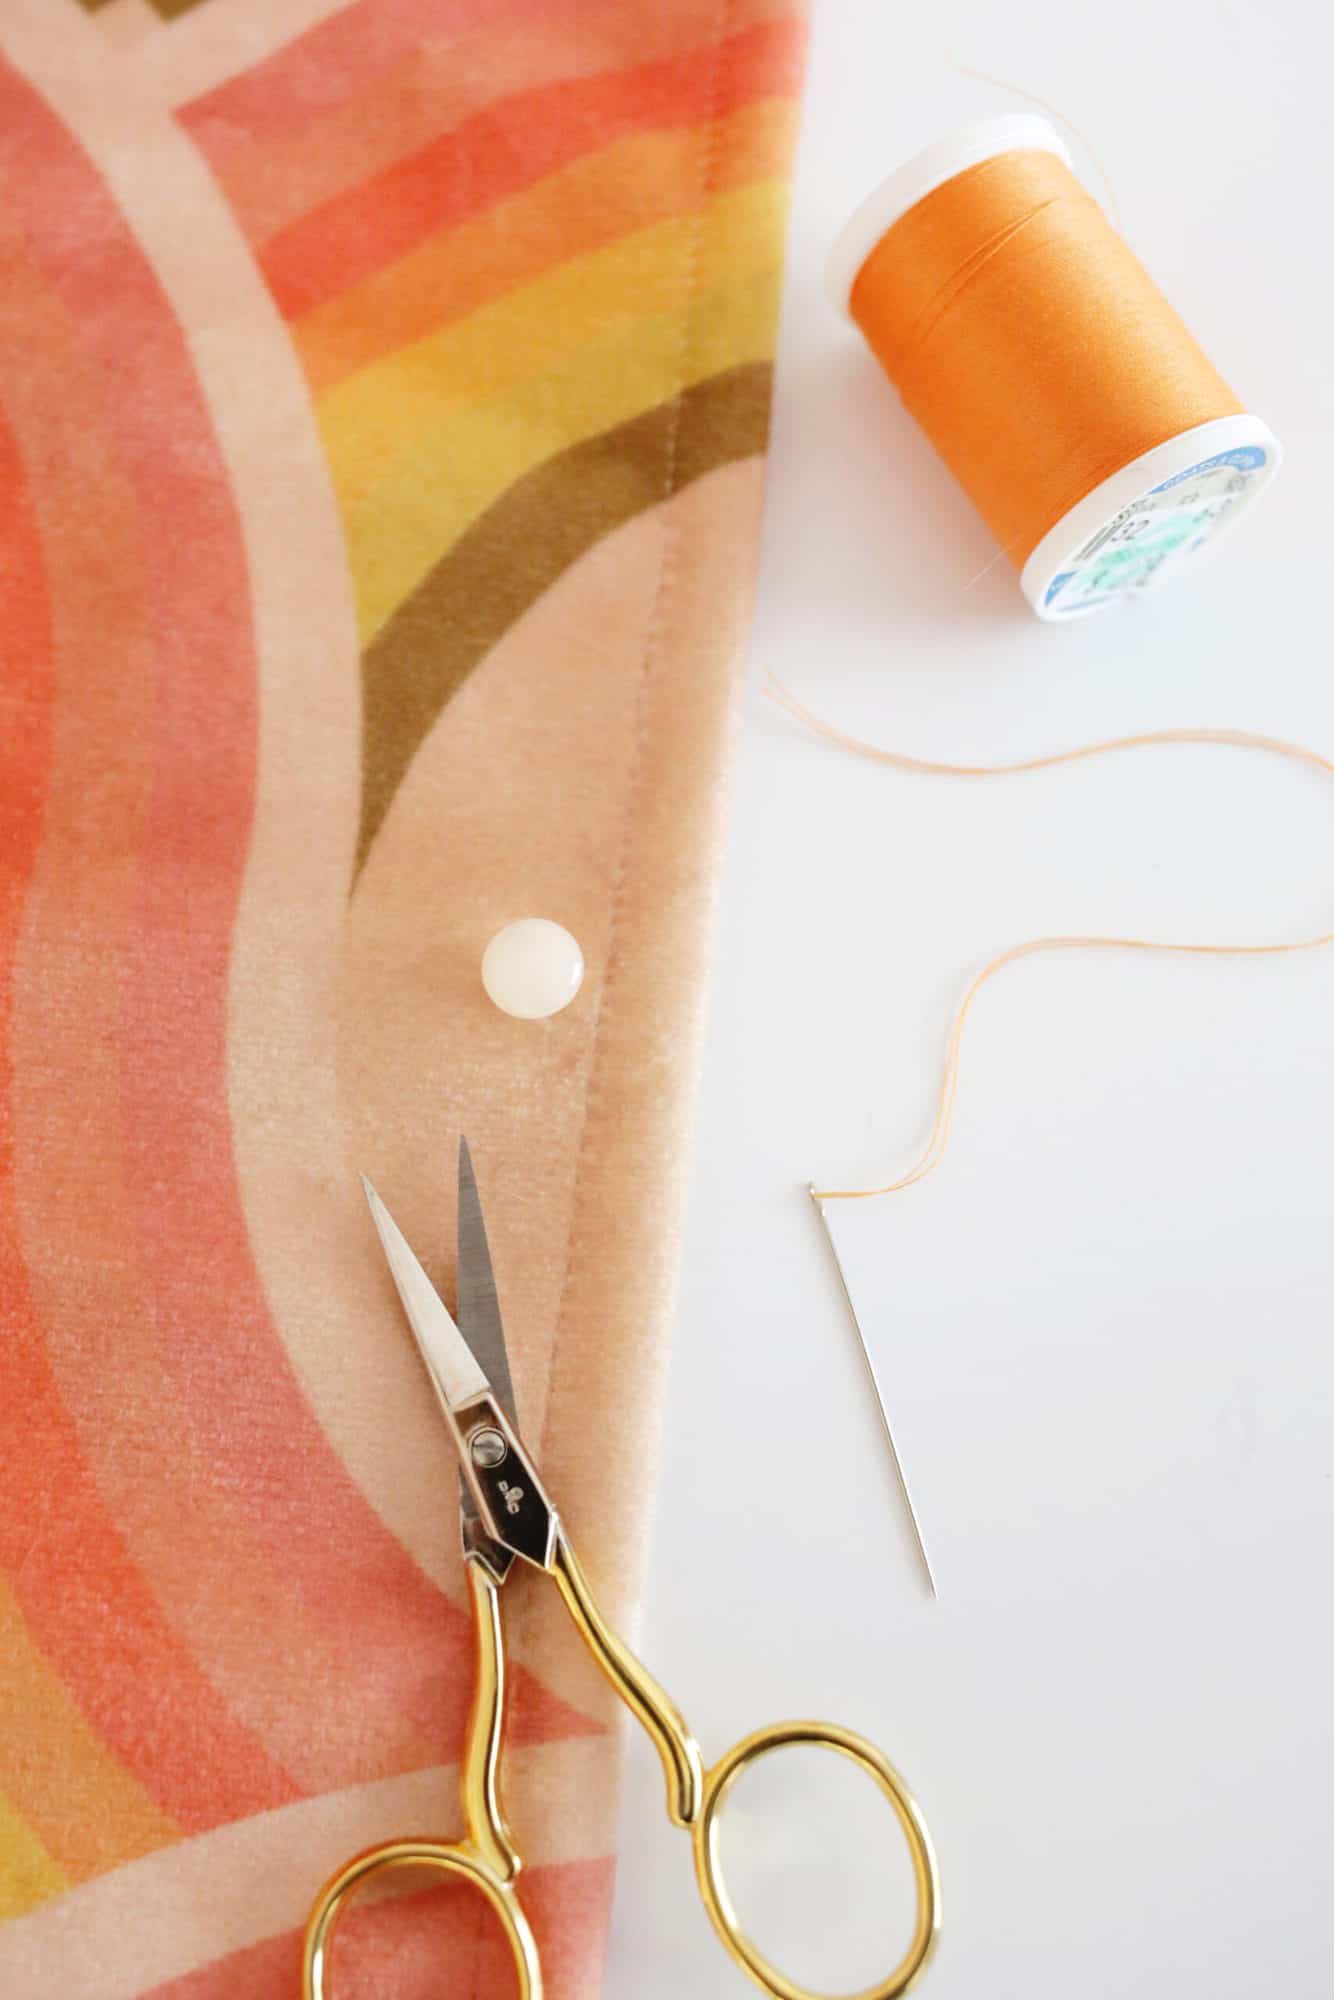
Provides:
-button (a two- or four-hole button)
-thread (regular weight works for many issues, however you are able to do a heavy weight for larger coats, and so on.)
-needle (a multi-pack like this has a number of choices for various thread weights)
–straight pin
-scissors
–disappearing marking pen (optionally available)
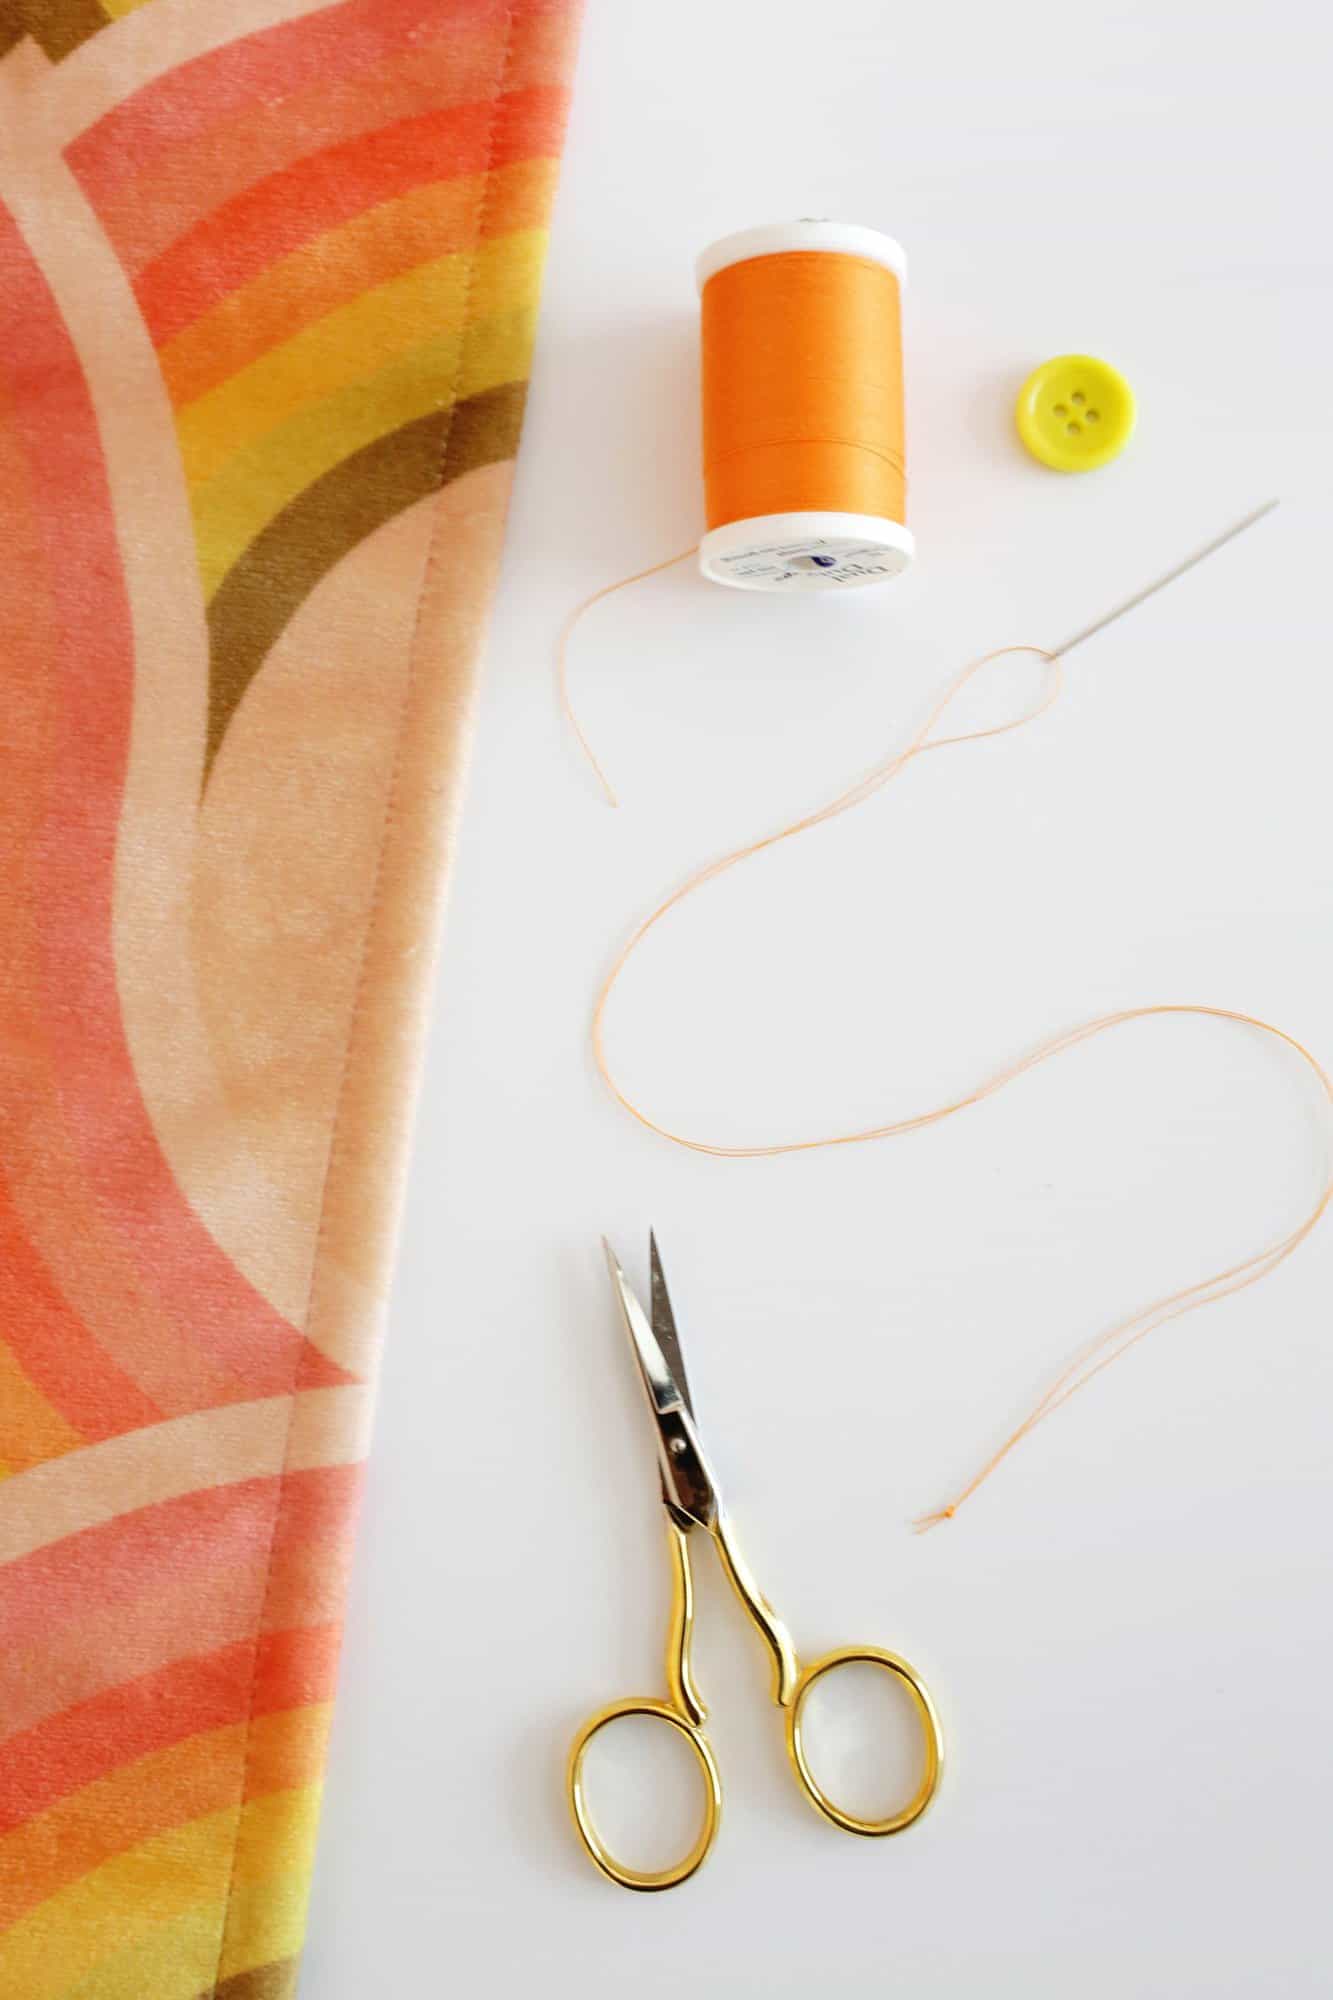
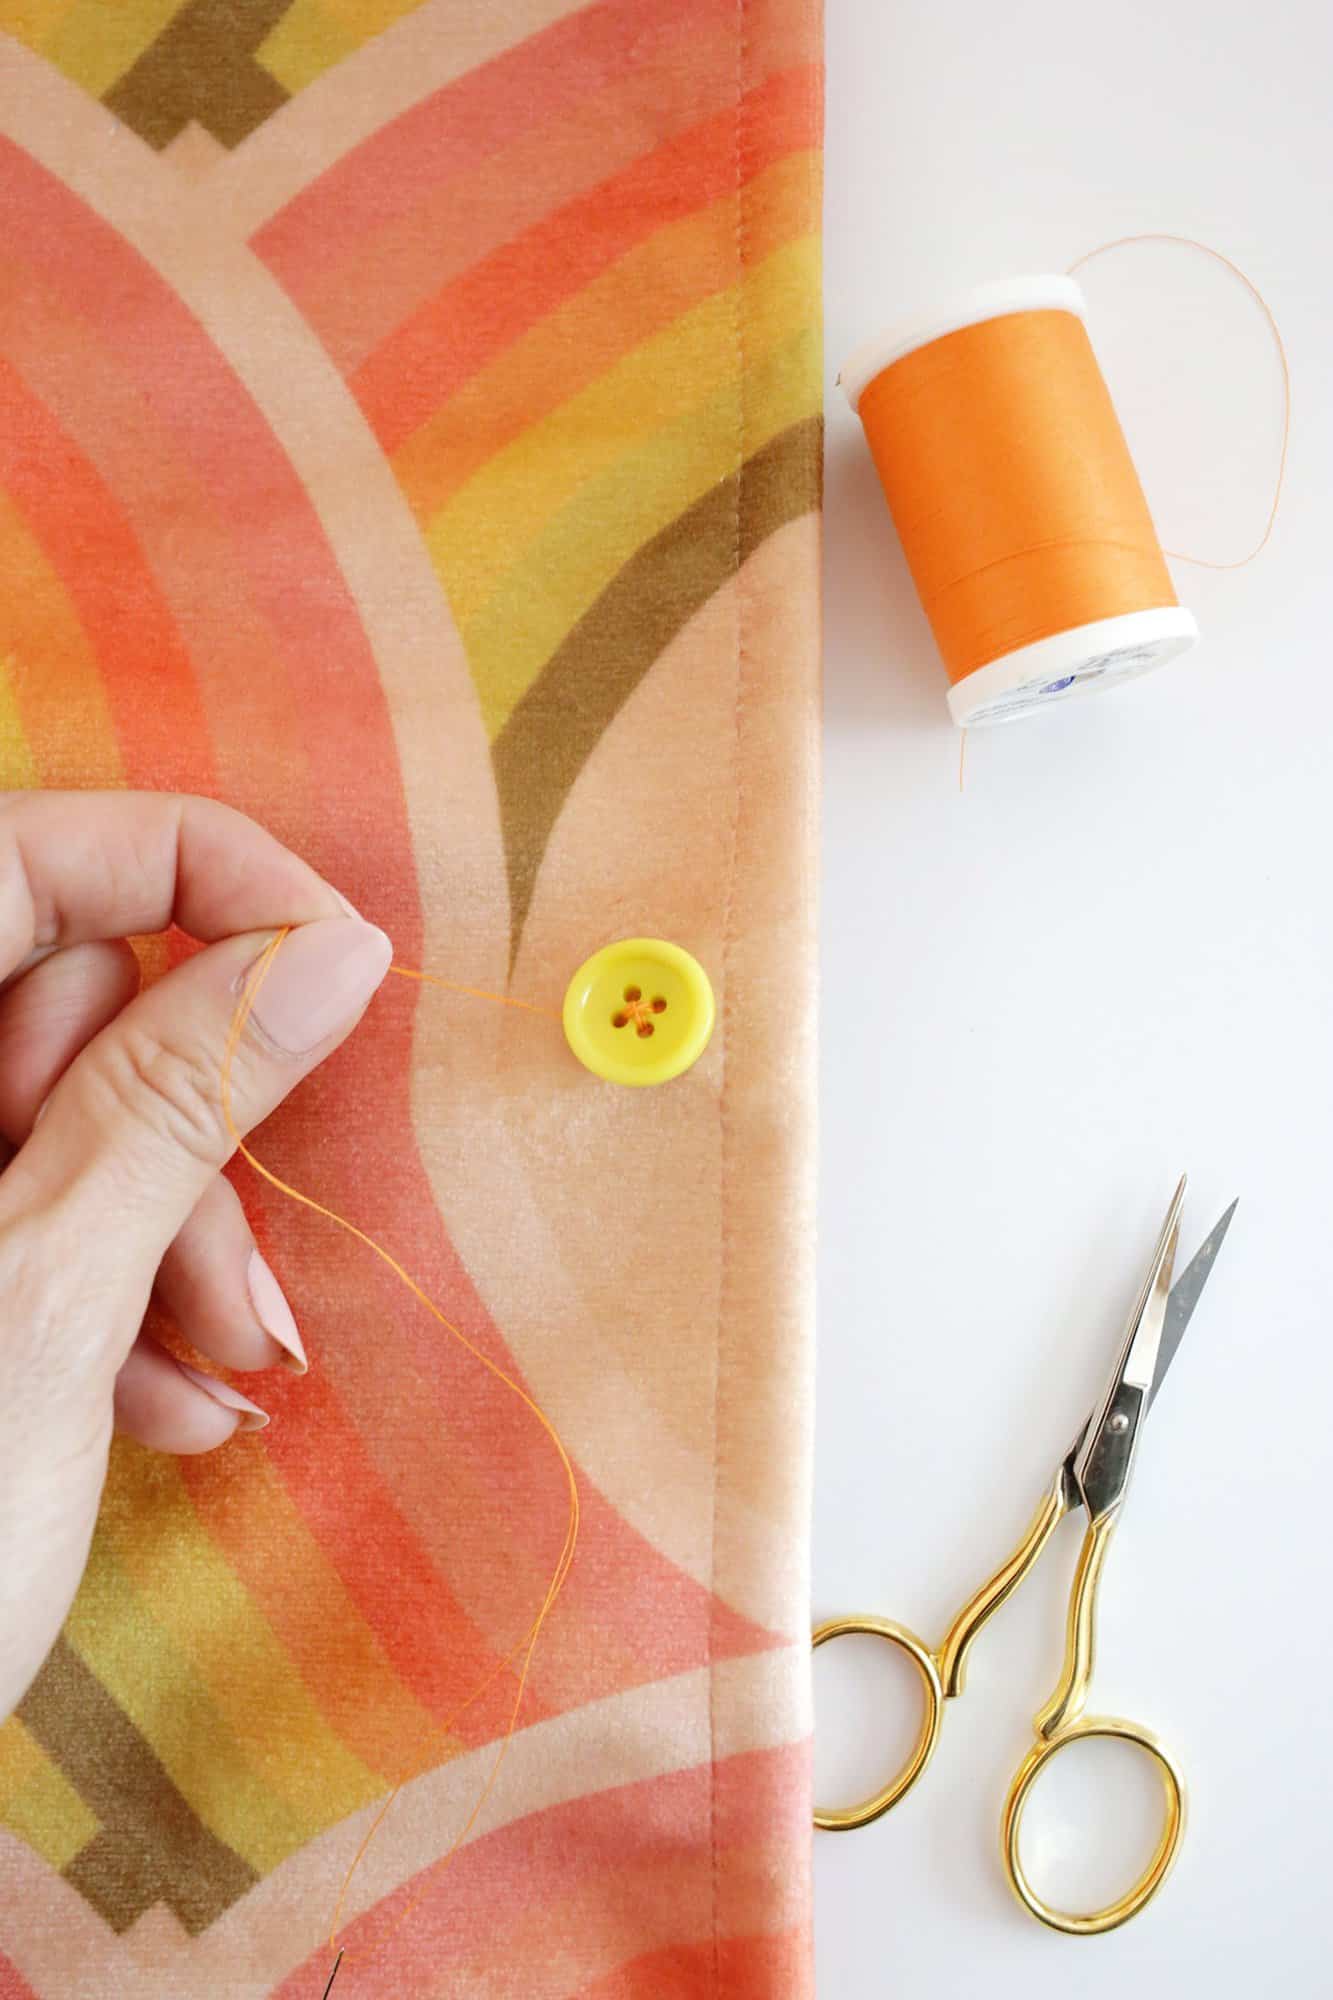
Thread the needle: Reduce a bit of thread about 24″ lengthy and thread it by means of a needle midway in order that each ends are equally as lengthy (you need to use a self-threading needle like this for simple threading). Protecting your strands collectively, tie a knot on the finish to tie them collectively.
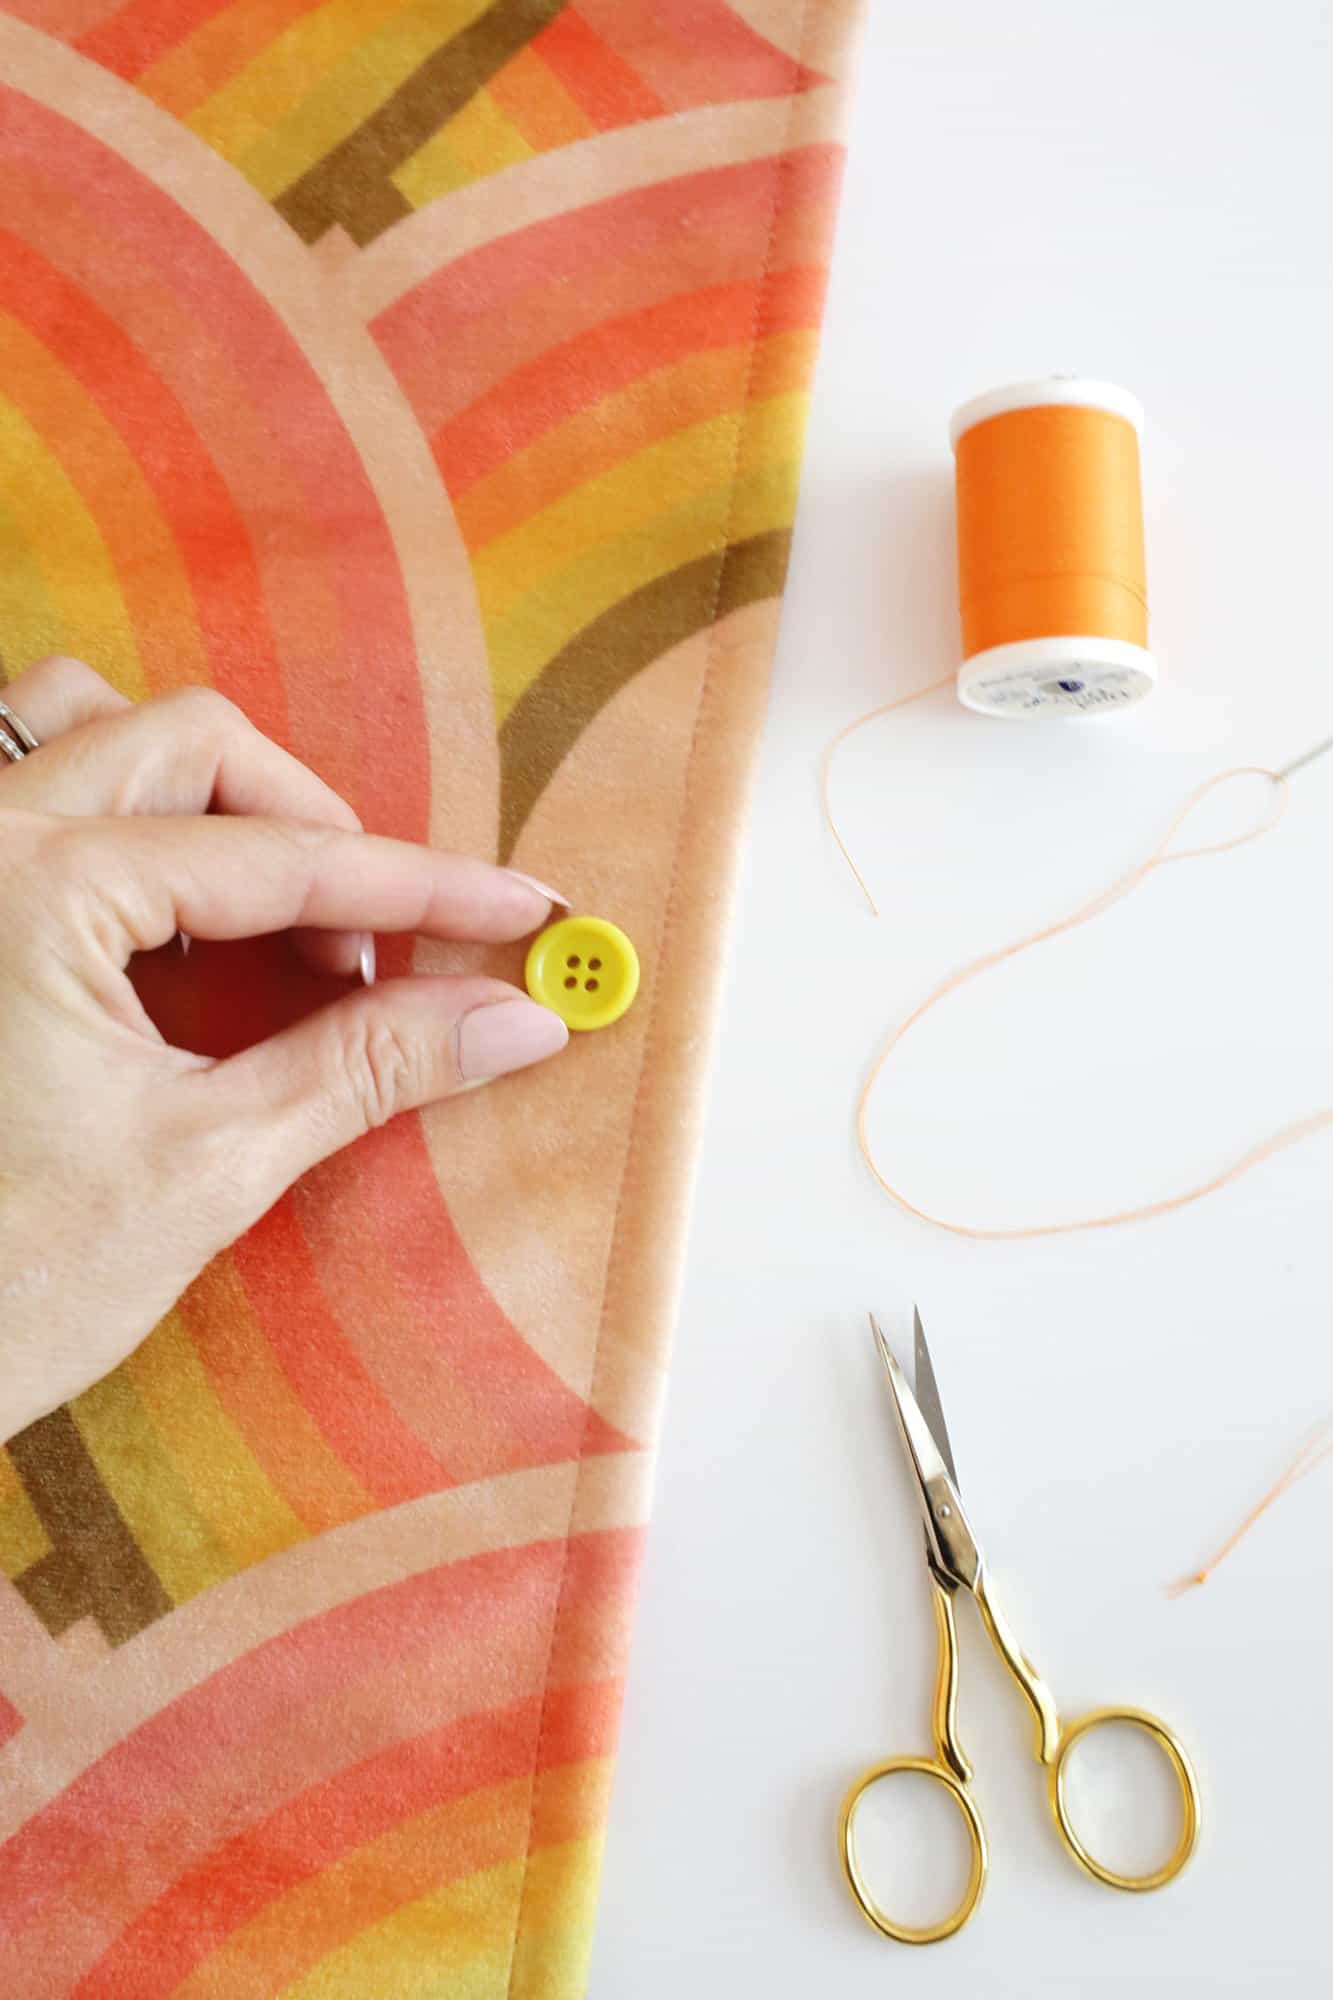
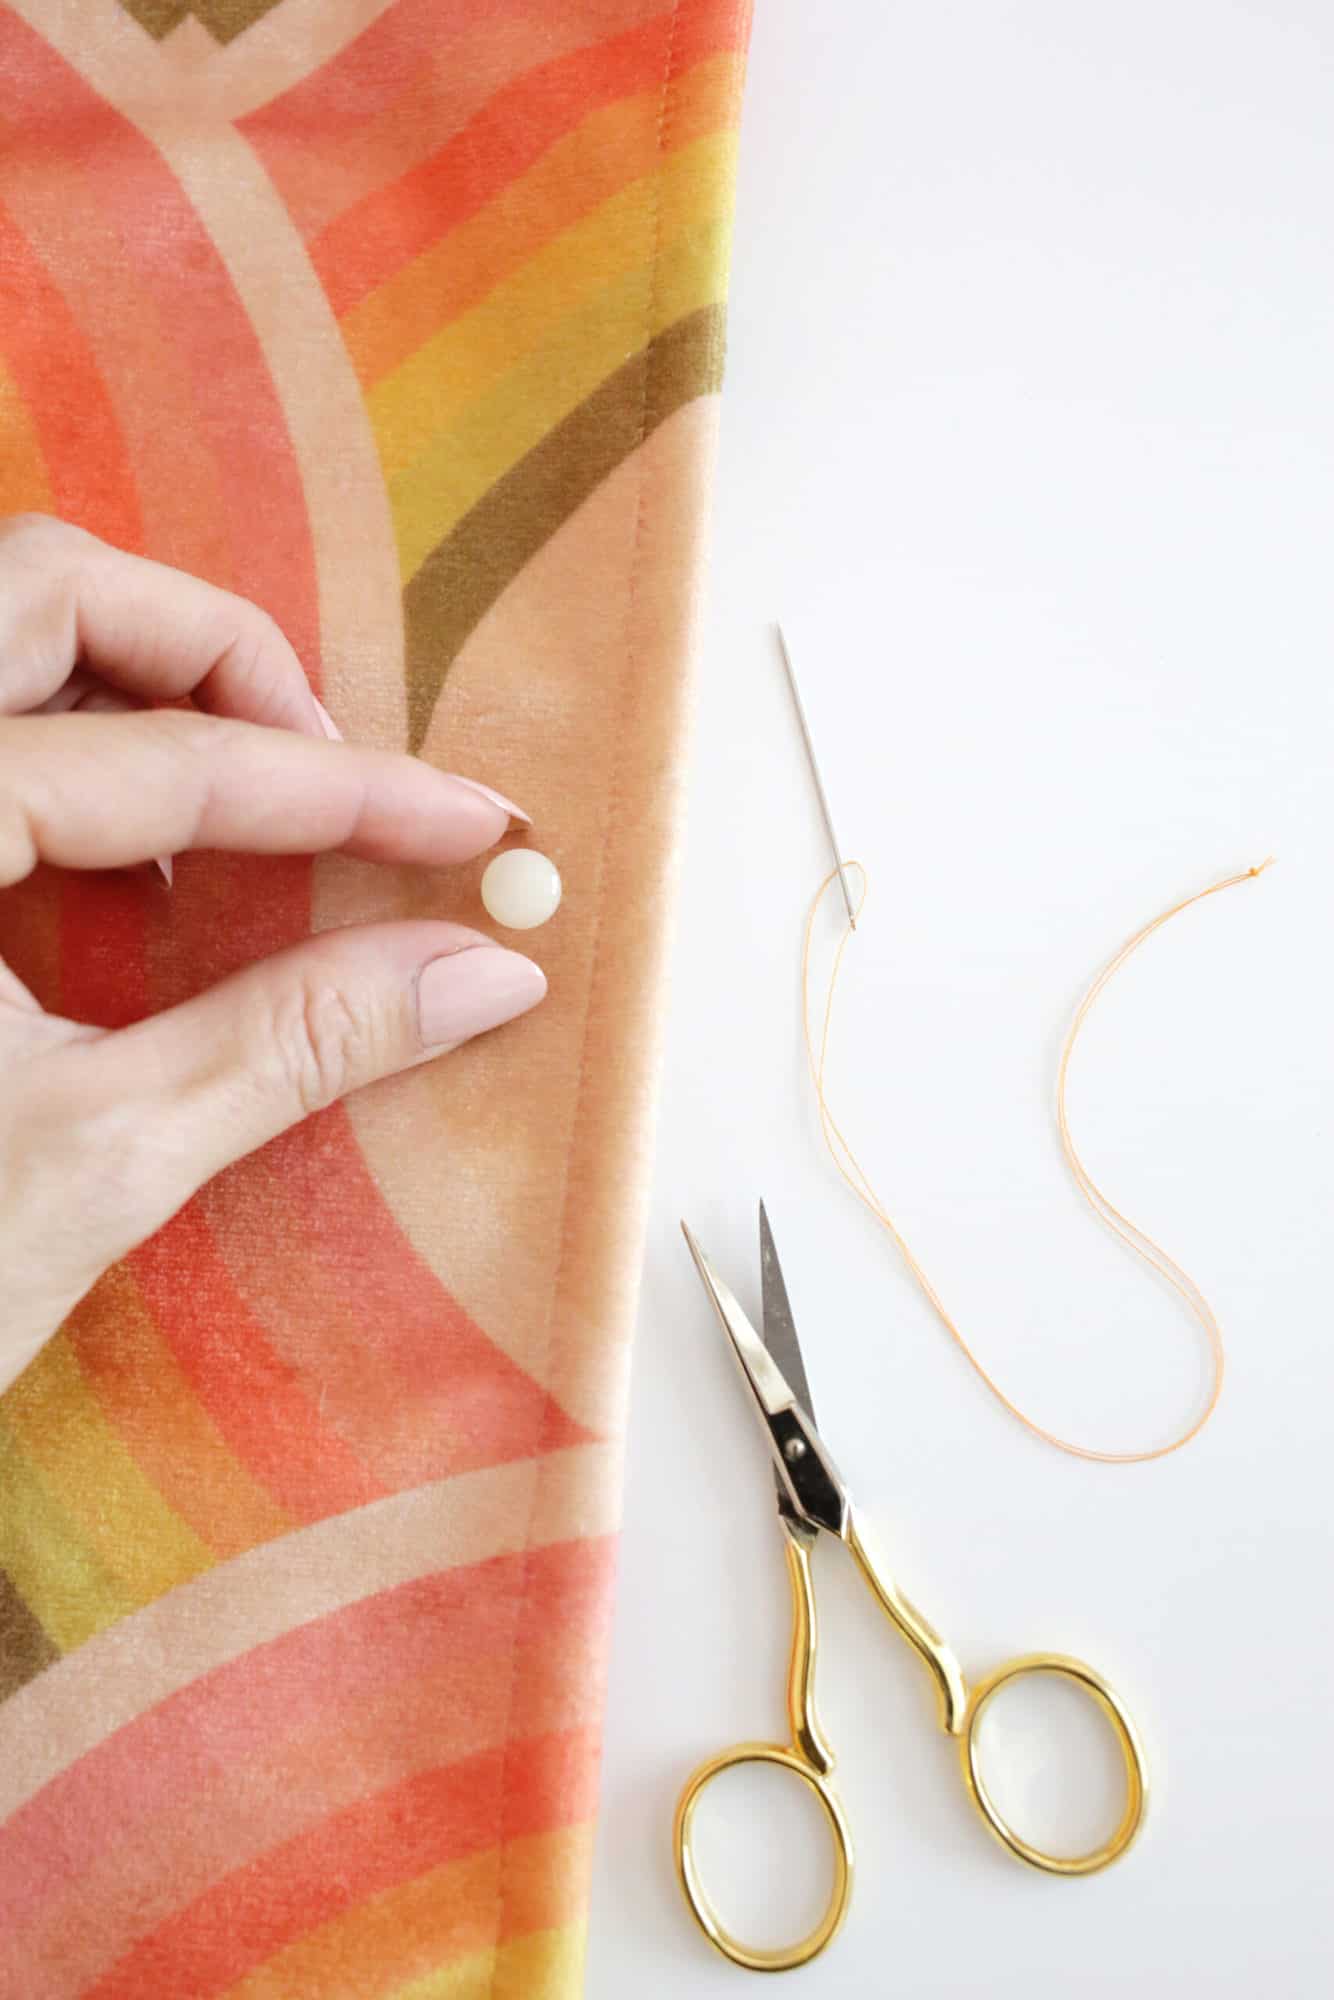
Place the button: Place the button the place you need it in your garment (ensure that the holes are going through the identical path as the opposite buttons close by).
Verify to see that it’s the proper spot for the buttonhole if it’s on a coat, shirt, or jacket. You too can use a disappearing marking pen to mark the spot if you want.
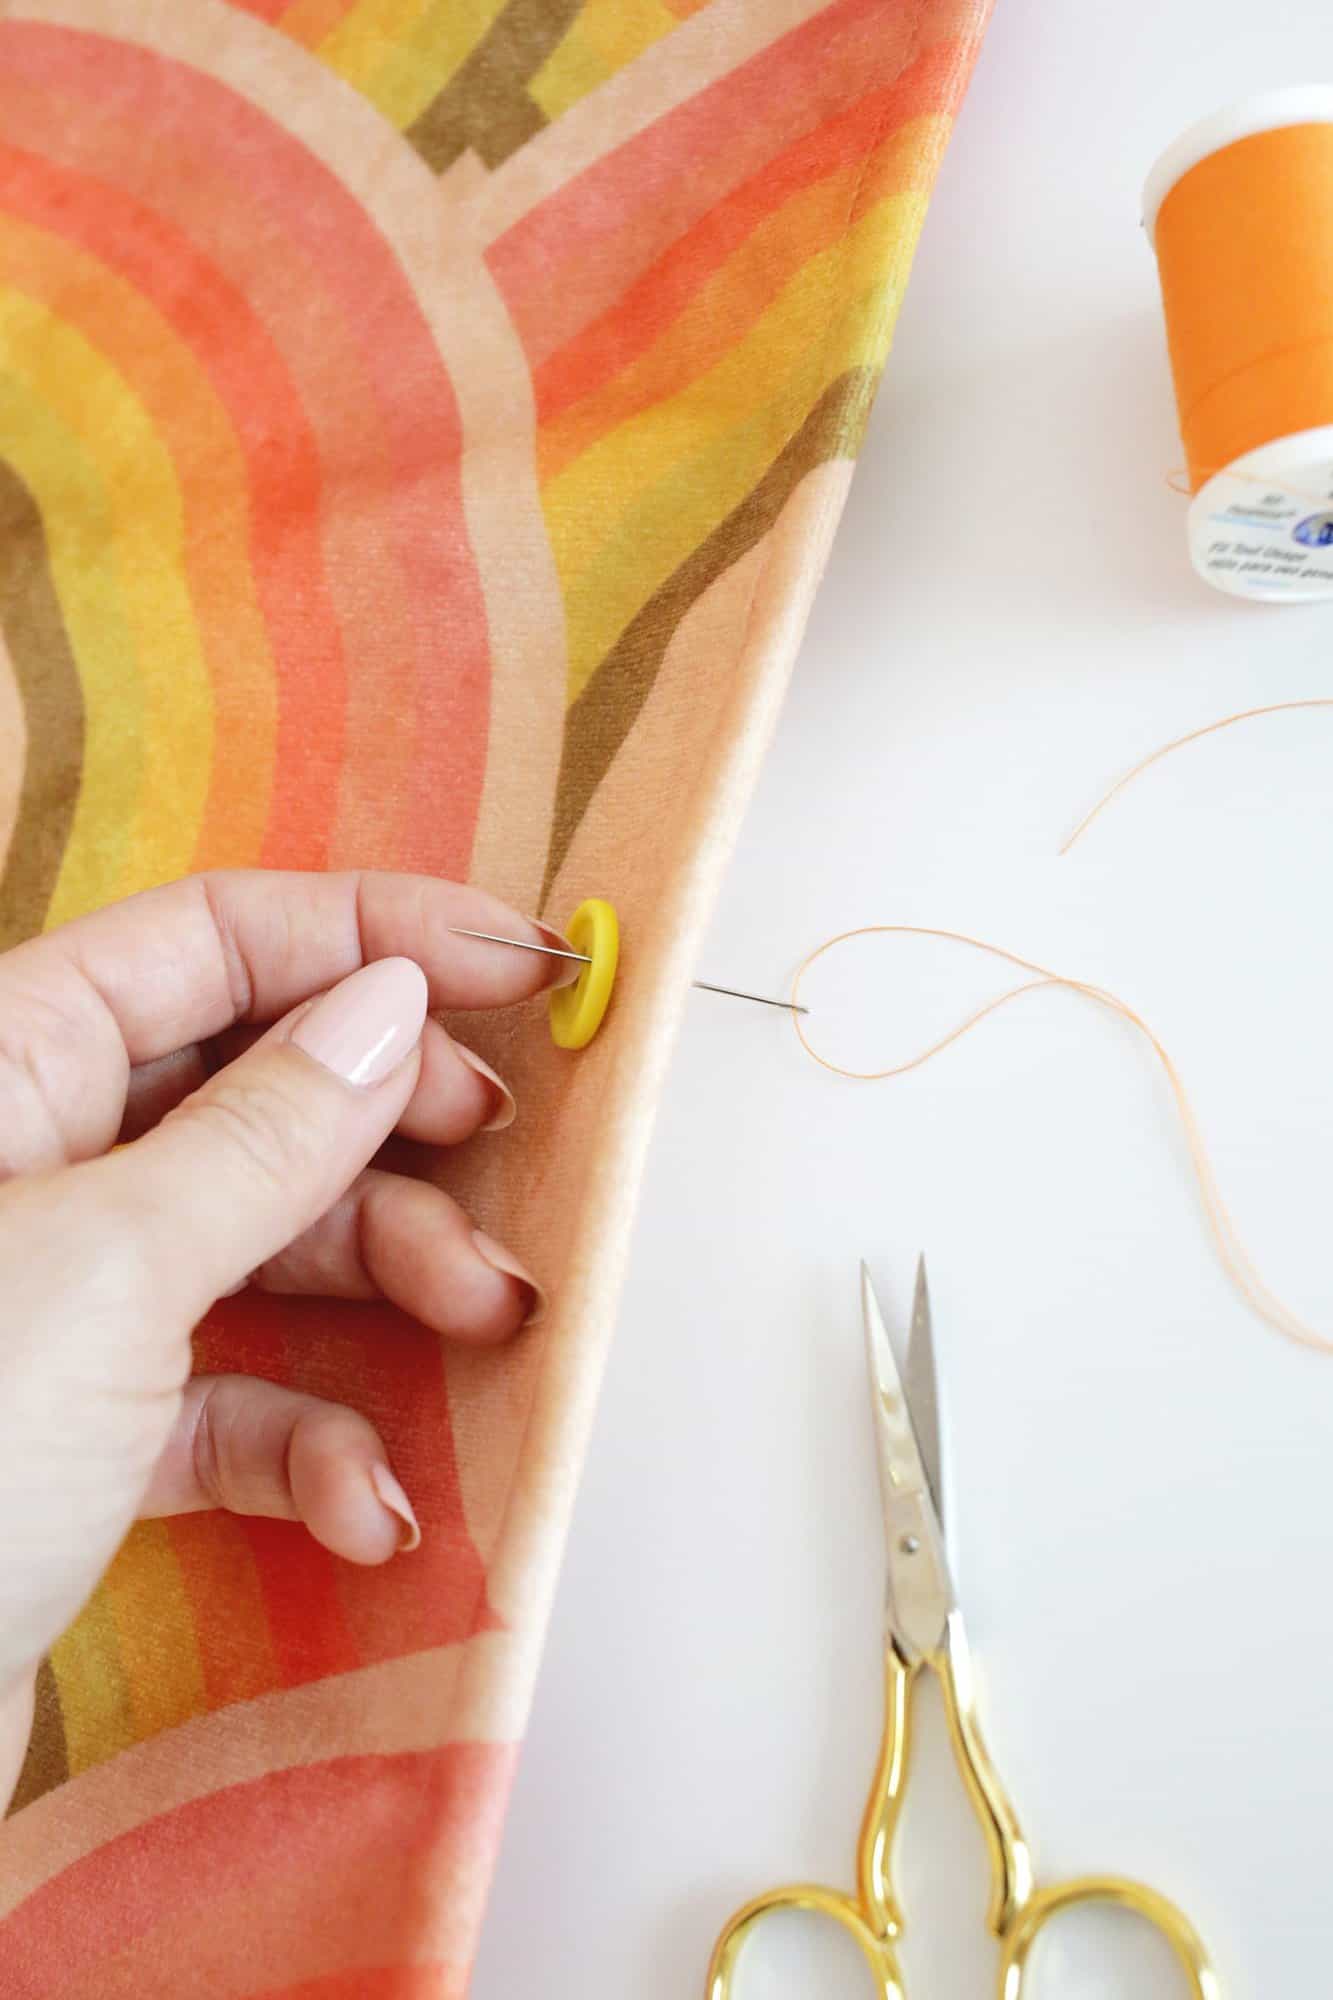
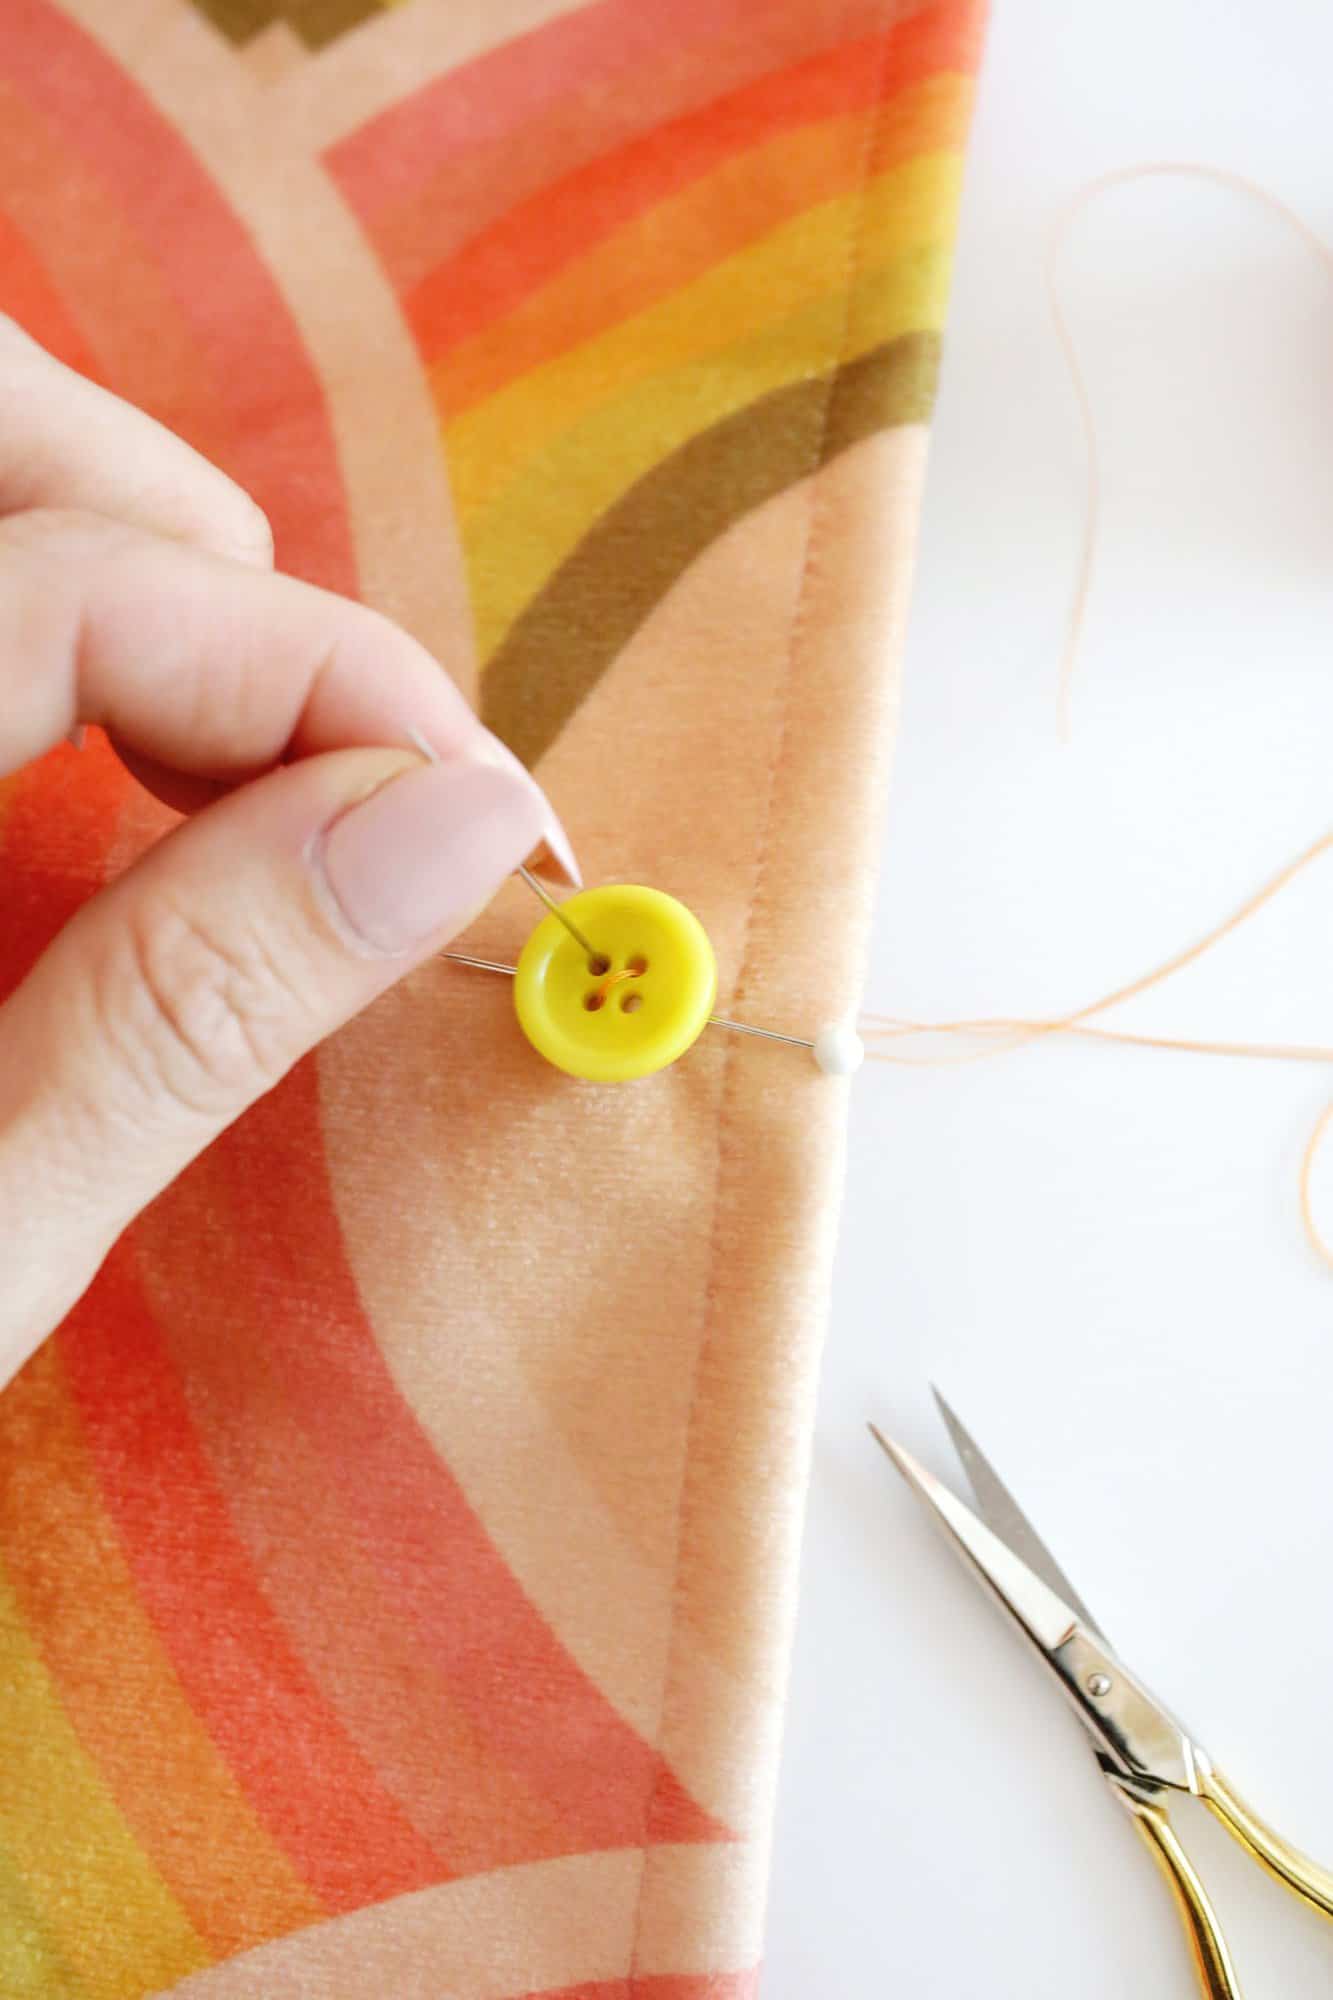
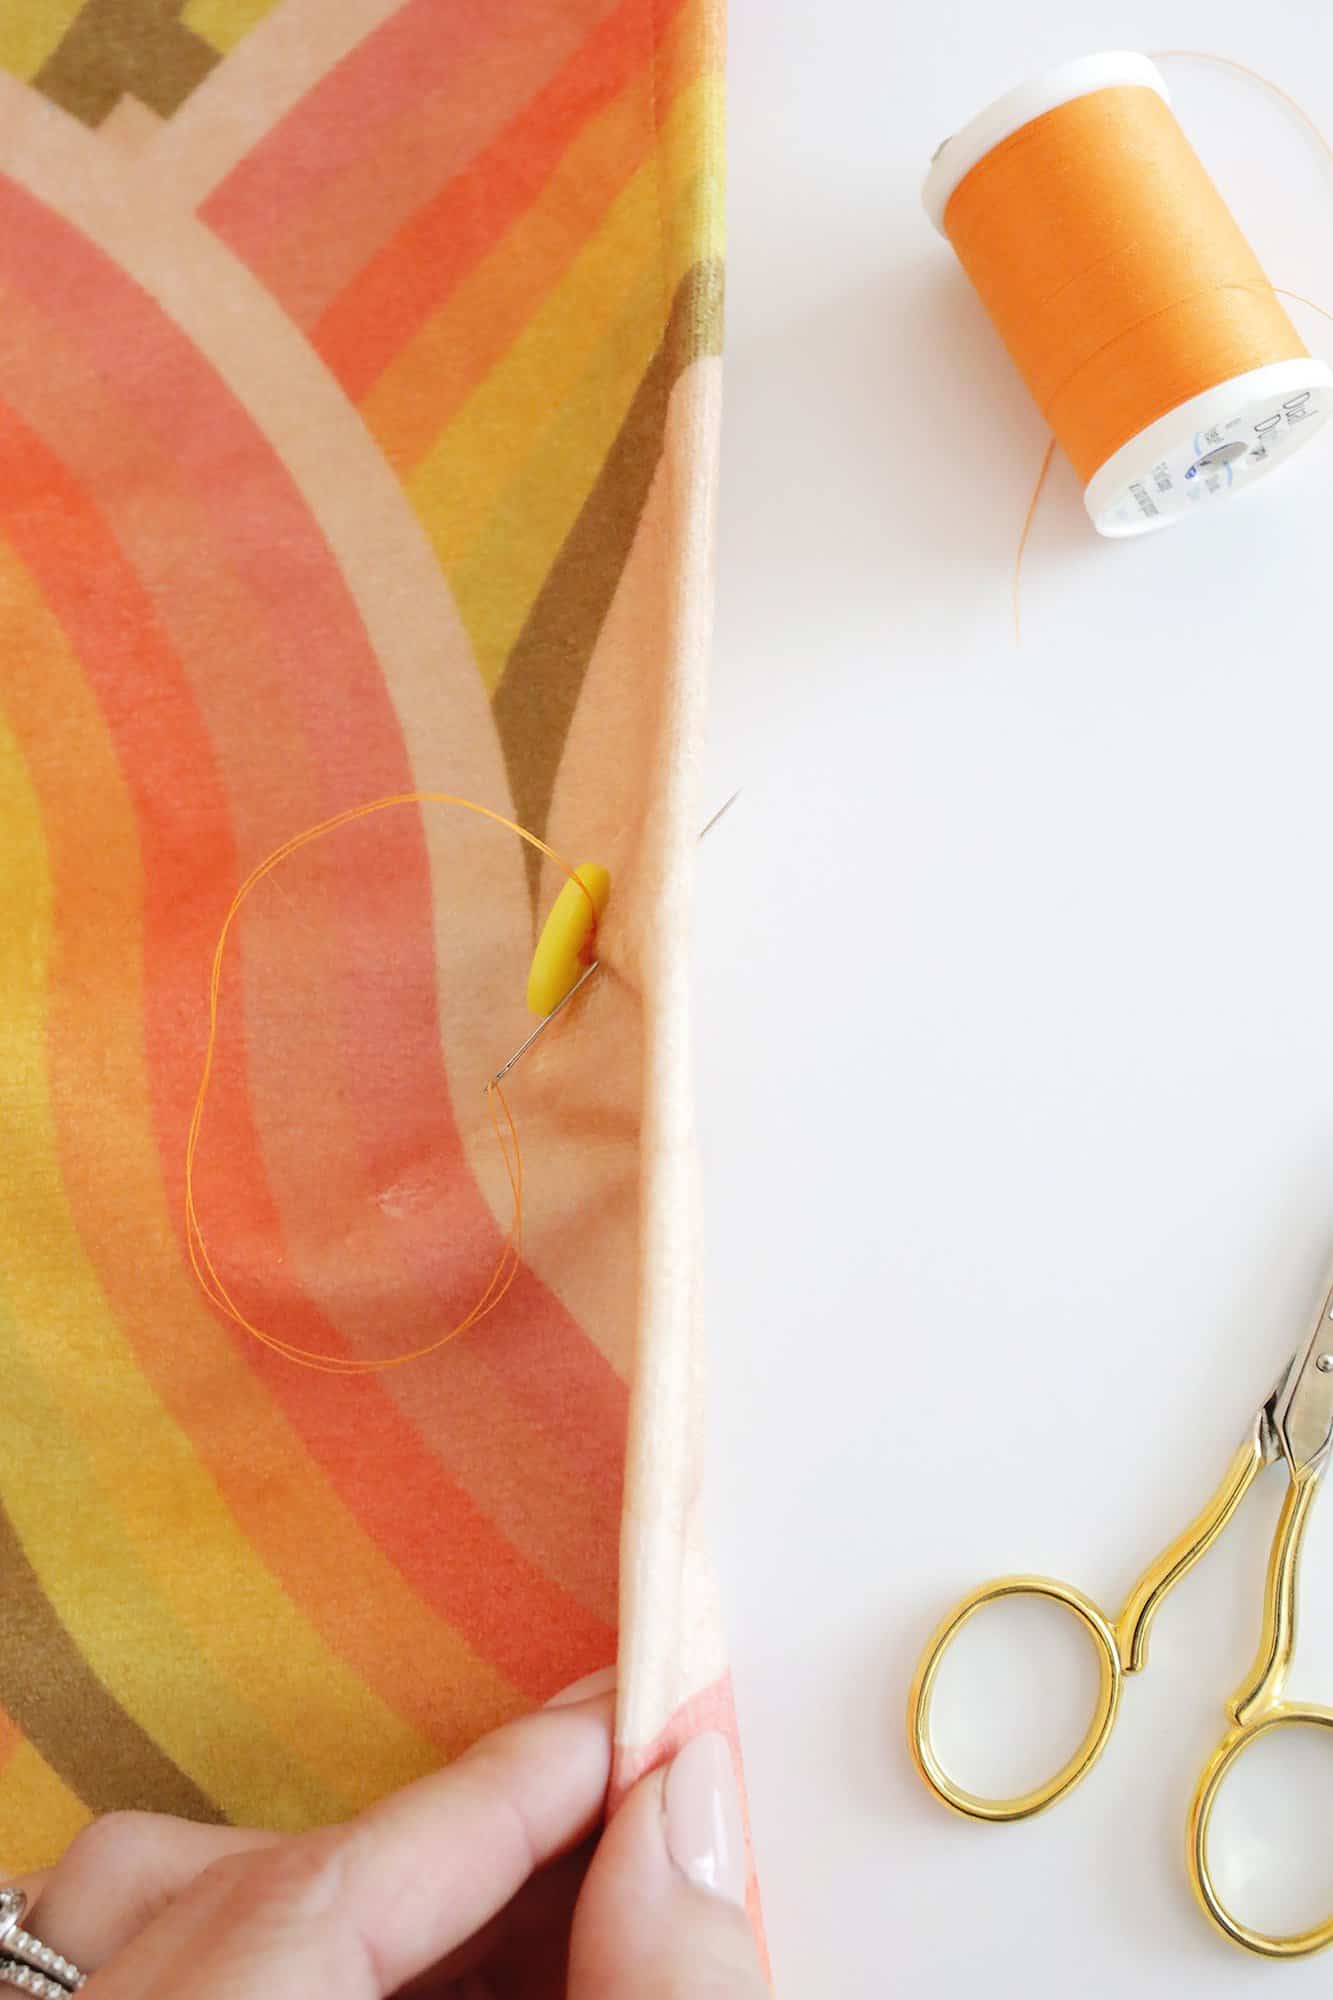
Begin your first sew: Pull your needle up by means of one of many holes from the underside of the material, pulling it all over till the knot stops you. Push the needle again down by means of the second gap and pull the needle all over once more.
When you’ve got a button with 4 holes as a substitute of simply 2, you’ll come up by means of one gap and cross to the button gap diagonal from that gap fairly than straight down so you might be creating an “X” as you sew.
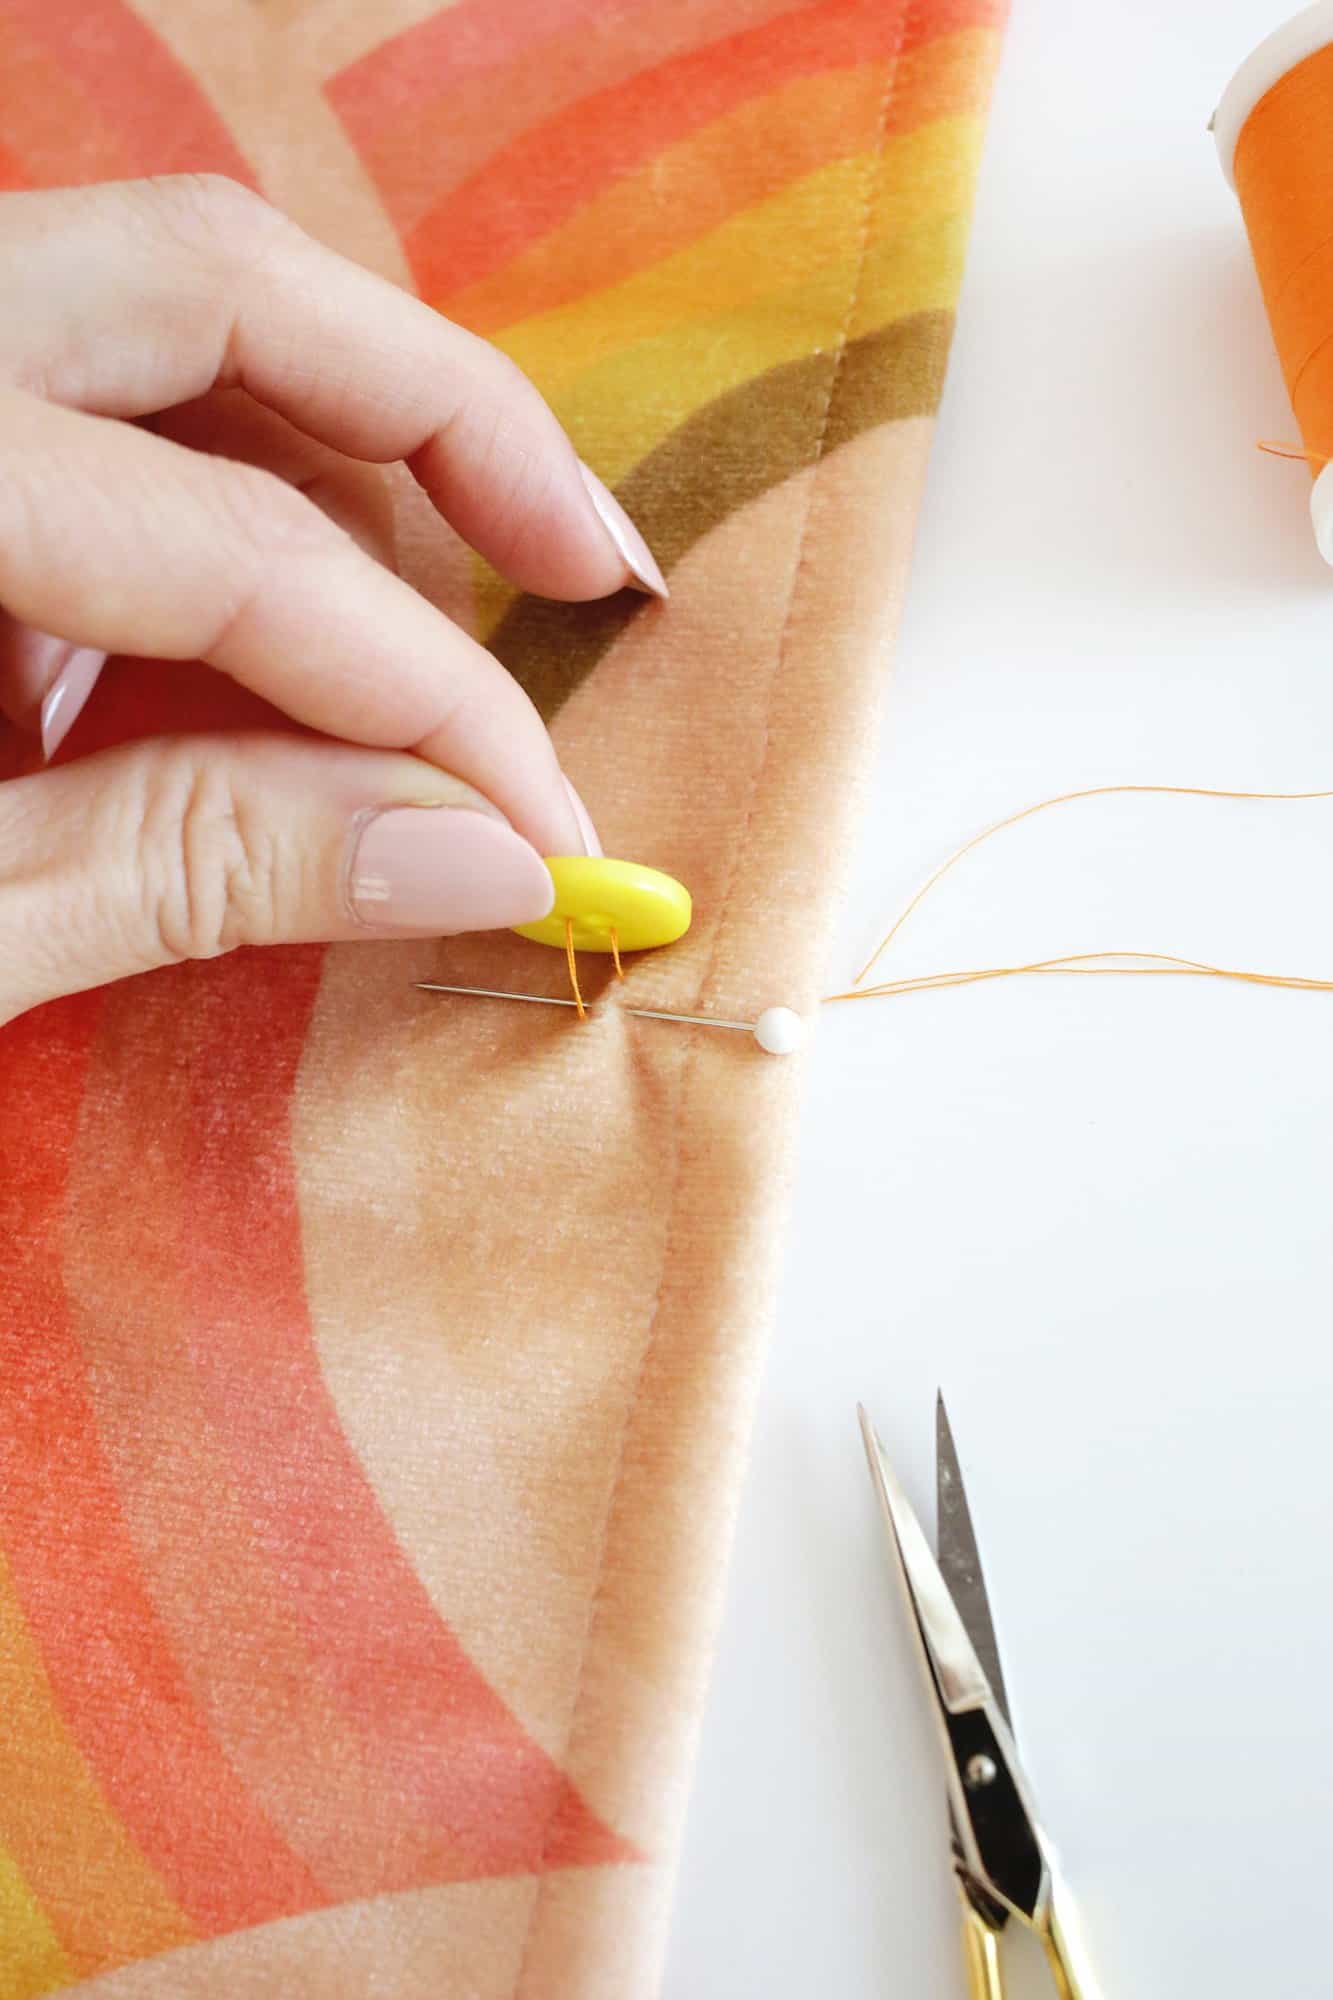
Use a straight pin as a spacer: Place a straight pin below the button between the button and the material in the course of your stitching. Having this pin there provides a bit of little bit of house so the button isn’t sewn too tight.
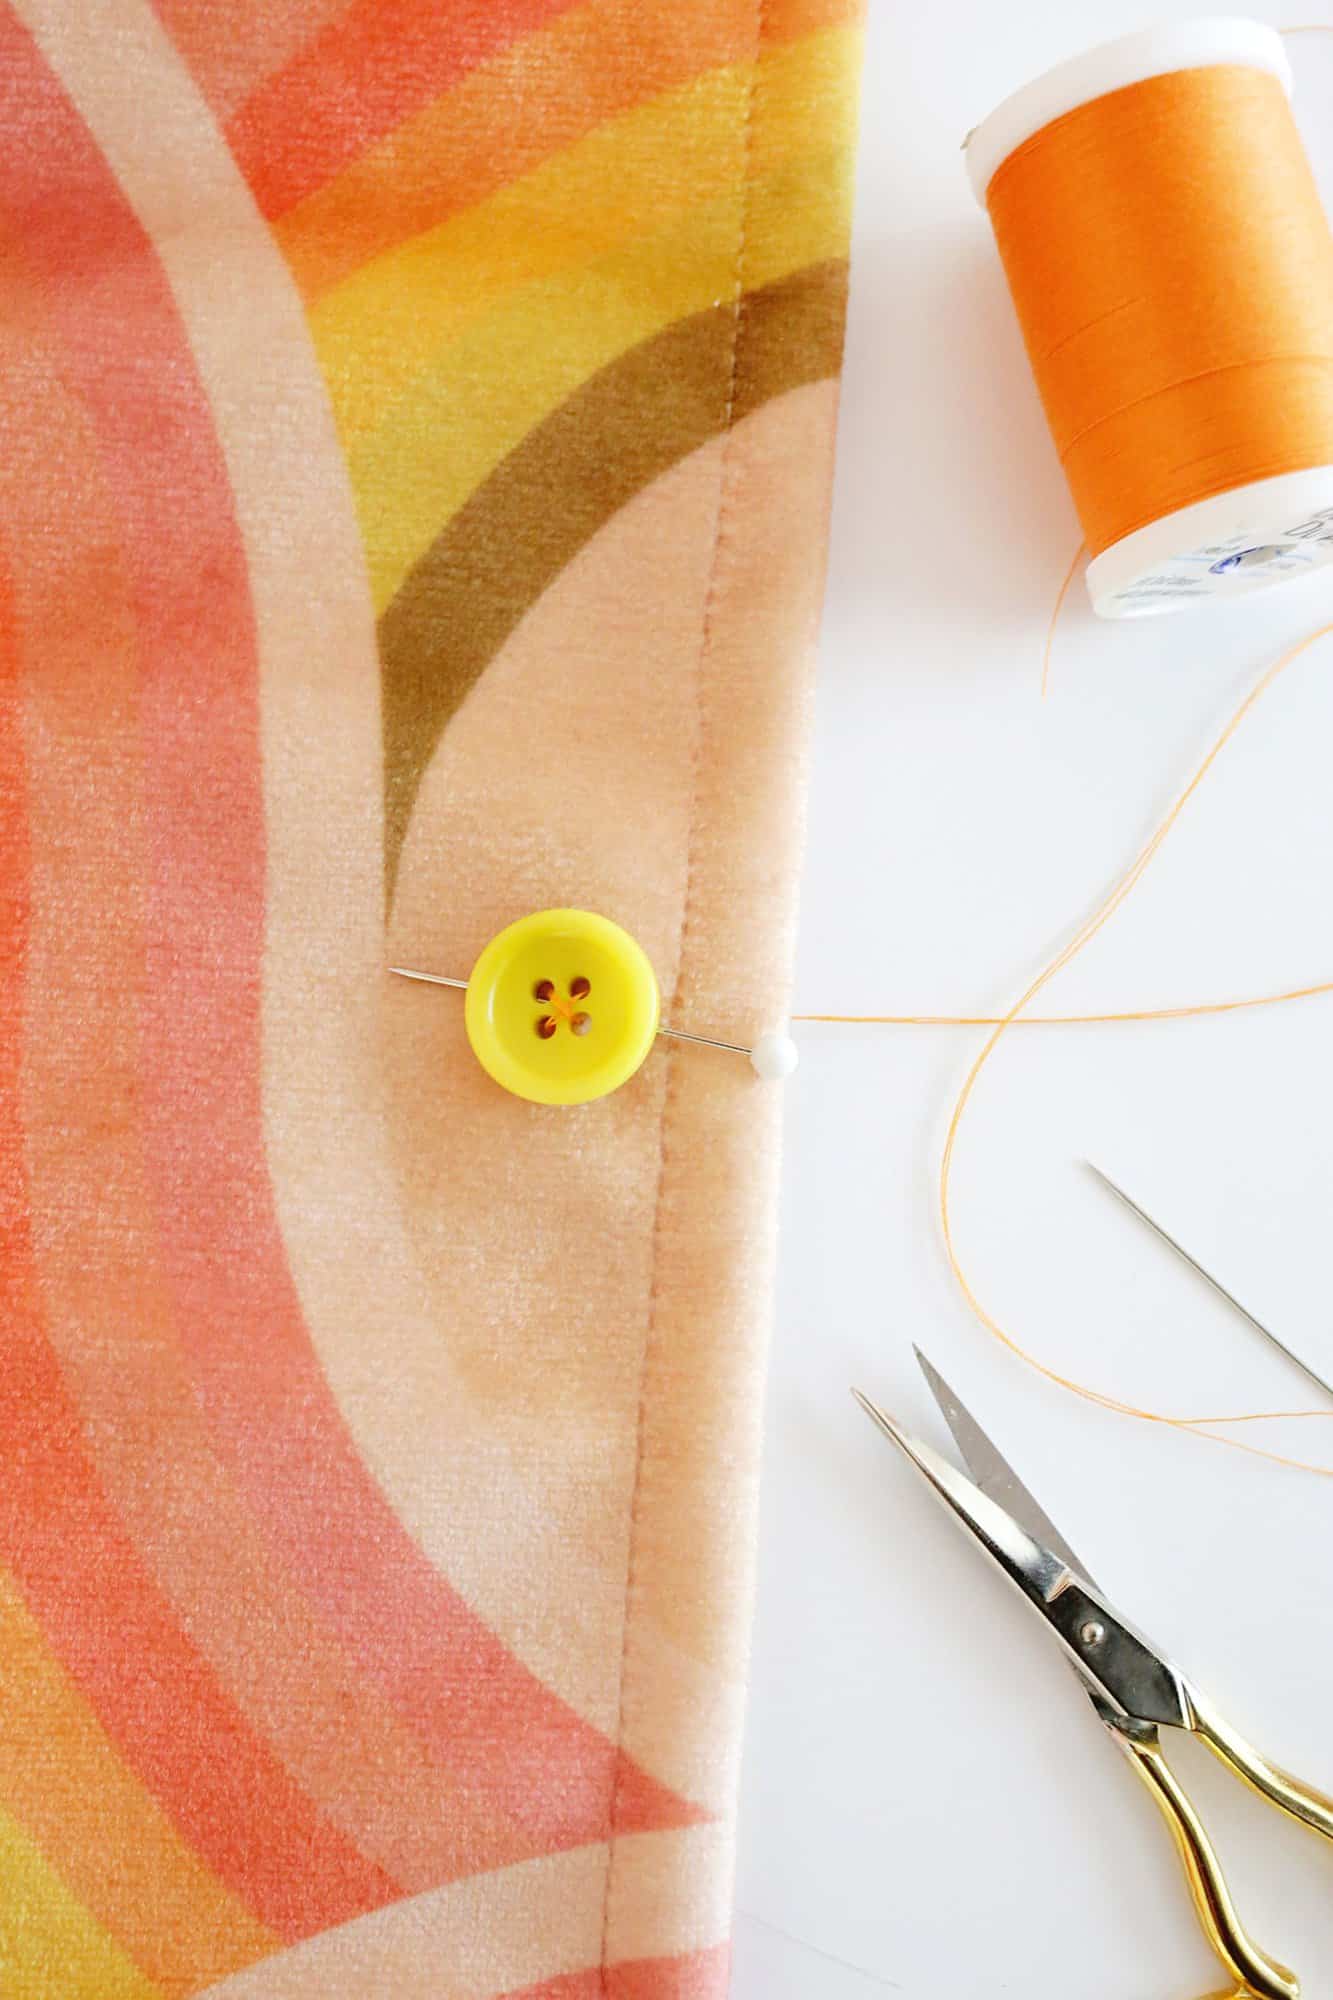
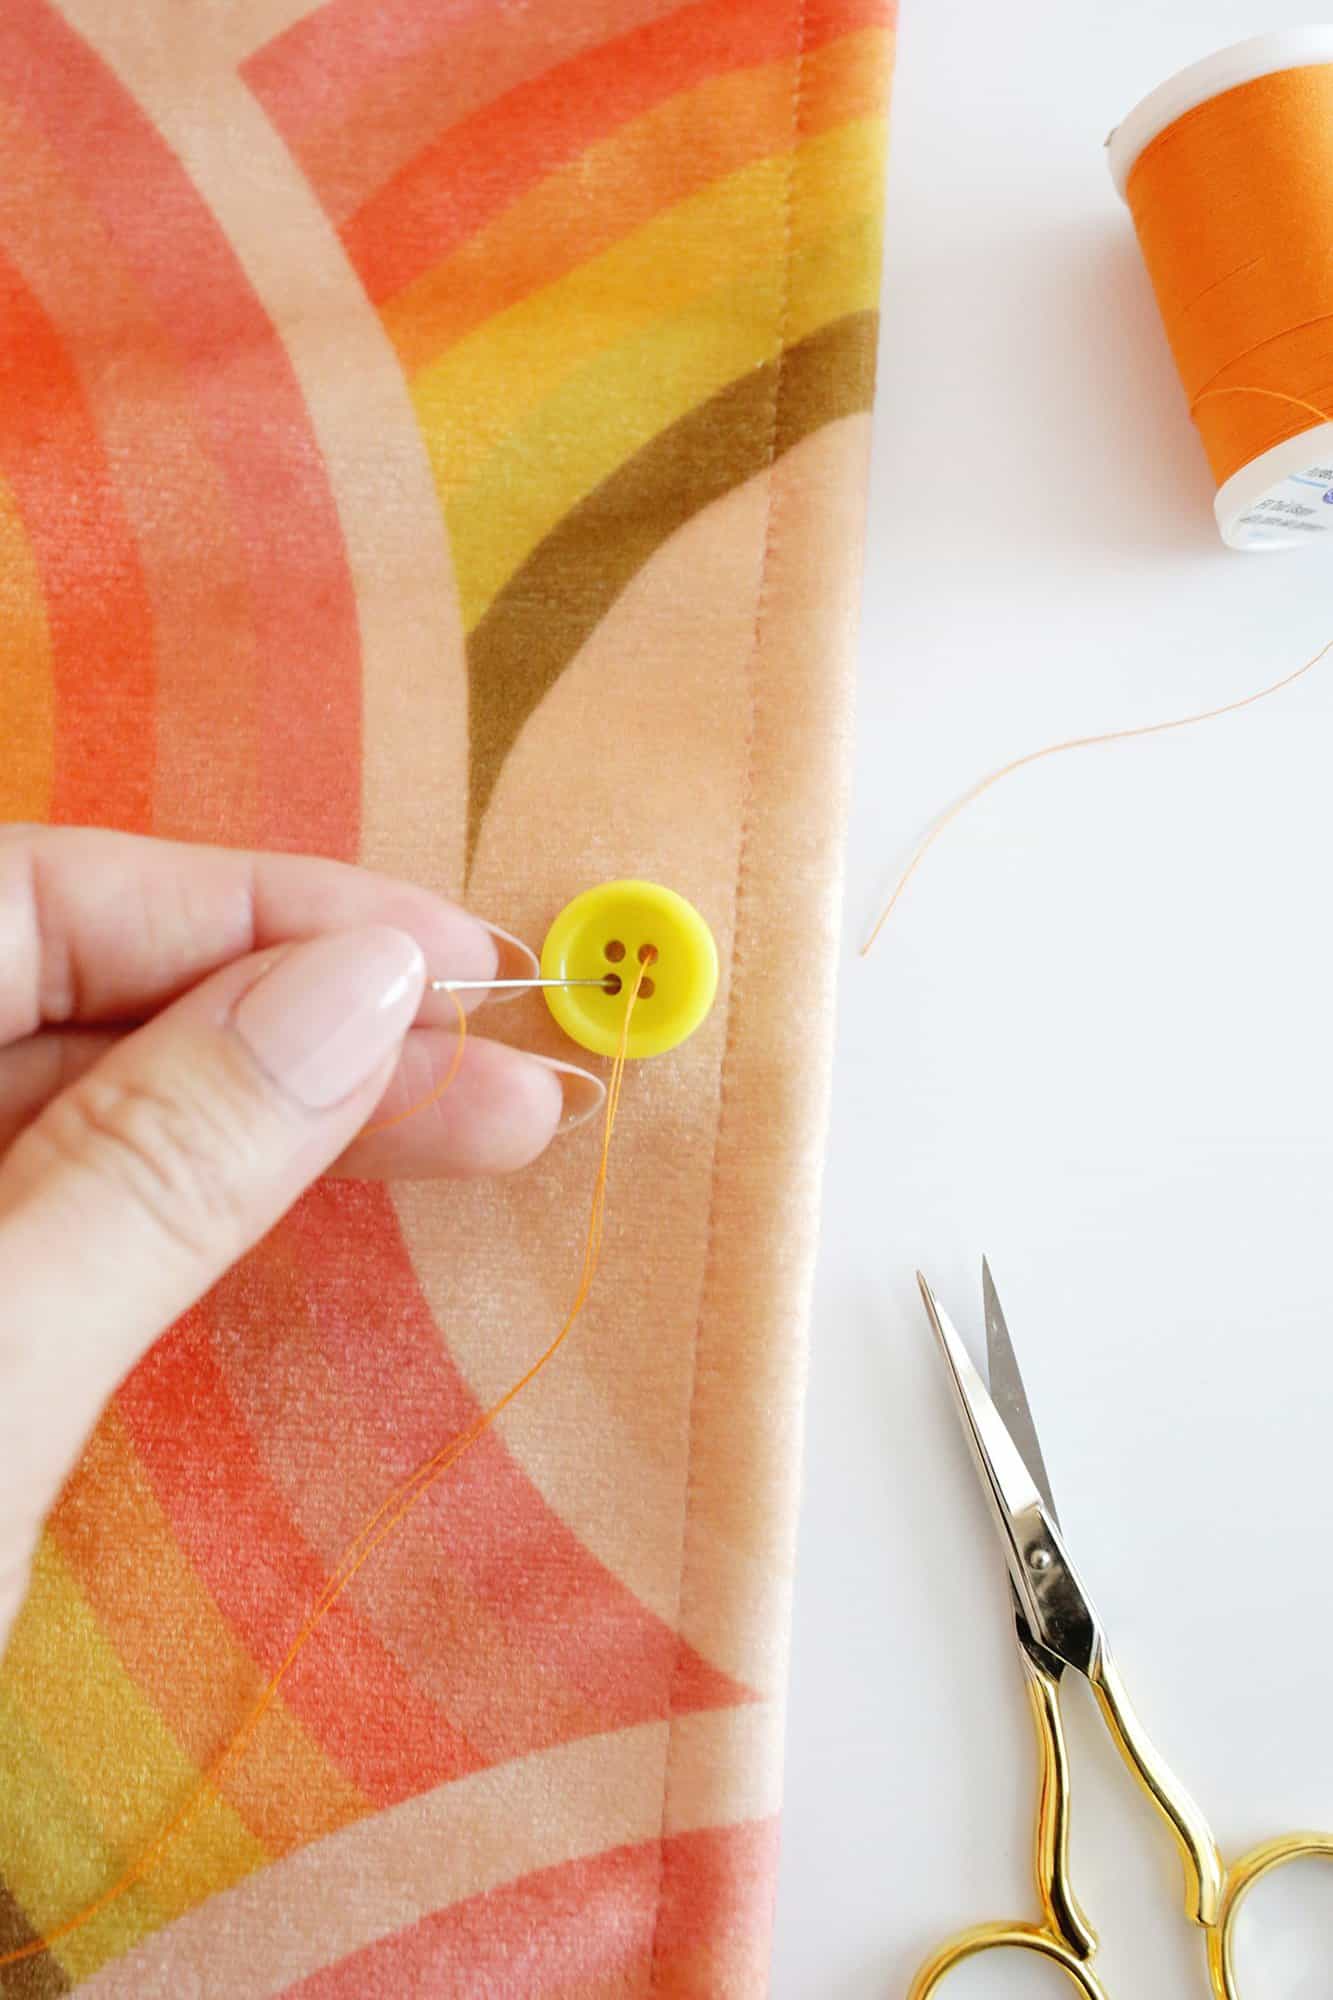
Proceed stitching: Proceed stitching your stitches by developing from the underside and happening into the following gap a number of instances till the button feels safe while you pull on it.
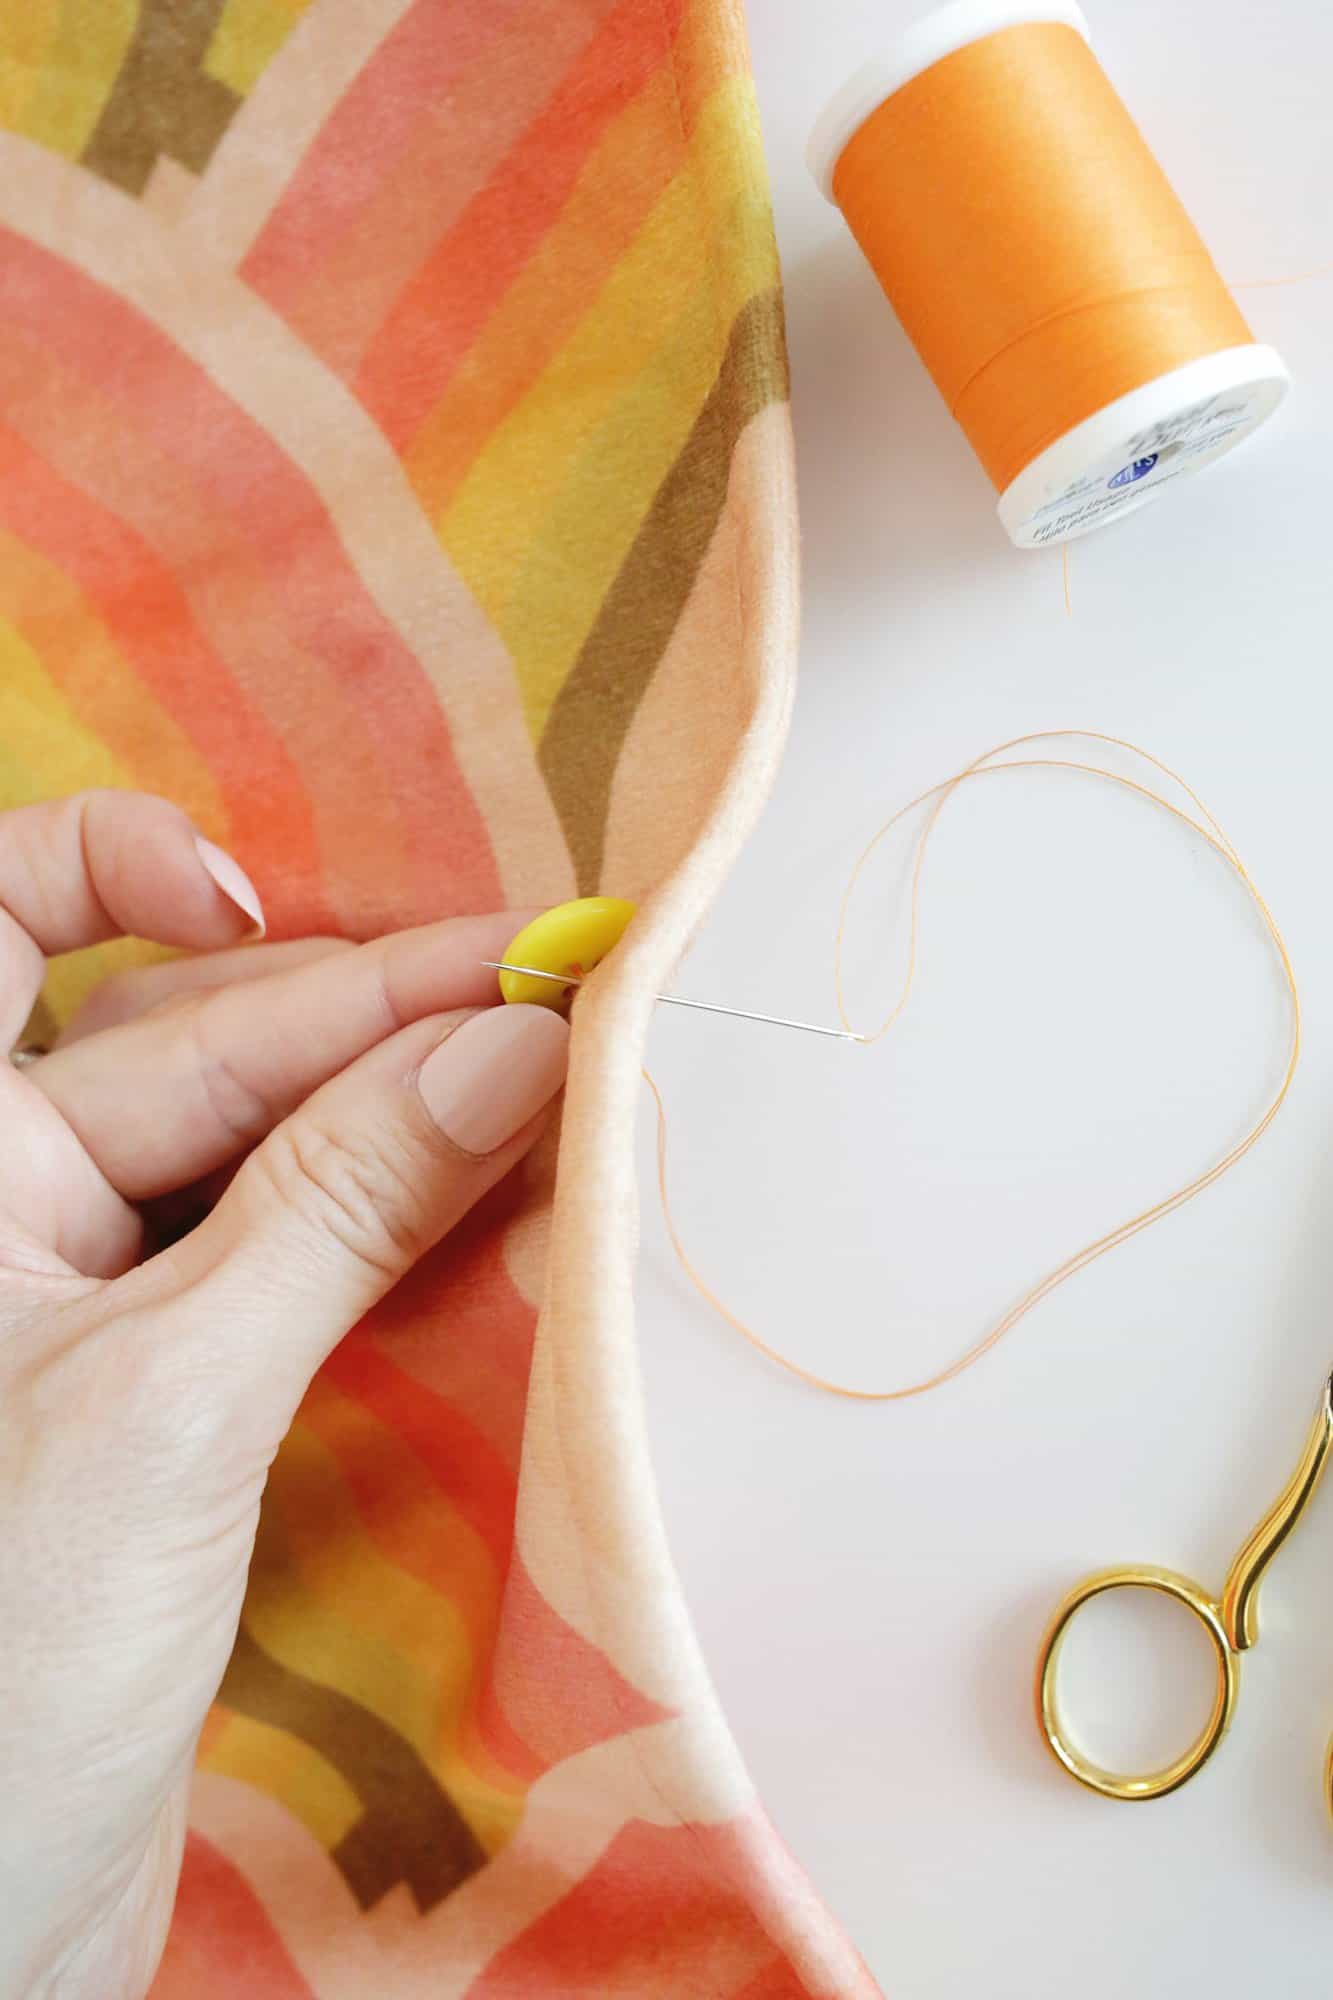
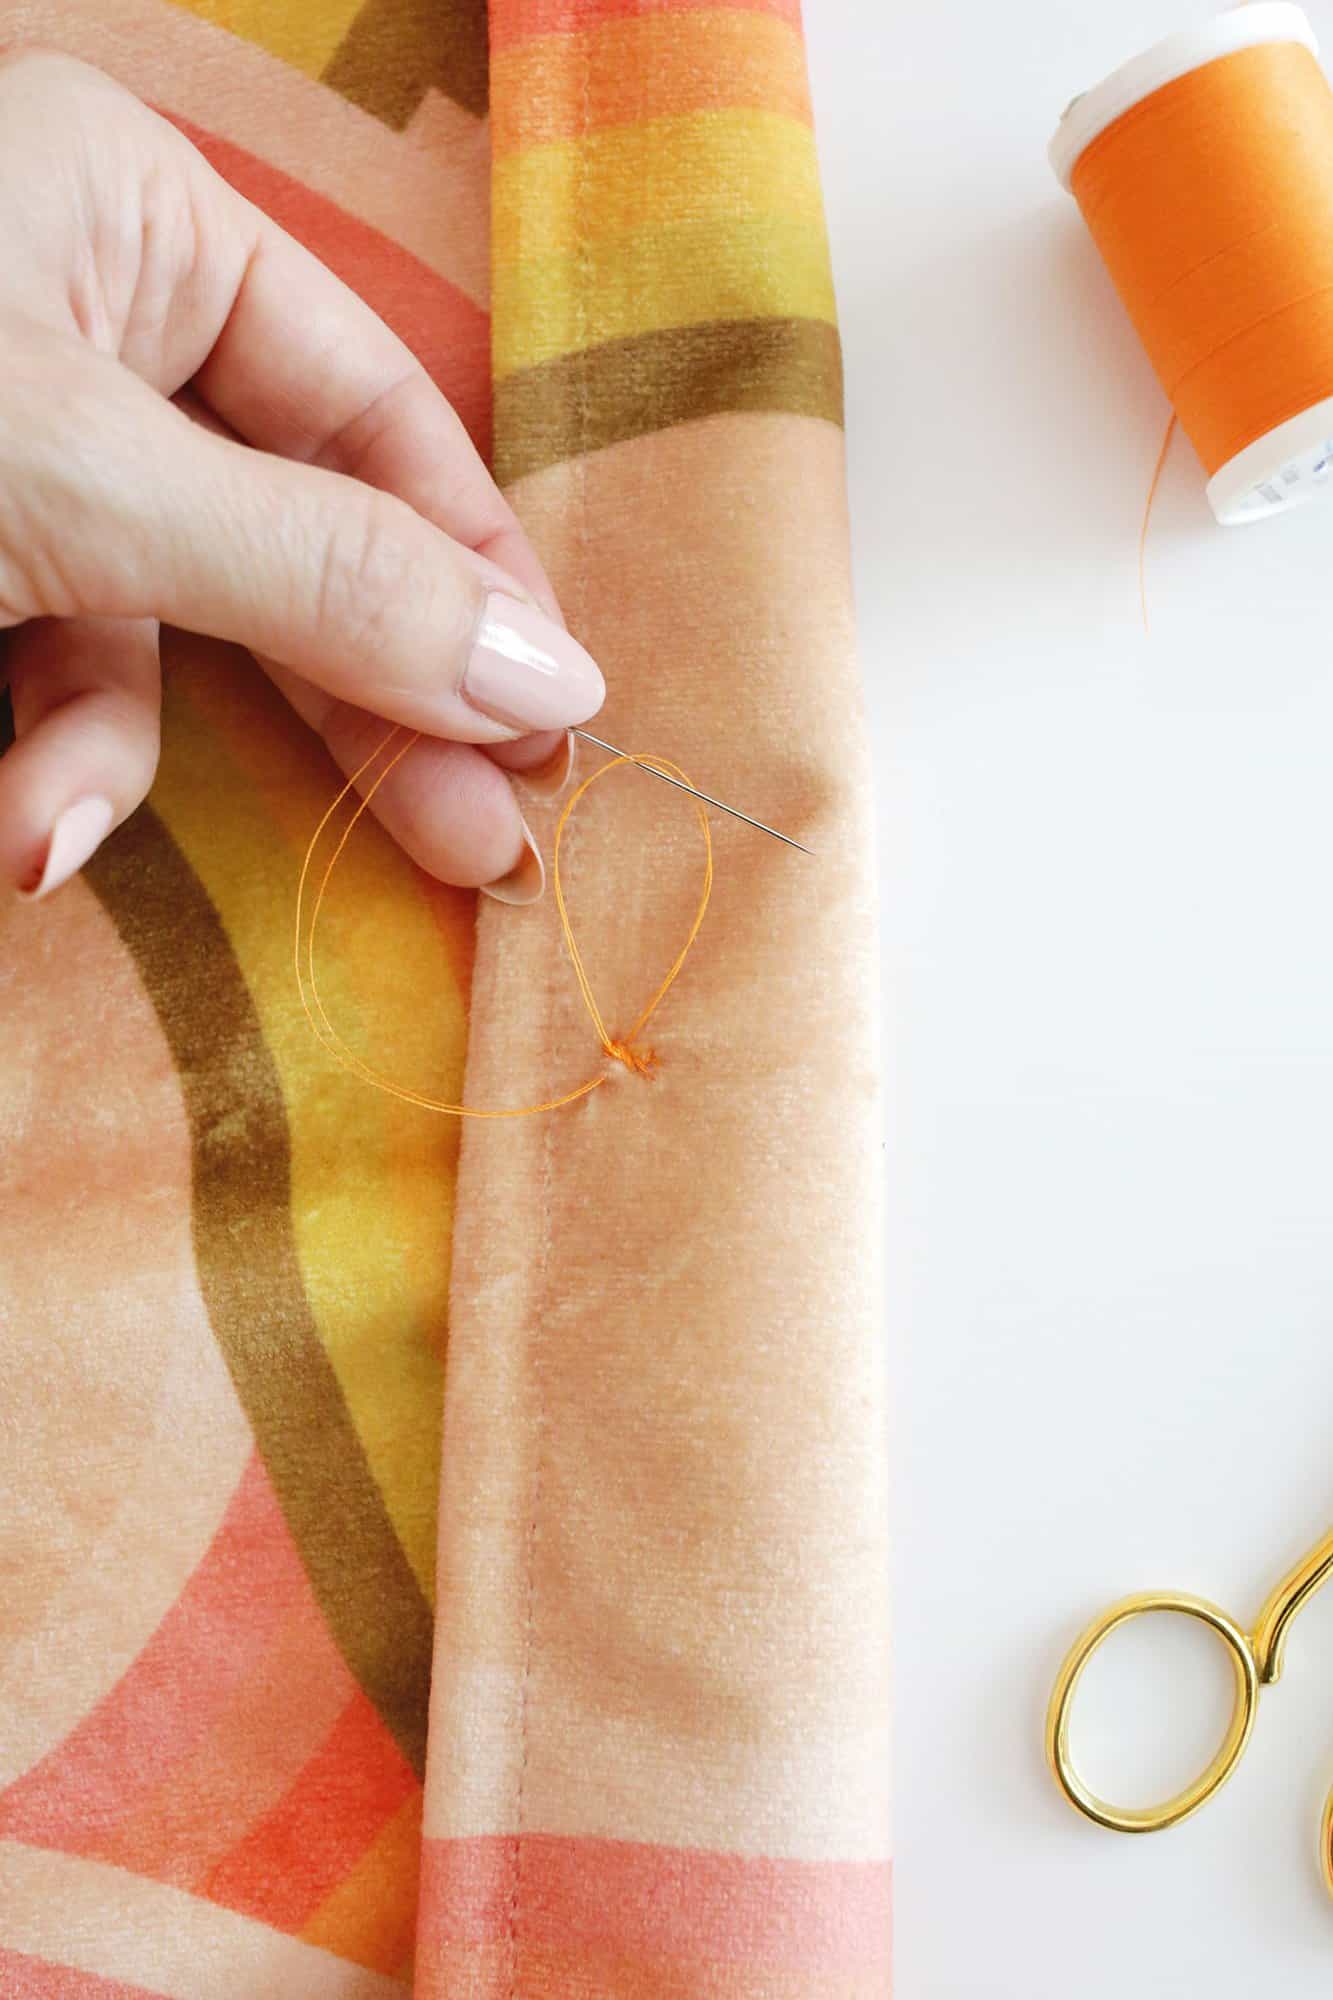
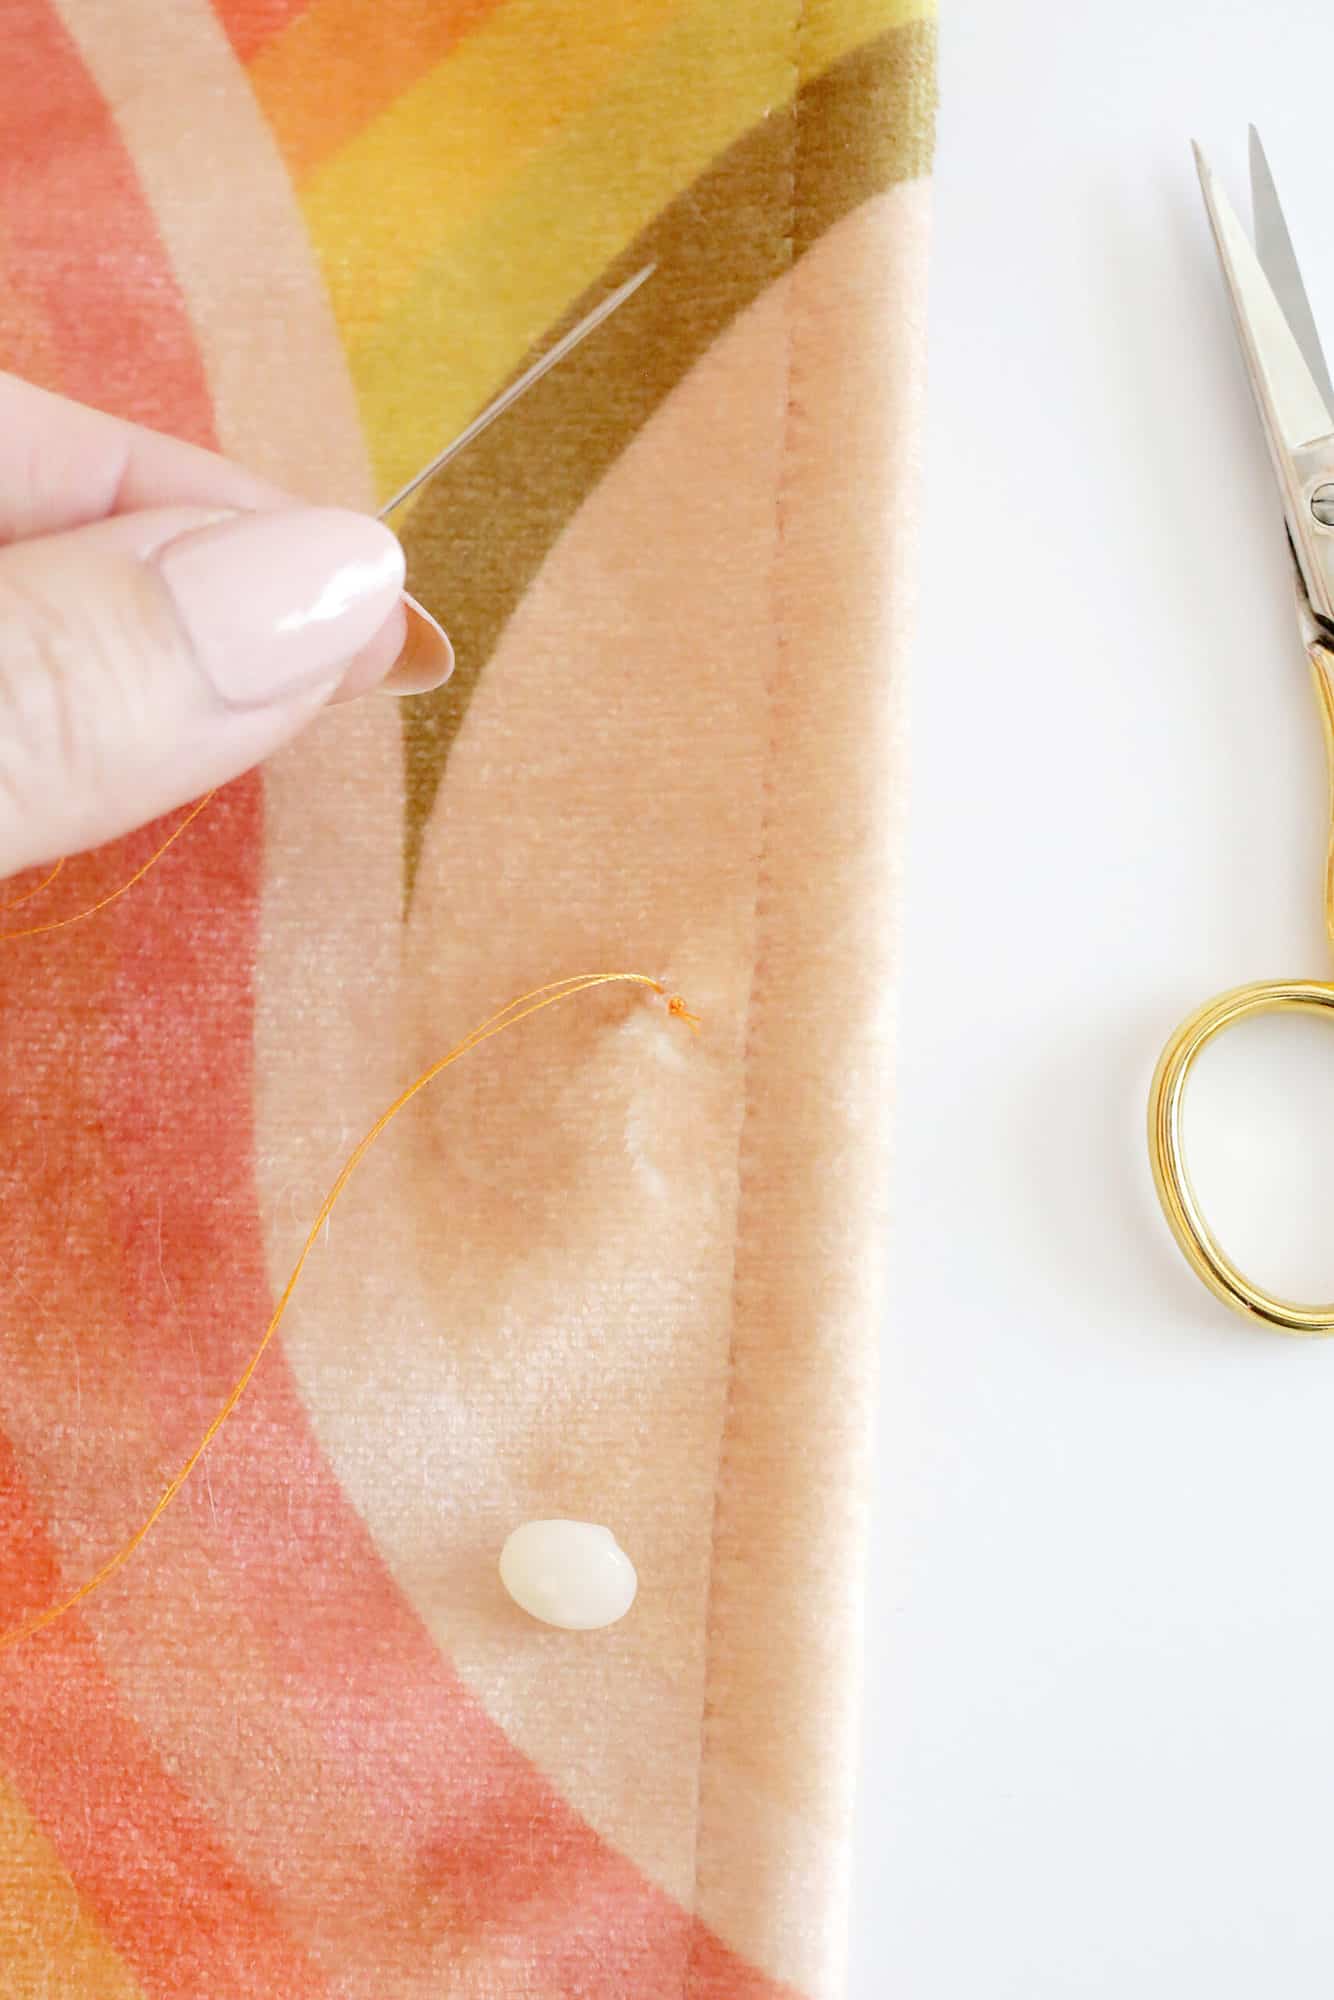
Create a shank (optionally available): Earlier than you end your button, come up by means of the fabric however come out beneath the button fairly than by means of the button gap once more.
Take out the straight pin and wind your thread between the button and material to strengthen the button and create a shank. (This offers you some house between the button and the material so it may be buttoned comfortably).
*If you’re stitching on an ornamental button that doesn’t undergo a buttonhole, you may skip this step of winding it round to create a shank.
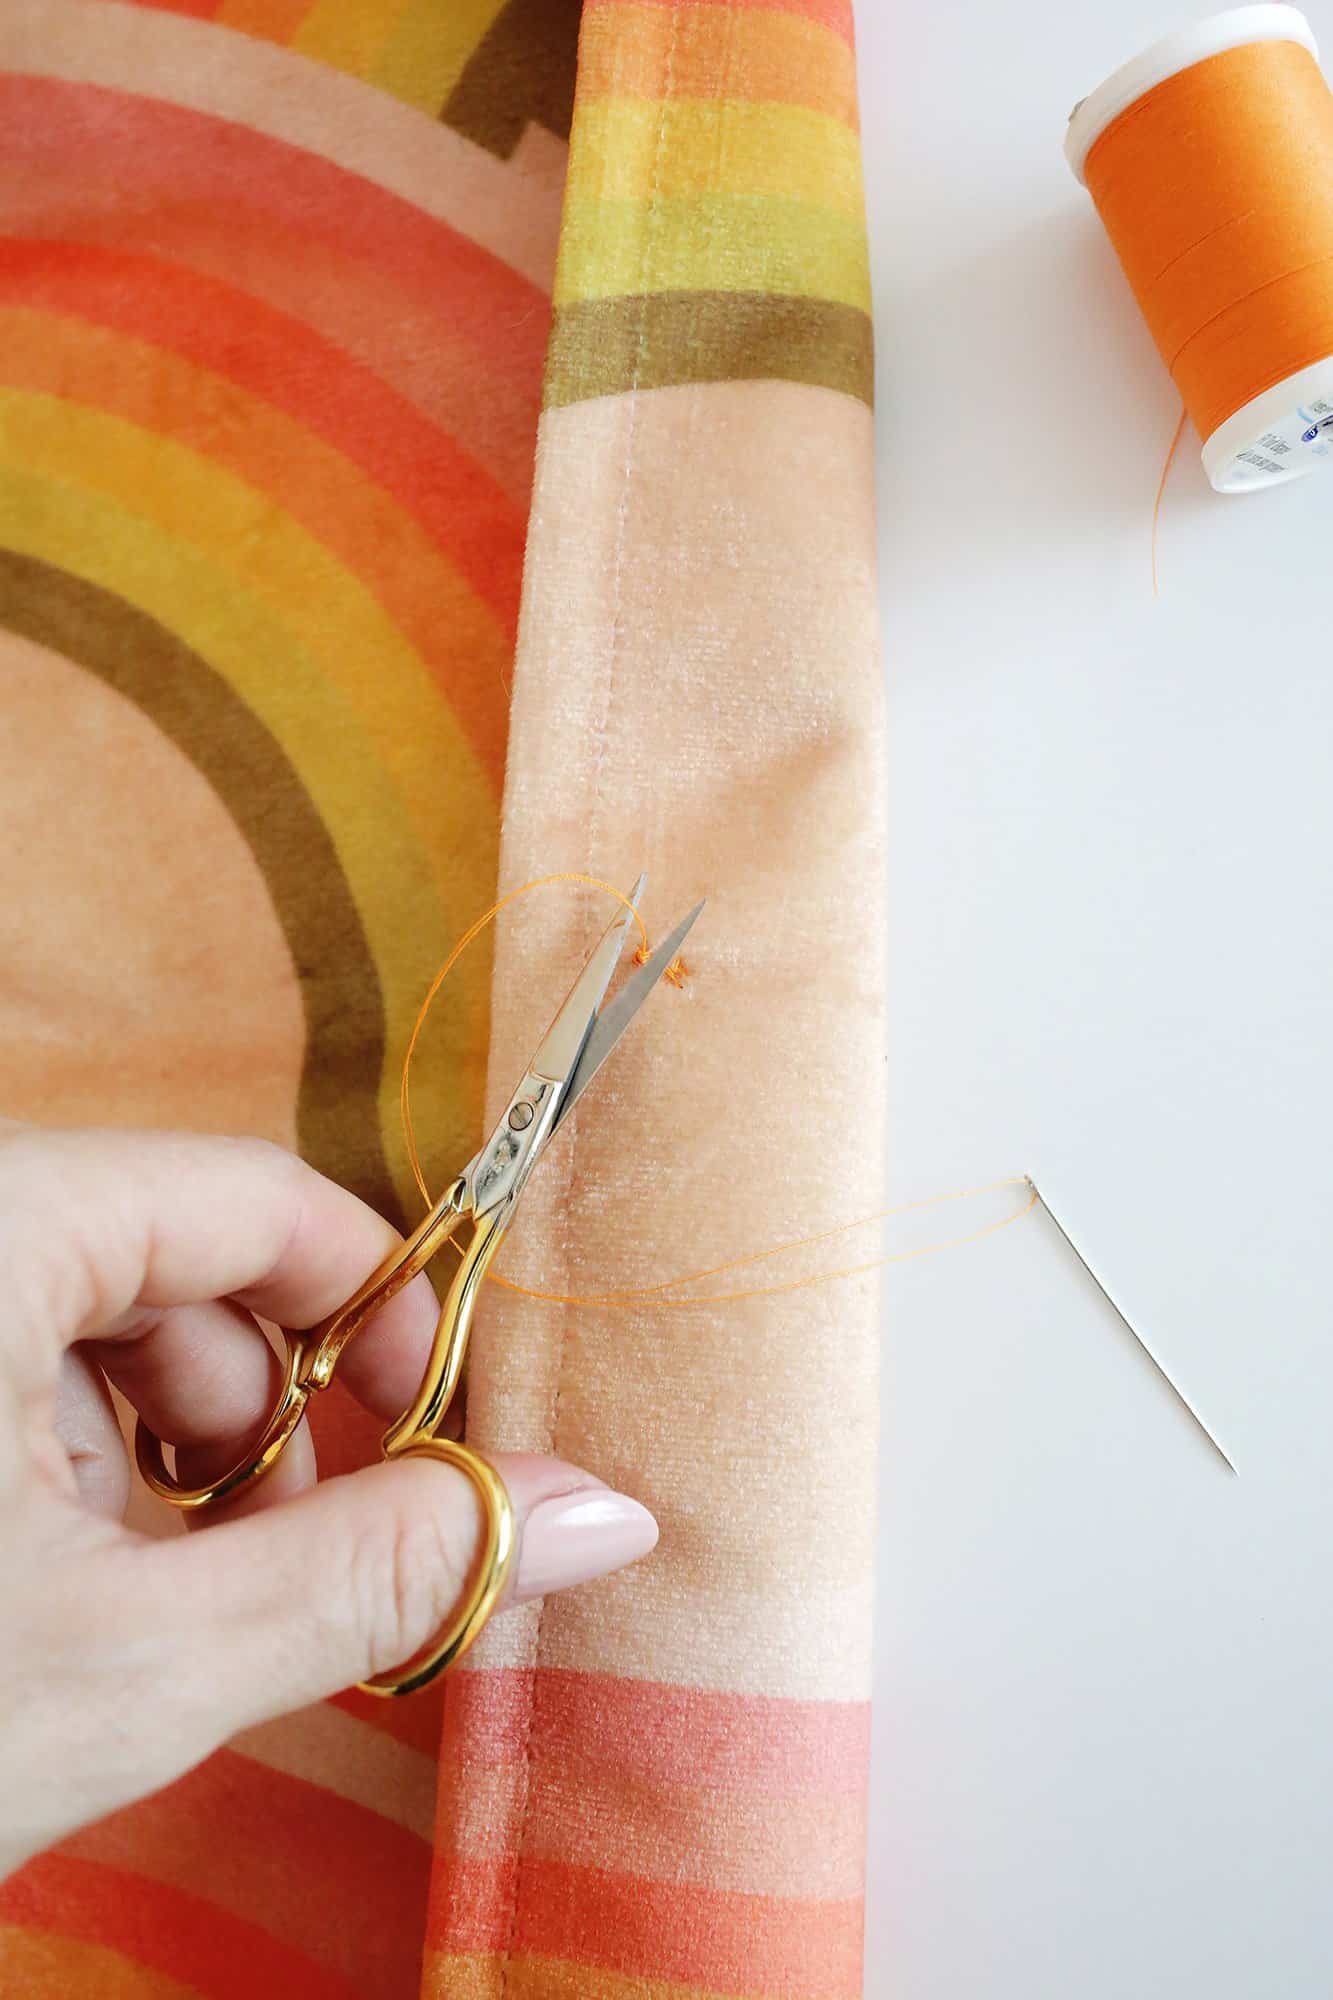
Tie off thread on underside: To complete, push the needle again down by means of the fabric, subsequent to the shank, so it’s on the underside of your materials.
Catch a bit of little bit of the underside materials together with your needle and pull it virtually all over so that you’ve a small loop of thread.
Move the needle again by means of the thread and pull it tight to create a knot. Reduce the thread near the knot to complete.
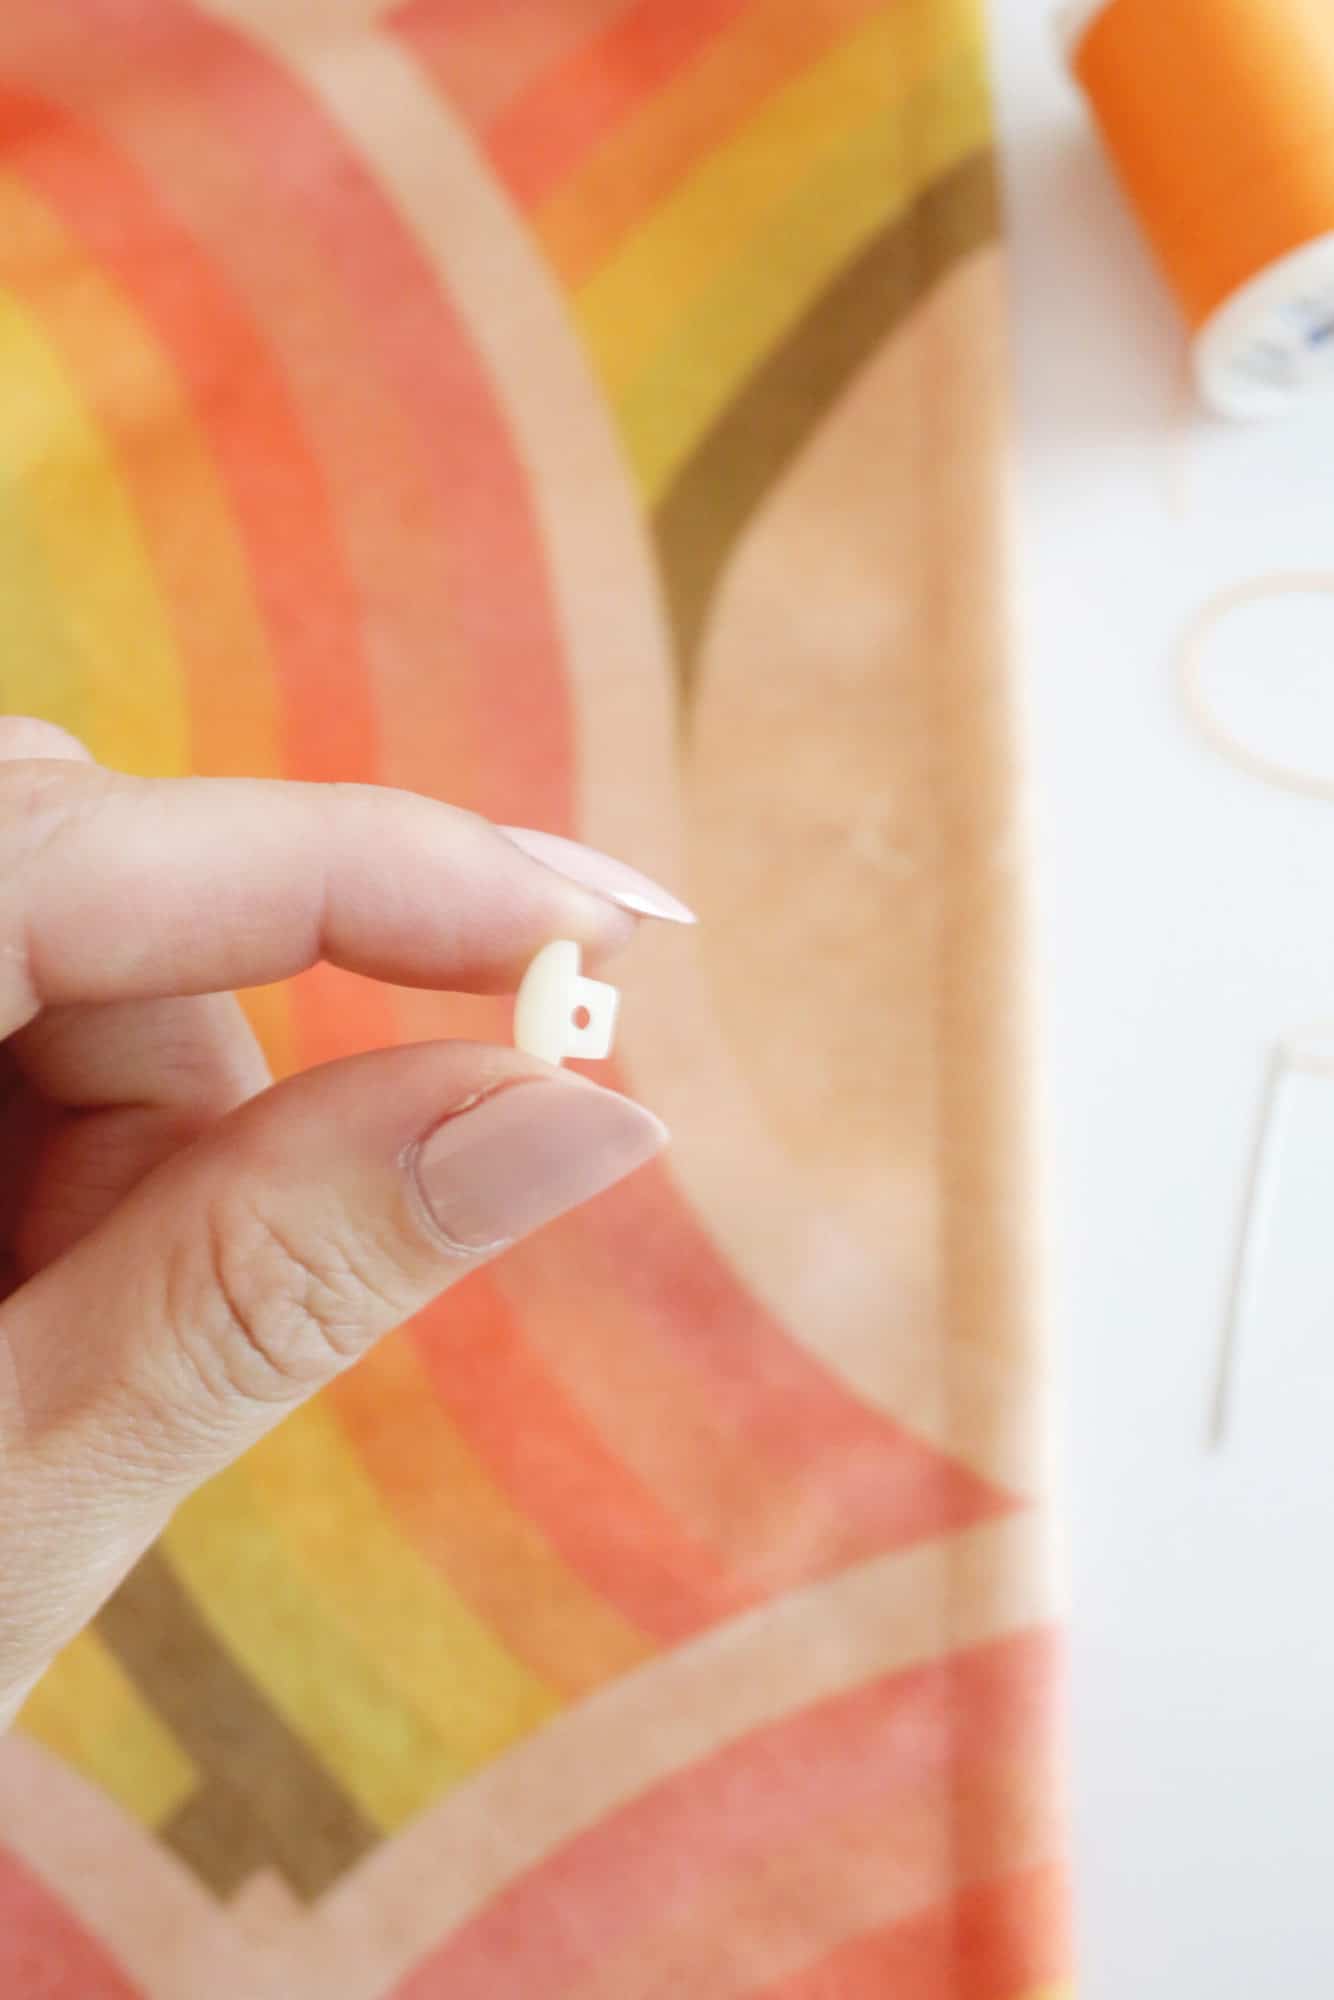
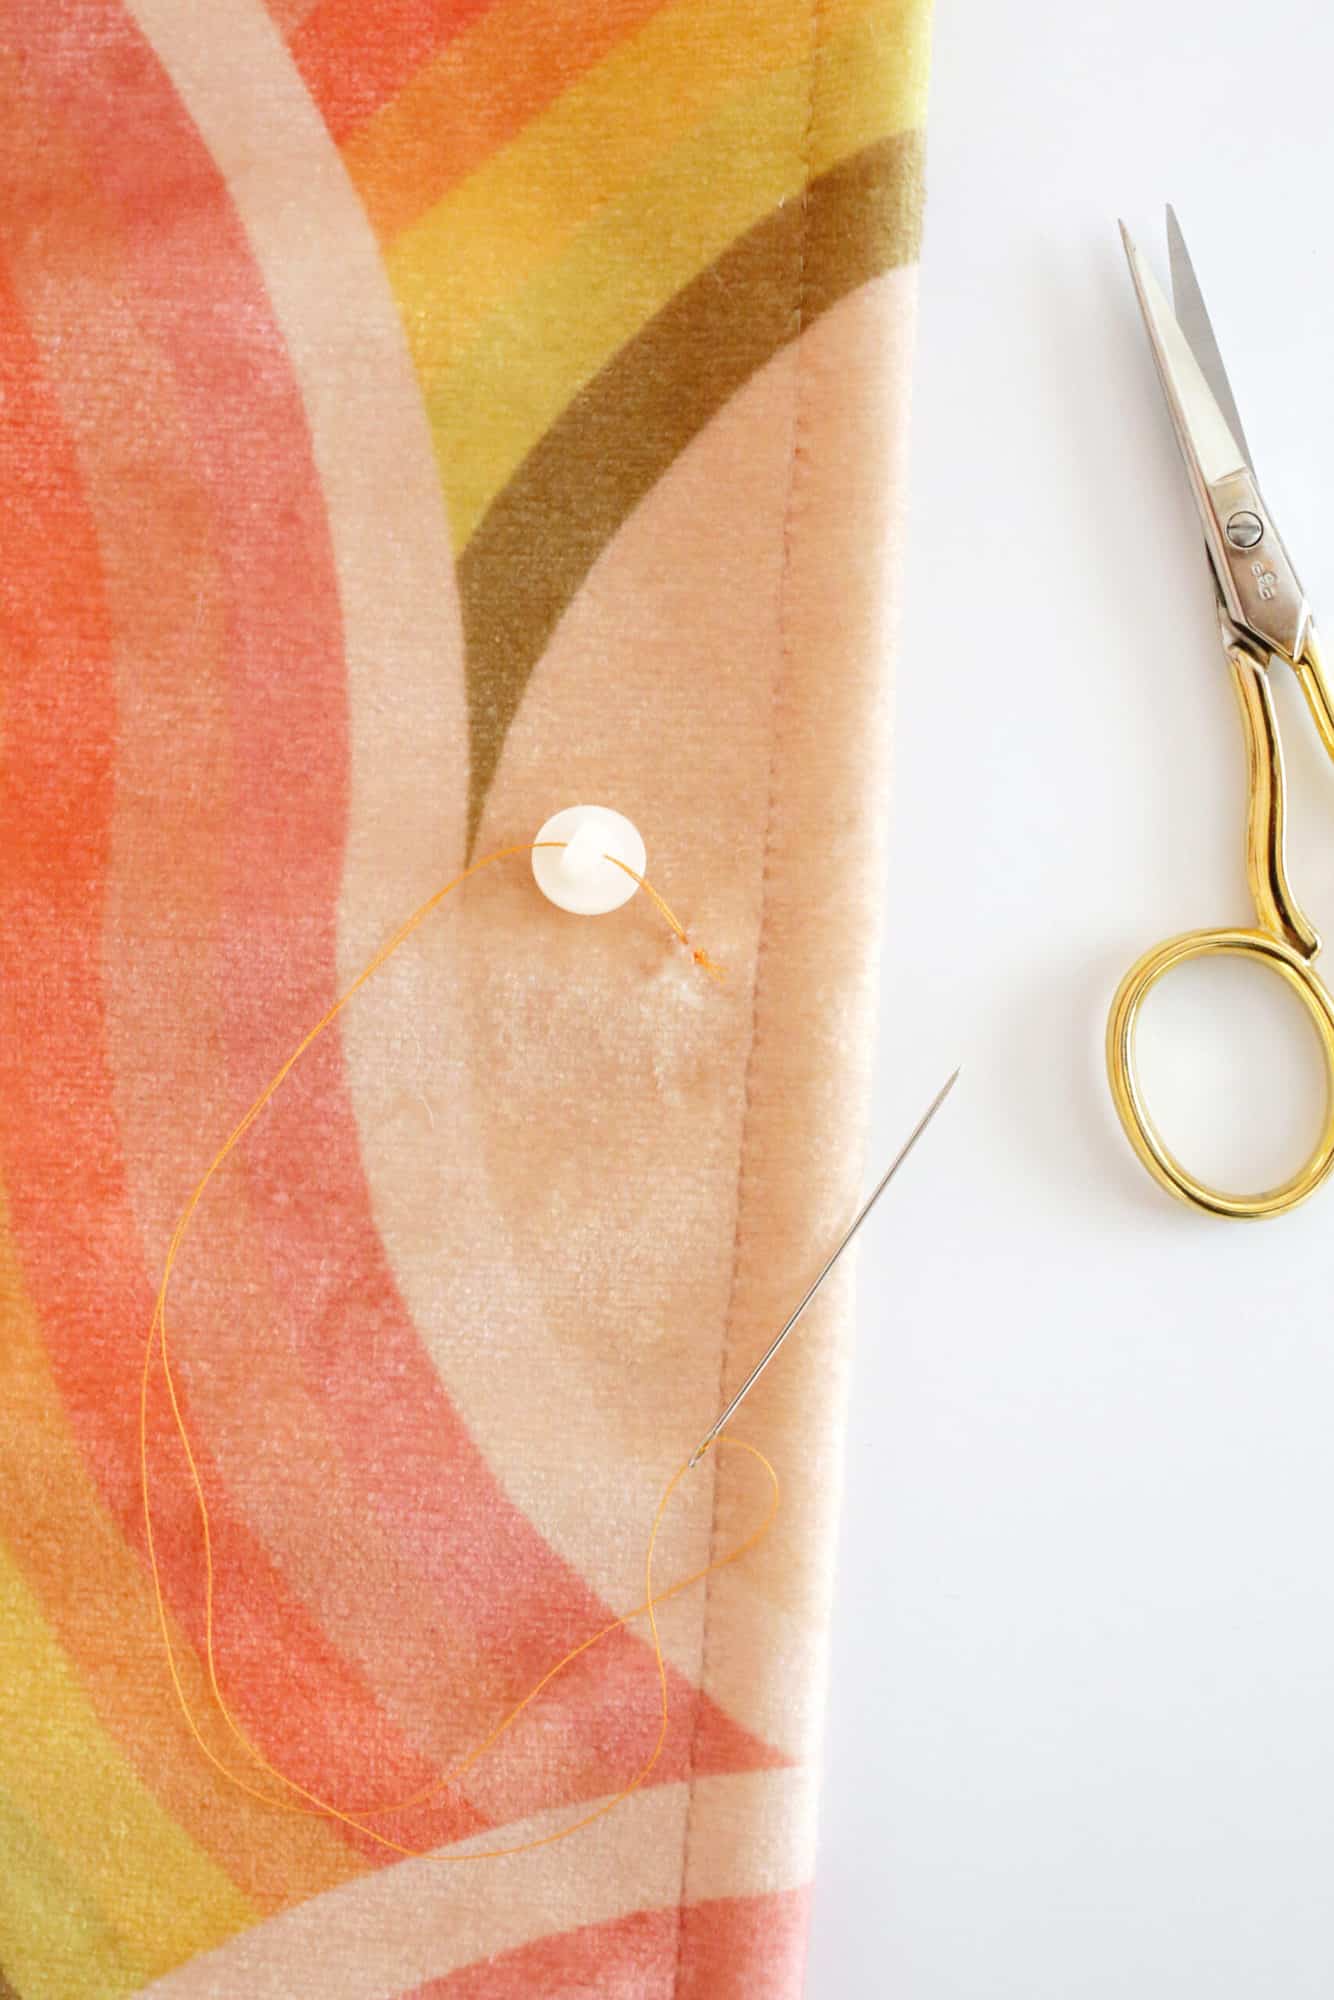
STEPS TO SEW A SHANK BUTTON:
Provides:
-shank button
-thread (regular weight works for many issues however you are able to do a heavy weight for larger coats, and so on.)
-needle (a multi-pack like this has a number of choices for various thread weights)
-scissors
–disappearing marking pen (optionally available)

Thread the needle: Reduce a bit of thread about 24″ lengthy and thread it by means of a needle midway in order that each ends are equally as lengthy (you need to use a self-threading needle like this for simple threading). Protecting your strands collectively, tie a knot on the finish to tie them collectively.
Place the button: Place the button the place you need it in your garment. Verify to see that it’s the proper spot for the buttonhole if it’s on a coat, shirt, or jacket. You too can use a disappearing marking pen to mark the spot if you want.

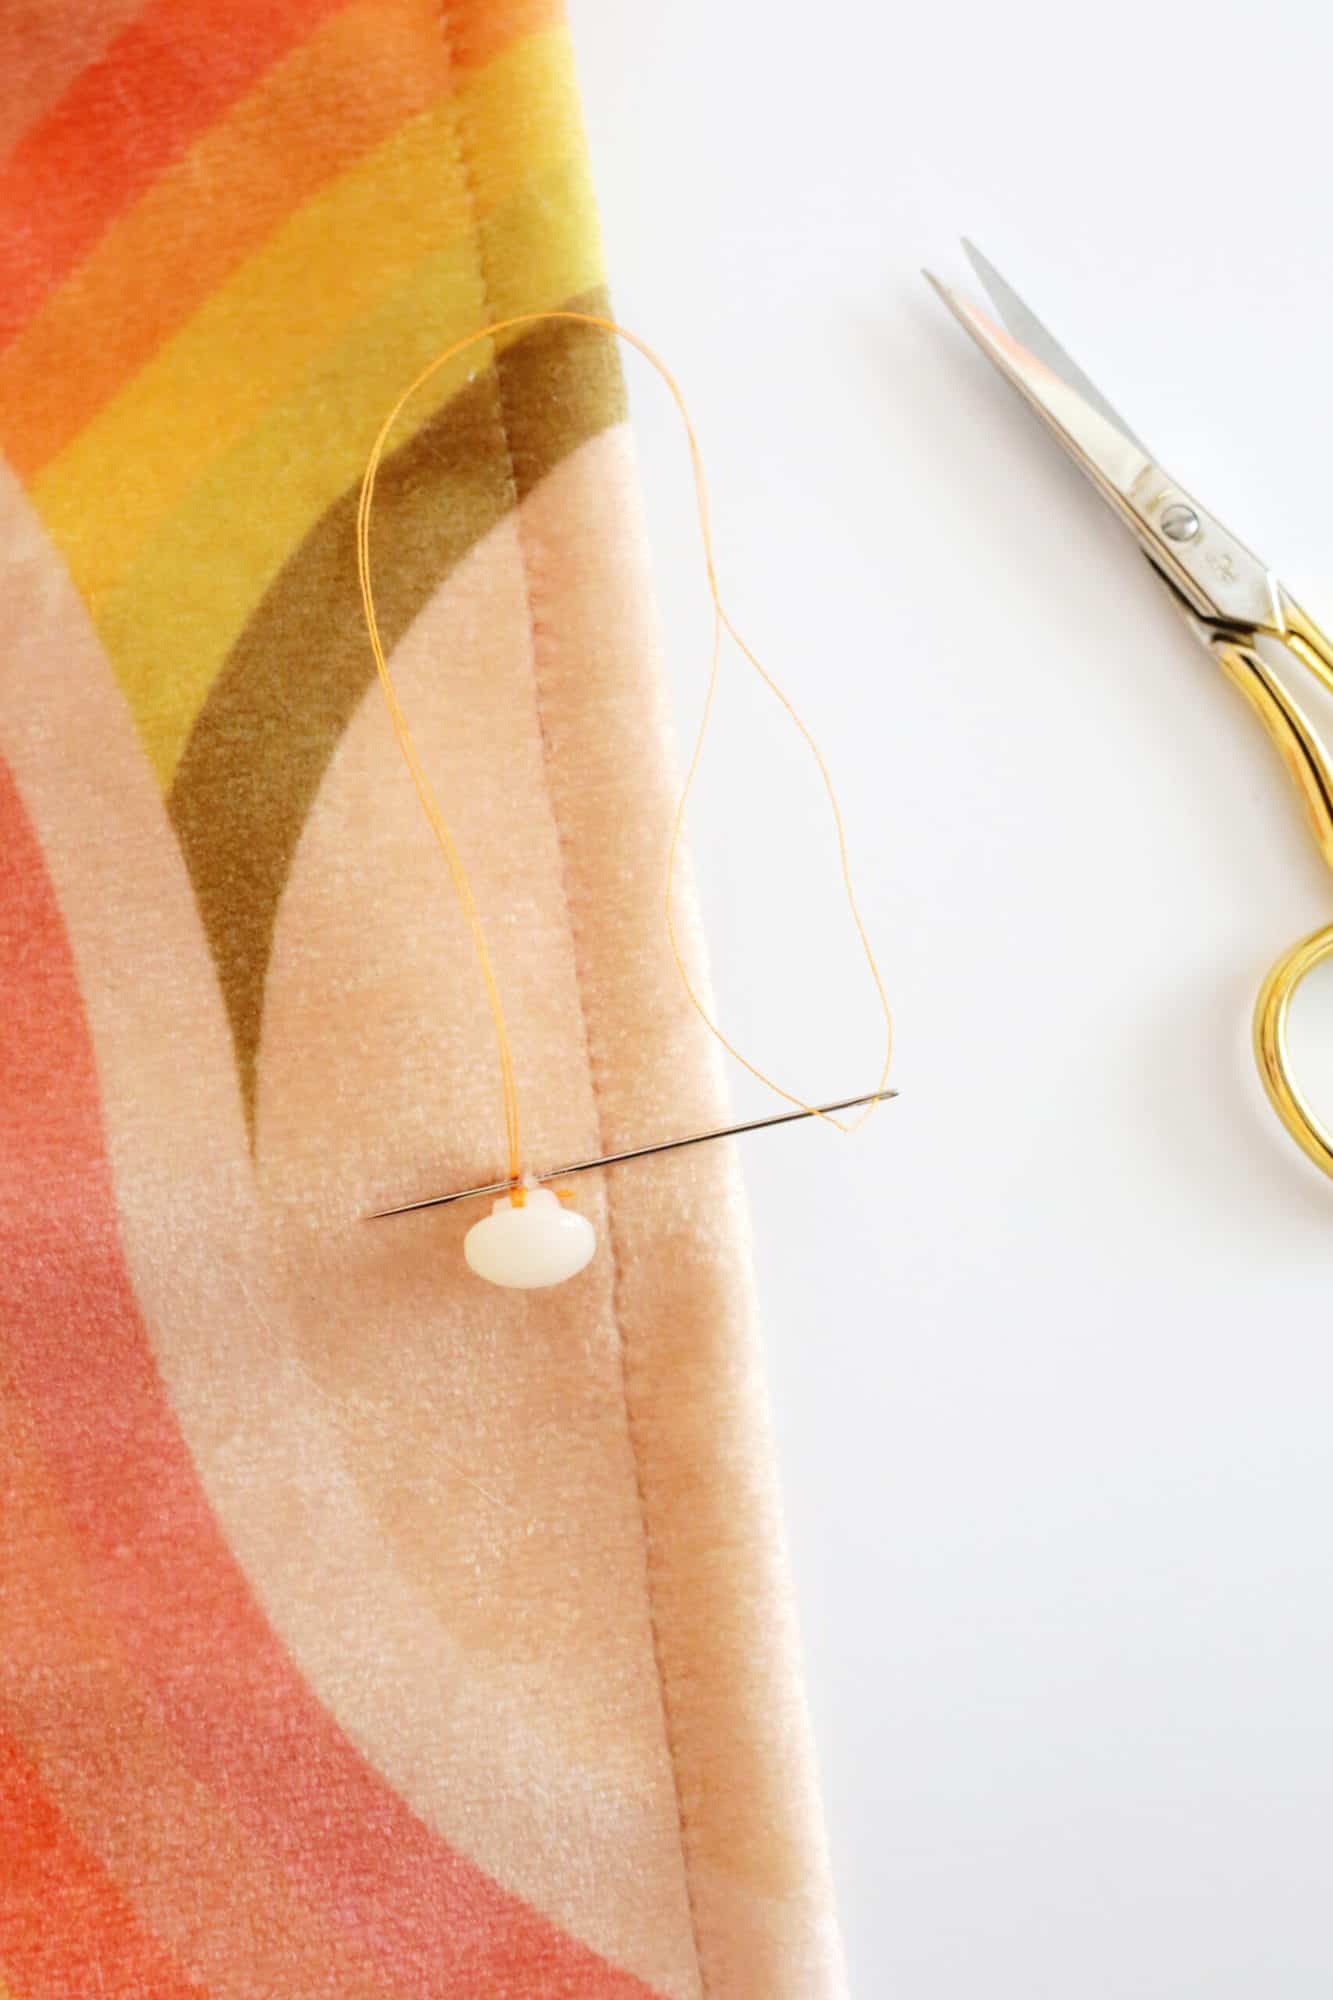
Begin your first sew: Push your needle by means of a small little bit of the fabric on the spot the place you need the button to go. Pull it all over.
Thread your button: Thread the needle by means of the shank of your button.

Connect the button: Thread the needle by means of a small bit of cloth once more such as you did earlier and pull tight to connect the button.
Proceed to cross the needle by means of the button shank after which by means of the small bit of cloth beneath a number of instances till it feels safe while you pull on it.
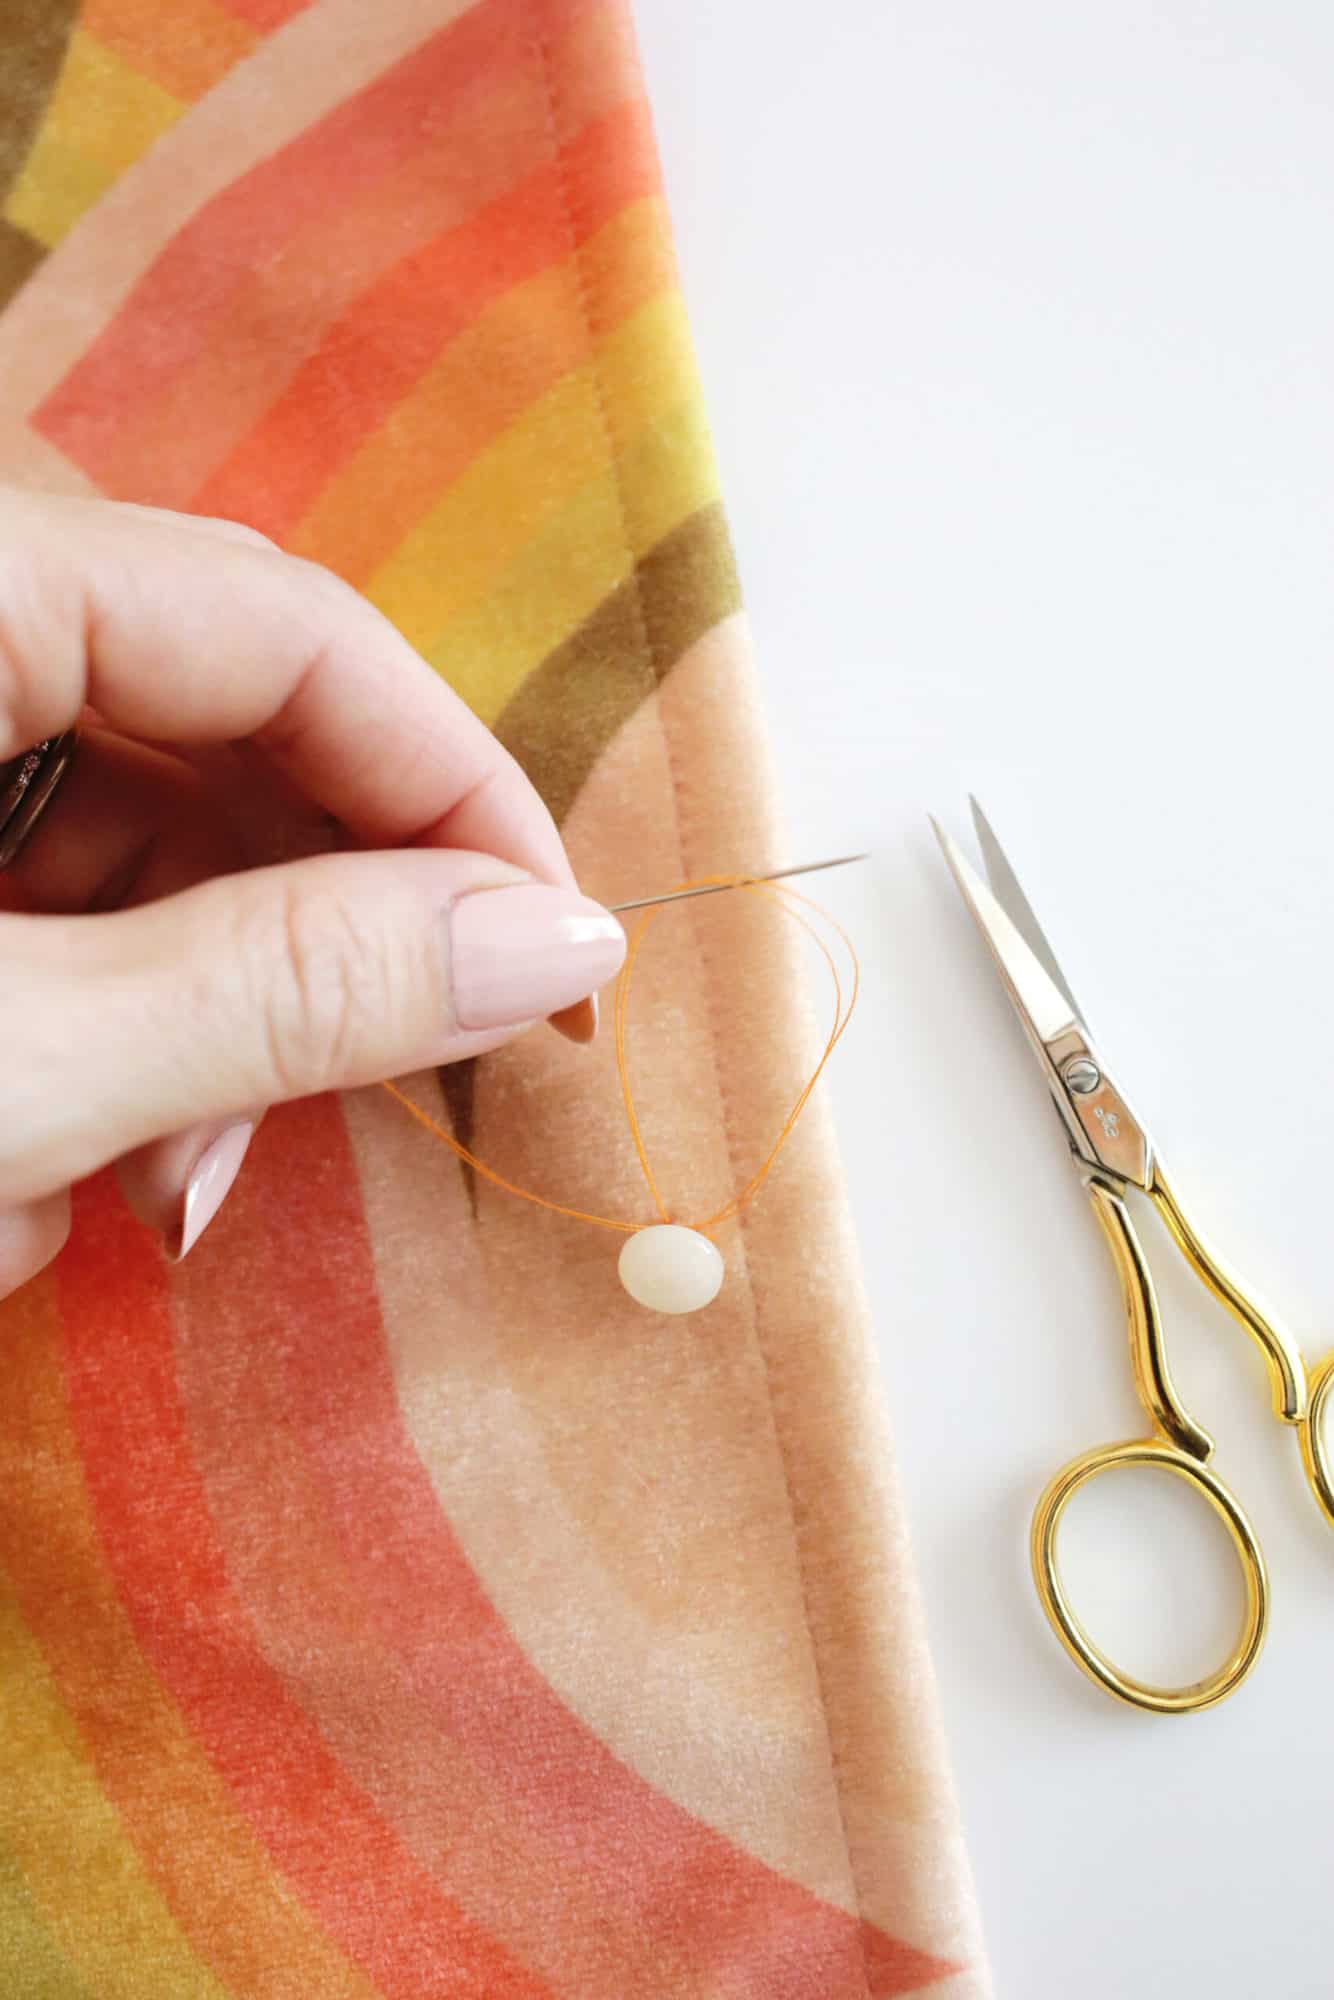
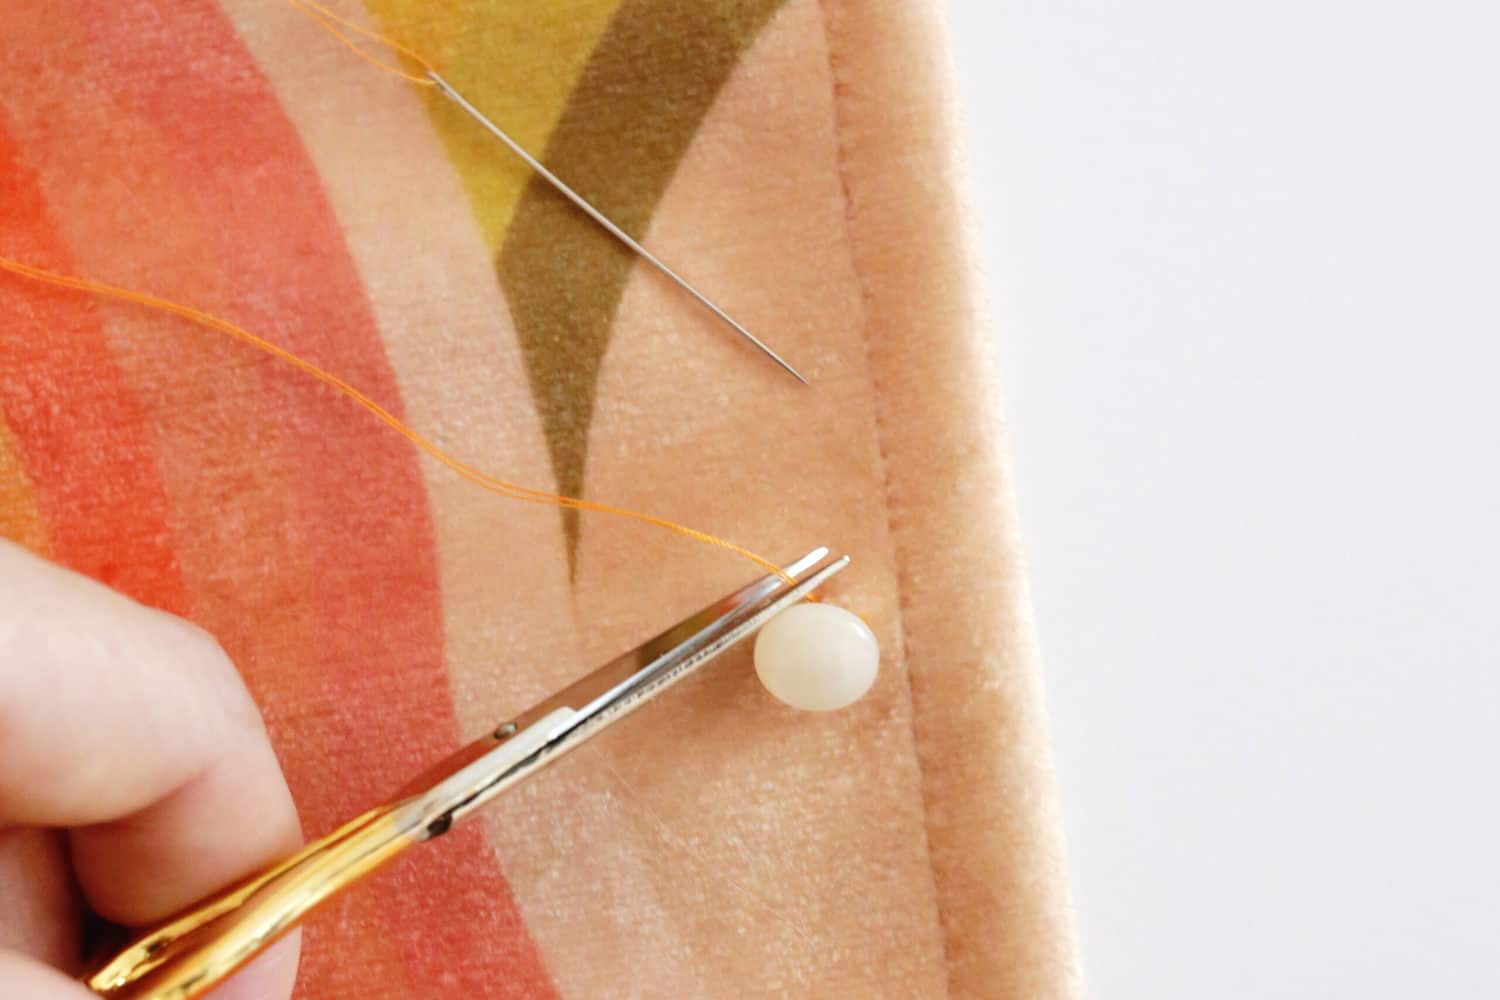
Tie off the thread: To complete, make one other cross by means of the small bit of fabric and pull it virtually all over so that you’ve a small loop of thread.
Move the needle again by means of the thread and pull it tight to create a knot. Reduce the thread near the knot to complete.
There you go! You simply discovered to stitch on a flat or shank button, and now you will be your personal tailor and do a fast restore the following time a button falls off. Take a look at our sewing archives for extra initiatives! xo Laura
Searching for a simple no-sew undertaking? Attempt these!
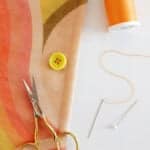
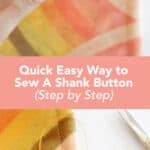
Straightforward Technique to Rapidly Sew a Flat or Shank Button (Step By Step)
Sew a flat or shank model button rapidly and simply!
STEPS TO SEW A FLAT BUTTON (TWO OR FOUR HOLE):
-
Thread the needle: Reduce a bit of thread about 24″ lengthy and thread it by means of a needle midway in order that each ends are equally as lengthy (you need to use a self-threading needle like this for simple threading). Protecting your strands collectively, tie a knot on the finish to tie them collectively.
-
Place the button: Place the button the place you need it in your garment (ensure that the holes are going through the identical path as the opposite buttons close by). Verify to see that it’s the proper spot for the buttonhole if it’s on a coat, shirt, or jacket. You too can use a disappearing marking pen to mark the spot if you want.
-
Begin your first sew: Pull your needle up by means of one of many holes from the underside of the material, pulling it all over till the knot stops you. Push the needle again down by means of the second gap and pull the needle all over once more.
When you’ve got a button with 4 holes as a substitute of simply 2, you’ll come up by means of one gap and cross to the button gap diagonal from that gap fairly than straight down so you might be creating an “X” fairly than an “=” as you sew.
-
Use a straight pin as a spacer: Place a straight pin below the button between the button and the material in the course of your stitching. Having this pin there provides a bit of little bit of house so the button isn’t sewn too tight.
-
End stitching: Proceed stitching your stitches by developing from the underside and happening into the following gap a number of instances till the button feels safe while you pull on it.
-
Create a shank (optionally available): In your closing sew, come up by means of the fabric however come out beneath the button fairly than by means of the button gap once more. Take out the straight pin and wind your thread between the button and material to strengthen the button and create a shank (this provides you some house between the button and the material so it may be buttoned comfortably). Push the needle again down by means of the fabric, subsequent to the shank, so it’s on the underside of your materials.
*If you’re stitching on an ornamental button that doesn’t undergo a buttonhole, you may skip this step of winding it round to create a shank.
-
Tie off thread on underside: To complete, catch a bit of little bit of the underside materials together with your needle and pull it virtually all over so that you’ve a small loop of thread. Move the needle again by means of the thread and pull it tight to create a knot. Reduce the thread near the knot to complete.
STEPS TO SEW A SHANK BUTTON:
-
Thread the needle: Reduce a bit of thread about 24″ lengthy and thread it by means of a needle midway in order that each ends are equally as lengthy (you need to use a self-threading needle like this for simple threading). Protecting your strands collectively, tie a knot on the finish to tie them collectively.
-
Place the button: Place the button the place you need it in your garment. Verify to see that it’s the proper spot for the buttonhole if it’s on a coat, shirt, or jacket. You too can use a disappearing marking pen to mark the spot if you want.
-
Begin your first sew: Push your needle by means of a small little bit of the fabric on the spot the place you need the button to go. Pull it all over.
-
Thread your button: Thread the needle by means of the shank of your button.
-
Connect the button: Thread the needle by means of a small bit of cloth once more such as you did earlier and pull tight to connect the button.
Proceed to cross the needle by means of the button shank after which by means of the small bit of cloth beneath a number of instances till it feels safe while you pull on it.
-
Tie off the thread: To complete, make one other cross by means of the small bit of fabric and pull it virtually all over so that you’ve a small loop of thread. Move the needle again by means of the thread and pull it tight to create a knot. Reduce the thread near the knot to complete.


