
For the newbie, canning could be equal components pleasure and terror. Extending your meals sustainment ought to be the purpose of each prepper.
Additional, extending the shelf lifetime of in any other case perishable meals expands your meals independence. Each calorie on the shelf will get you yet one more day via tough occasions.
Canning can come at a price, although. If it have been simple, everybody would do it. I’ll be frank. It’s not foolproof and you have to head into it educated concerning the guidelines and be keen to comply with them. The excellent news is that these guidelines are easy, simple to search out, and simpler to comply with.
So let’s begin with the fundamentals.
Oh, and a fast word for you specialists. Even if in case you have just a few hundred jars in your cabinets, learn on. Time implementing the basics is at all times nicely spent. You additionally might decide up a bit of gem or two. So learn on!

Advantages of Dwelling Canning
Okay, Grandma used to do it, possibly even your dad and mom. When you’re like me, you have been in all probability stirring applesauce as one among your first “actual” kitchen duties.
If these transient sentences describe your childhood, then you might be in all probability used to seeing shelf upon shelf of fruits, veggies, soups, stews, sauces, and meats.
There’s no denying the enchantment of the satisfaction of popping open the lid of veggies that you simply grew, or fruits off your individual timber many months past their season. You might be really blessed if this was part of your childhood.
Even when it wasn’t, you’re studying this text as a result of one thing deep inside desires to pop a lid by yourself jar.
So why can?
First, there may be the attraction of constructing your individual meal, probably from your individual substances. You management the supply (homegrown or bought from a neighborhood farm), the standard, and usually, the style.
That store-bought spaghetti has an excessive amount of oregano on your liking. Wouldn’t it’s good to grasp and may your individual recipe? Yup, it’s very satisfying.
Second, there’s the financial system of it. A fast Amazon search revealed that canned rooster is working about $35-$40 per six 12.5 oz tins. That is about $0.50 per ounce or $8 per pound.
When shopping for on sale and in bulk I can get boneless, skinless rooster breast at $1.50 per pound.
That’s fairly the financial savings (after getting invested in a canner, jars, and the opposite minor different gear–however extra on this later).
Lastly, there’s the straightforward truth of extending the shelf-life of your meals. Apples, peaches, string beans, and meats solely final so lengthy.
Sure, you possibly can freeze them, however how a lot freezer house do you even have? Ever examine the price of freezer house vs shelf house? What occurs when the ability goes out?
We used to get an entire pig yearly. That was between 150 and 200 kilos of pork that had a shelf lifetime of 5 days within the freezer if the ability give up. Our longest outage was 10 days. If we didn’t have a generator, we’d have misplaced that and much more.
Canned meals solely require a cool and dry location to maintain them in high form. Once more, learn on. There will probably be extra on that later.
Extending the usable life is important for any perishable items, particularly through the harvest. Simply what number of inexperienced beans or corn are you able to really eat when the crops are available?
Briefly, canning is satisfying and economical, and it retains your valuable items from rotting on the vine.
What Can You Can
There are few guidelines to canning. A few of these are common, however most are particular to the meals canned and the tactic required.
Let’s begin with the backyard. Most greens and fruits could be canned. Any hardy vegetable that can survive boiling is often good to go.
Root greens resembling potatoes, carrots, and beets in addition to non-root veggies, together with corn, beans, and sizzling peppers, are all good for the canner. Watery greens resembling zucchini and greens are higher off eaten contemporary.
Most fruits are good to go in a number of kinds. We are able to apple slices, applesauce, apple pie filling, and apple butter (thick sauce). The identical goes for cherries, pears, rhubarb, and peaches. When you assume you possibly can retailer it, discover a examined recipe from a trusted supply, and go for it.
Meats are additionally candidates for the canner. They are often uncooked and unseasoned (rooster and pork loin), extremely seasoned (corned beef), or in different kinds.
These others embody soups and stews (we reside on canned rooster soup, chili, and cacciatore within the winter). Don’t restrict your self. We put up a variety of rooster inventory and hope so as to add beef bone inventory to the larder quickly.
Mainly, don’t go into canning with blinders. There are public teams (college departments, cooperative extensions) and federal companies, such because the US FDA, that both publish canning data or carry out testing to develop protected and efficient recipes.
Use these sources to your benefit. If in case you have an abundance of an ingredient (e.g., pole beans) make a journey round your books and the web and you might be certain to discover a solution to retailer them on the cabinets (e.g., dill beans) and never the compost pile.
Canning Strategies
Sufficient concerning the “Why”, how concerning the “How”?
For house preservation lovers, there are two strategies, water bath canning, and pressure canning.
Briefly, water tub canning makes use of boiling water to kill off micro organism. Additional, the meals, or the created atmosphere, must be acidic. Water tub canning is used to protect fruits, greens, jellies, and jams.
Stress canning makes use of a weight or valve to create elevated strain and temperature. Stress canning is for the whole lot else (with a number of limitations) and contains meats, soups, and stews.
Let’s dive deeper into every.
Water Bathtub Canning
A water tub is precisely what it appears like. This canning methodology makes use of a giant pot of water to submerge canning jars and encompass them with temperatures of 212F (100C).
There’s not much-needed gear. I’d guess that the overwhelming majority of canning performed is a water tub. It’s protected and simple, and the gear funding is low.
This methodology is extensively used due to its simplicity. Get a giant pot, just a few jars, rings and lids, and also you’re good to go. Water tub canning is a little more concerning the limitations than the gear.
As I discussed above, water tub canning requires a giant pot, jars, tops, and rings. The pot holds the water and hosts the jars throughout processing. The lids and rings type the air-tight seal.
The first concern is the meals relevant to water tub canning. You possibly can solely protect high-acid meals by way of this methodology.
By excessive acid, I imply you have to create the right atmosphere to kill off and retard the expansion of micro organism. Water at 212 F (100 C) solely works so nicely, and it doesn’t kill botulism spores. That is the place the acid is available in.
A pH of 4.6 is required to kill off the spores of botulism, nevertheless, that is at equilibrium. This contains the liquid AND contained in the meals you might be canning (e.g., contained in the beans, tomatoes, and apples).
Subsequently, it’s good observe to shoot for a pH in your canning liquid of 4.3. Because it mixes with the meals and dilutes, the ultimate equilibrium will land nicely inside the protected zone.
Don’t have a pH meter? Not likely certain what I simply mentioned? That’s okay. The underside line is that this. Use examined recipes and also you’ll be positive!
How do recipes comply with all of the science and preserve us protected? First, they’re selective concerning the meals which can be water tub canned. No meats, no fats, simply fruit, and greens.
Additional, the recipes decide the liquid that can assure canning within the protected zone. Most greens have a pH of between 5 and 6, and subsequently should be canned in a vinegar answer.
Fruits are naturally acidic. Sure, that candy, off the tree apple, has a pH of three.5 to 4. Subsequently, most fruits could be canned in gentle sugar syrup.
Regardless, discover examined recipes and water tub canning that can make a shelf-stable product out of your backyard’s lots!
Stress Canning
That massive, scary, steaming canner that your grandmother used to make use of is definitely a strain canner. Some meals, resembling meats, should not protected when preserved at boiling temperatures and should have a bit extra warmth utilized.
Stress canners use science (e.g., elevated strain) to convey temps above 212 F (100 C) as much as the food-safe vary of 245 F (118 C). Stress canners will both use a weight or a gauge to extend the strain inside the sealed canner.
This elevated processing temperature (and time) permits you to create shelf-stable meats, stews, and sauces. This even applies to some greens resembling corn.
There are nonetheless guidelines to comply with, resembling complete canning time, in addition to altitude changes.
Nonetheless, your canner directions and examined recipes will provide you with the instructions wanted to maintain your meals protected. Observe them and may with confidence.
However What About Dry Canning?
Dry canning makes use of your oven to create a heat (200 F or 93 C) and dry atmosphere. The mixture of warmth and low humidity takes away the atmosphere that micro organism must thrive. You then sealed the jars and the contents are good to go.
First, the USDA doesn’t suggest dry canning. To their profit, they don’t suggest it for the canning of moist items resembling greens and sauces.
A lot of the articles I’ve learn make the most of dry canning for dry items resembling salt, sugar, flour, beans, rice, and pasta (with no eggs).
There are a lot of articles on the net that suggest dry canning for dry items as these listed above. I’ve just a few points with this.
First, salt, sugar, and pasta can all be safely saved in buckets and mylar.
Salt and sugar want no additional therapy, nevertheless, an oxygen (O2) absorber or two gained’t harm).
Pasta, beans, and rice could be saved long-term in mylar 5-gallon buckets with the usage of O2 absorbers. Don’t need to retailer 30 kilos at a time? Use smaller 1-gallon luggage.
In my thoughts, dry canning doesn’t present a lot worth for these meals.
The place I take advantage of dry canning is for the short-term storage of dehydrated meals. Normally, we run the dehydrator at 140 F (60 C) till the fruits or veggies are dry sufficient to snap.
Over the last hour, I place just a few clear jars, lids, and rings within the oven at 140F. When the dehydrator is completed, I pop the meals into the nice and cozy jars, add an O2 absorber and descant pack, then seal them up.
After 15 extra minutes within the oven, I flip off the oven and allow them to come to room temp.
This methodology of storage is just good for the quick time period (months, not years). That being mentioned, educate your self, and select the most effective strategies on your wants.
Canning Tools
Most canning could be performed with a restricted quantity of apparatus. The excellent news is most of this gear is long-lived and could be handed from era to era with solely a minor quantity of disposable objects.
Water Bathtub Canning Tools
Water tub canning requires one specialised piece of apparatus and that’s the pot. A water tub canning pot is little greater than a skinny metal or aluminum pot.
The normal pot is enameled and has a capability of round 4-5 gallons. The bigger ones will maintain about 8 quart jars, 12 pints, or 14 jelly jars. There are smaller pots for while you solely have just a few jars to place up.
The canner will include a rack that retains the jars off the underside (a requirement for protected canning – it reduces damaged jars) and permits you to increase them up for simple removing. We now have moved to a silicon pad as the unique rack rusted out a while in the past.
If you have already got a big pot, use it. Merely get one thing to maintain the jars off the underside. The aforementioned silicon pad is the right accent for this.

That’s it, that’s all. And it’s the primary cause that water tub canning is so extensively adopted.
Stress Canning Tools
Stress canning, however, requires a bit extra of an funding. You want a specialised strain canner.
Stress canners lock the lid on tight in order that because the water heats it builds up inner strain. The elevated strain will increase the warmth.
A number of vents preserve the operation protected by permitting the strain to solely construct a lot earlier than venting. Normally there’s a fundamental vent and an emergency vent.
In our All American canner, the primary vent is a weight that sits on a small nipple. Because the steam strain will increase, the burden tilts, permitting the strain to flee.
You select the burden worth on your altitude and set the warmth so it jiggles and vents 1-4 occasions per minute. The backup vent is a rubber plug. If the primary vent will get clogged, the plug pops out, venting the canner.
The exploding canners of the previous, are precisely that (if there have been really that many accidents). Security options on trendy canners assist to attenuate points.
The “fast disassembly’s” that I’ve seen on-line all seem like older canners, both handed down or bought at second-hand shops.
Purchase your first strain canner new, learn the complete instruction e book, comply with its recommendation, and also you’re in for a lifetime of protected and fruitful canning.
Frequent Tools
Now that you’ve your canner, there are a number of different objects that you will want. These embody jars, rings, lids, and one or two instruments.
Jars are the primary objects so as to add to your listing. They arrive in quart, pint, jelly (1 cup), and half’s (4 ounce).
We primarily use quarts and pints, however have just a few jellies readily available for smaller parts (one jelly jar holds simply sufficient sauerkraut for 4 sizzling canines), and only a few halves that we use for fruit butter, sizzling sauce, and presents.
One of the best factor about jars is that they are often re-used. We’re the third era to make use of most of our jars. Handed down from my grandmother to my mom, then to me.
It’s with some reflection that I can up the fruits of our backyard. The jars are the last word connection to our preserving previous.
You should buy jars on the native feed retailer, Walmart, and even on-line. We additionally wish to hit the native second-hand shops.
Any jar you employ, new or re-used, you have to examine them for chips or cracks. If there may be any signal of misery, both toss them or use them for adornment.
We have been lately gifted a number of circumstances (over 10) by a buddy whose mom was too previous to can anymore. She, nevertheless, noticed the worth in them and couldn’t justify tossing them within the recycling bin.
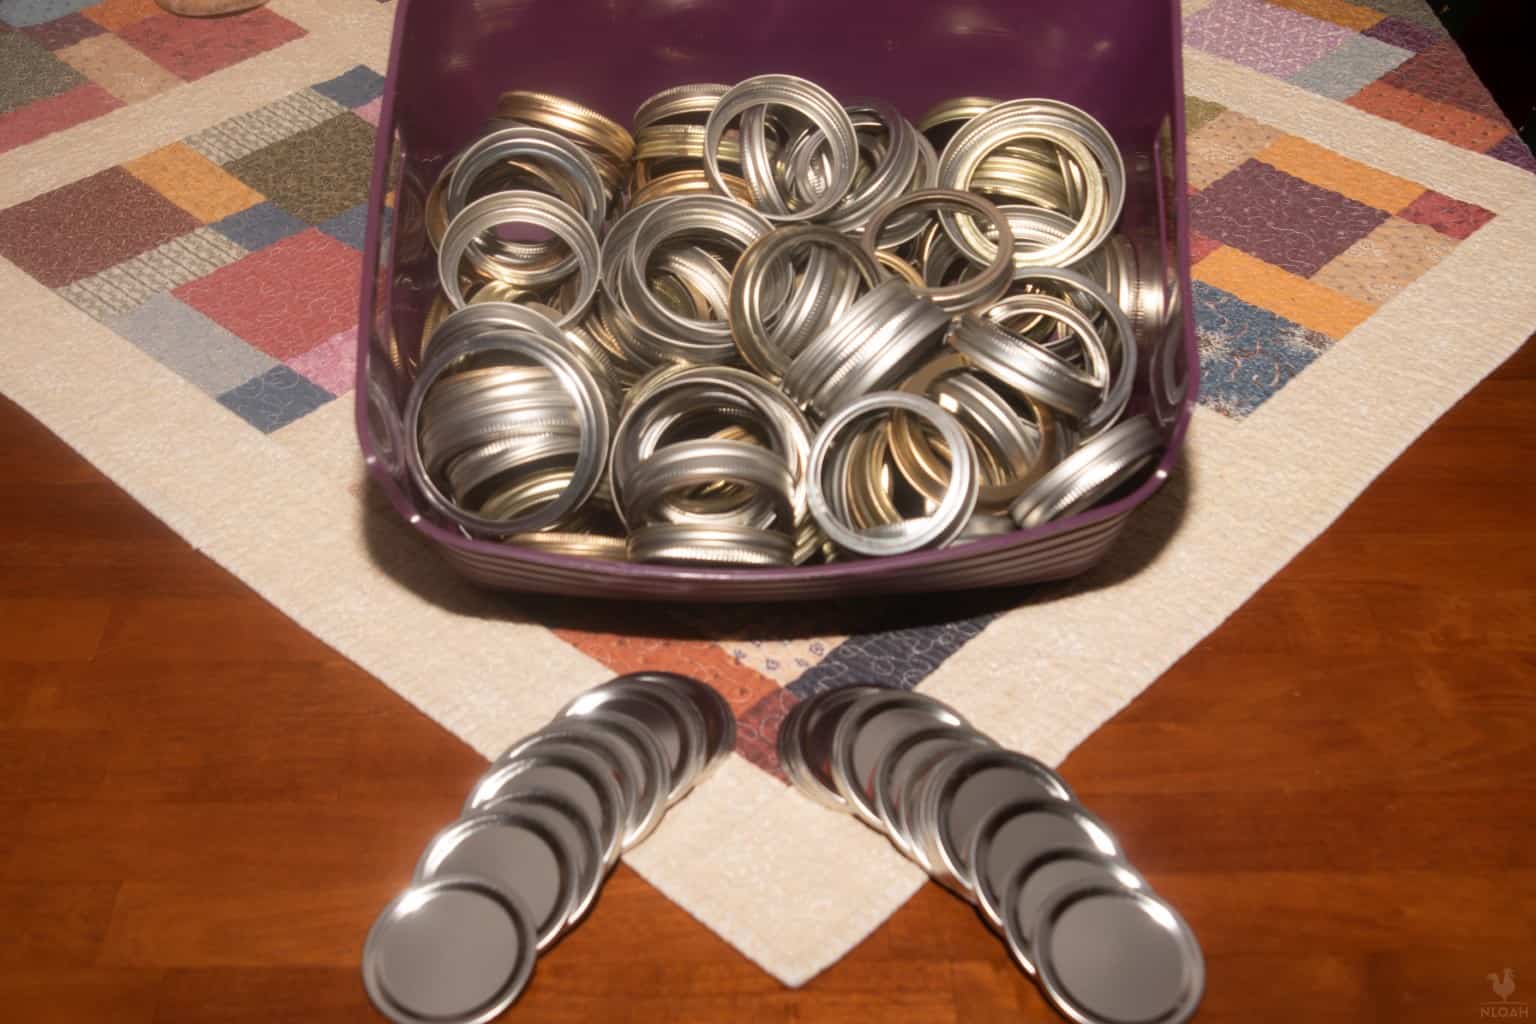
Subsequent are rings and lids (or tops). Rings tighten over the threads of the jars. The threads, by the best way, are practically common.
Rings are 100% reusable and shortly you’ll have greater than you’ll know what to do with. We now have a plastic tote the place rings go to die. There should be 200-300 of them in there.
Lids are the primary expendable merchandise within the canning course of. Lids are pressed into the jar by the rings and are held in place by the vacuum that kinds through the canning course of.
Whenever you purchase a case of jars, they often include each rings and lids. You can even purchase lids individually. I like to recommend getting within the behavior of shopping for one or two packing containers each time you see them on sale.
We have a tendency to purchase them in bulk. We purchase sleeves of 150-200 once we discover them on sale. It’s a giant funding, nevertheless they don’t go dangerous.
We now have our lid field that has a number of years of tops able to go. We have been fortunate sufficient to refill earlier than latest shortages drove availability down and costs up. Refill while you see them!
As I discussed, lids are a single use merchandise. As soon as they’ve made a visit via the canner, the rubber seal turns into compressed and is now not assured to type a seal.
This could result in spoilage. If undetected, this could result in extreme sickness for you and your loved ones.
That being mentioned, I’ll save the cleanest lids for brief time period storage of dry items in addition to making tinctures.
I don’t want an ideal seal when the contents are already shelf secure. This contains medicinal tinctures and fruit liquors which can be 80-100 proof. A calmly used lid is ideal for this example.
Lastly, you could want just a few instruments to make the canning course of simpler. A canning funnel helps you fill in your jars with out making a whole mess.
They’re additionally useful for gauging head house (the house between the canning meals and the lid). Both a plastic or metallic funnel is ok. You don’t want something fancy or costly.
A lid lifter/magnet can be useful and can prevent burnt fingers. Part of the method is heating the tops and rings. The lids could be particularly troublesome to get out of your pot with tongs.
A magnetic lid lifter is ideal for fishing each the rings and tops out of the pot. Subsequent is a jar lifter.
This wrench is used to put the jars into or get them out of the canner. Not one thing you need to do naked handed or with an oven mitt. I think about it important gear.
References
You aren’t alone in your canning journey. Many generations have gone earlier than you and plenty of will come after. The excellent news is there are many sources for you in your journey.
We now have accrued fairly a bit of library for our canning adventures. This contains books from the Ball firm. Ball is the maker of canning jars, lids, and different gear.
The “Ball Blue Guide of Canning” is the go to tome for all first timers. Its recipes cowl the gamut of meals from apple sauce to sizzling peppers, to pork.
Subsequent are books by Diane Deveraux aka “The Canning Diva.” She has amassed an enviable quantity of information that she has shared primarily with the prepping and homesteading communities.
On the subject of “off the trail” recipes, we often hit her books first. I particularly like her strain canning e book.
It alone has expanded our canning efforts into meats and stews in addition to given us confidence to attempt new recipes.

A number of of the writer’s books for water tub and strain canning recipes
Subsequent are web sites for cooperative extension places of work and varied universities. These are the teams which can be really testing recipes and evolving the canning world.
Lastly, hit the remainder of the web. From YouTube to Reddit, there’s a wealth of knowledge on the market available. Simply watch out with a few of the much less standard websites.
Their information could be generally incomplete, deceptive, or simply improper. When researching a brand new recipe, I at all times search for affirmation concerning the course of from a number of websites. We as soon as wished to can meatballs.
That is attainable and is very advisable. It wasn’t till I paid shut consideration to the recipes and located that none included cheese like ours.
Somewhat digging later, I discovered that the addition of cheese just isn’t advisable for house canning. Do your homework earlier than utilizing a recipe from the web!
Canning Course of
Okay, sufficient concerning the boring however required background. Let’s get you canning. I’ll focus on two strategies:
- Water Bathtub Canning
- Stress Canning
That is meant as an intro and to provide the primary processes earlier than you dive deep into your individual canning books and manuals.
First, you could comply with these 5 primary guidelines for each strategies:
1. Watch Your Directions As a result of They’re There for a Motive
When you don’t comply with them you could break jars, or you could even get sick. Use trusted recipes from universities, cooperative extensions, books, and well-known web sites.
2. Your Directions Will Have Changes for Altitude
The upper the altitude, the longer the boil time or the upper the strain. If you’re above 1000 toes, take note of your directions.
3. Pay Consideration to Temperature (and Particularly Temperature Variations)
Chilly meals in heat jars, heat jars in chilly water, or chilly jars in heat water.
The thermal shock will break a jar faster than you’d anticipate. Hold the meals, jar, and water at comparable temperatures.
When canning sizzling meals, I desire to maintain the jars in sizzling washing water till I’m able to fill them. Then it’s a fast rinse in sizzling water they usually get stuffed and popped into the canner.
4. Don’t be Superman
You don’t must crank down on the rings. Simply finger tight. Any extra and you could not permit the gasses to flee and a vacuum gained’t type. Or you could trigger the tops to pucker.
We bought a sleeve of notably delicate lids. If the rings have been in the least over-tight, they might pucker. It took 3 or 4 batches to determine that out.
5. Pay Consideration to Your Senses
I’ll contact on this later when discussing meals security. However for now, belief your sight, odor, style, and even listening to.
In case your jar appears to be like, smells, or tastes off, into the trash it goes. Additionally, hear when putting the jars within the canner. Pay attention for any sounds of breaking glass. Warning, it could be delicate.
Water Bathtub Recipe
Right here’s a fast water tub recipe that couldn’t be any less complicated and it applies to some meals.
Peaches, pears, and plums can all be put up with a “easy syrup.” A easy syrup, on this case a light-weight syrup, is a mixture of sugar and water.
For a light-weight syrup, mix 3 ¼ cup sugar and 5 cups water in a pot and convey to a boil. Put together this as you clear and pores and skin your fruit.

Then merely heat up the fruit within the syrup, pack your jars, and high off with syrup and may.
Starter Water Bathtub Recipe
- 5 kilos peaches, pears, or plums
- Rinse and save the spice packets, pour them right into a measuring cup to be used later
- 3 ¼ cup sugar
- 5 cups water
-
Put together the straightforward syrup by including the sugar to the water and convey to a boil whereas getting ready the jars and the fruit
-
Add rings and lids to a pot, cowl with water and convey to a boil
-
Examine the jars for chips or cracks, wash and rinse, put aside in sizzling faucet water to maintain heat
-
Fill the canner half full with heat water, set on the range low warmth
-
Add the fruit to the straightforward syrup and convey to a simmer
-
Empty a jar, and fill with fruit, leaving ½ inch head house (hole between the fruit and the rim of the jar)
-
Fill the jar with easy syrup, leaving ½ inch head house
-
Clear off the rim with a paper towel dampened with vinegar
-
Add lids and rings
-
Middle the tops on the jars
-
Finger tighten the rings – don’t crank down on them
-
Place the jar within the canner (on a rack or a mat, it should not relaxation on the underside of the canner)
-
As soon as all jars are within the canner, flip the warmth on excessive and convey to a boil
-
As soon as the canner involves a boil, course of for 20 minutes
-
After 20 minutes, flip off the warmth and take away the jars
-
Enable jars to return to room temperature
-
Pay attention for the tops to “ping” because the vacuum kinds examine all jars for dimpled tops as soon as they’ve cooled – any that don’t seal transfer to the fridge and eat inside every week
-
Take away rings, rinse the jars, label and retailer in a cool dry place
-
Get pleasure from inside one 12 months
If utilizing pears or plums wash first
If utilizing peaches, place in boiling water for 60 seconds then plunge into ice water to loosen the pores and skin, then peel
If utilizing plums or peaches, take away pits and slice in half
Stress Canning Recipe
Protein is a ache to retailer. Processed, it’s costly. It’s at all times finest to can your individual and eat as part of a steady rotation.
The next recipe works for both pork loin or boneless and skinless rooster breasts. For pennies on the greenback, you possibly can put up a shelf stuffed with protein when in comparison with freeze-dried or commercially canned.
This methodology is known as “uncooked packing.” The meat goes in uncooked and raw whereas the canning course of cooks it completely. The meat generates its personal juices.
Starter Stress Canning Recipe
- 17 kilos lean pork loin or boneless and skinless rooster breasts
- Canning salt
-
Add rings and lids to a pot, cowl with water and convey to a boil
-
Add cool water to your canner in line with the instructions
-
Minimize the meat into ¾” cubes
-
Pack every jar with roughly 1 pound of cubed rooster or pork
-
Don’t fear about any air gaps, these will fill in with broth as the meat cooks
-
Depart 1” of headspace – that is the house between the highest of the corned beef and the highest of the jar
-
Add ½ teaspoon of canning salt to every pint jar
-
Clear off the rim with a paper towel dampened with vinegar
-
Add lids and rings
-
Middle the tops on the jars
-
Finger tighten the rings – don’t crank down on them
-
Add jars to the canner
-
Place the lid on the canner and tighten in line with the directions
-
Flip the warmth on excessive
-
Enable the canner to warmth
-
As soon as the steam comes out of the vent, permit the canner to vent 10 minutes – All American particular
-
Add the burden to the vent – All American particular
-
As soon as the burden jiggles, modify the warmth till it jiggles 4-10 occasions per minute – All American particular
-
The temperature ought to come as much as 240-245 levels
-
Enable the canner to course of for 75 minutes for pint jars
-
After processing, flip off the warmth
-
Enable the canner temperature to return again to 200 levels
-
Take away the burden and let the canner vent for 10 minutes
-
Take away the lid after which take away the jars
-
Enable the jars to chill and are available to room temperature
-
Pay attention for the “ping” of the tops sealing
-
Check the tops to verify they’ve dimpled and now not flex
-
As soon as cooled, take away the rings and provides the jars a fast rinse
-
Label and date every jar
-
Get pleasure from
The next directions are for our All American canner – Your directions might range
How Lengthy Will My Canned Meals Final
You’ve simply prolonged the shelf lifetime of your meals… However for the way lengthy? That’s a extremely good query. Let’s do our greatest to provide you some steerage.
First, the final advice for house canned meals is a shelf lifetime of 1 12 months. For this schedule to carry, preserve the cans in a cool dry location out of direct daylight.
For these with a basement, that is the right atmosphere. Run a dehumidifier if you could preserve the moisture down.
When you don’t benefit from a basement, preserve them indoors (keep away from garages and sheds). If you’re ready, retailer them in an inside room with no exterior partitions to keep away from temperature modifications.
Even with out good storage, I’ve positively eaten just a few jars which can be previous the 1-year mark. Well beyond the mark.
So why did I take my life into my very own fingers? Easy. I trusted the method and trusted within the evaluation of the jars I used to be about to eat.
I canned every jar that was older than a 12 months. I knew the method and the recipe and trusted the final outcomes.
Since I knew they have been canned correctly, I moved on to the subsequent stage of trying, smelling, and tasting, and I’m nonetheless right here to speak about it.
I’m not recommending that you simply do that, simply saying that it may be performed safely.
Canning and Meals Security
As I mentioned above, belief your senses. Take a look at the jar from the surface and examine if there are any chips or cracks within the glass. If that’s the case, toss it.
Subsequent, examine the lid and search for rust spots. Understand that a bit of gentle floor rust is okay. When you see this, instantly rotate these to the entrance of the stack.
If the rust creates a pinhole and invalidates the seal, then you could toss it. The lid ought to be dimpled. It is a signal of a superb seal and a superb vacuum. Don’t eat it if the dimple isn’t there.
Now have a look at the contents. They shouldn’t be cloudy and the colour ought to be just like while you put it up (a bit of fading is okay).
Subsequent, it’s time to pop the lid. There ought to be a superb hiss when the lid pops. No hiss. You guessed it. Toss it. As soon as it’s open, odor the contents. Your nostril is a superb indicator. If it smells off. It’s dangerous.
Lastly, give it a style. If any signal of off flavors, keep away.
In all my years of canning, I’ve solely misplaced two or three jars. These have been clearly dangerous both via sight, sound (no hiss), odor, or style… Nicely, I by no means tasted them.
Frequent Canning Errors
Whereas canning, each water tub and strain, are fairly simple when you get the grasp of them, there may be nonetheless room for error.
First, it’s simple to get snug and run a recipe from reminiscence. All the time discuss with the recipe no matter how acquainted you might be with it.
Somewhat off in your vinegar and also you gained’t create the right atmosphere. This may result in spoilage.
Subsequent, and remaining on recipes, comply with directions on the dimensions of your meals you possibly can. Particularly, when strain canning, meals that’s too thick might not warmth fully via through the giving processing time.
Watch the air within the jars. That is for each headspace and bubbles. Headspace is the hole between the highest of the liquid and the jar high.
When you go away too little headspace or go away too many bubbles within the jar, you could expertise siphoning. Siphoning is liquid loss out of your jar.
With little head house, you don’t go away a lot room for enlargement. Bubbles within the jar will develop as they warmth. This will drive liquid out of the jar.
There are two points with siphoning. The primary is liquid loss. You need to preserve the contents below the liquid for long-term storage. Meals uncovered above the liquid line won’t have the identical coloration, texture, and taste as that under.
Second, any liquid that escapes the jar might trigger issues with the seal. That is primarily a priority with pressure-canned meats. Fat can rapidly invalidate the seal. A nasty seal is the quickest solution to spoilage.
Lastly, protected thickeners to be used after canning. By no means embody flour in a canning recipe. There are food-safe thickeners and flour just isn’t one among them.
I see it as flexibility. If I make rooster soup and may it as such then I’ve two choices. You possibly can both can soup, or I can add thickener, and as soon as I pop the seal, I can flip it right into a hearty stew.
If I have been so as to add the thickener earlier than canning, then I might solely make stew.
Subsequent, take note of the way you tighten your rings. Don’t crank down on them. An excessive amount of strain and also you’ll lock down the seal.
Air can’t escape and the jar gained’t type a vacuum. You need the ring finger tight. Too unfastened they usually gained’t seal, or too tight and no vacuum.
The ultimate widespread mistake is setting the recent jars on the countertop. All the time set them on a double-thickness of the towel. The countertop might draw warmth too rapidly out of the jar inflicting it to shatter. Scorching liquid and glass are a horrible mess and a hazard.
Wrapping Up Canning
Meals preservation is a basic ability for homesteaders, preparedness-minded people, and anybody wishing to take management of their “meals chain”.
Whereas it could be a bit intimidating at first, it doesn’t need to be. In truth, it may be a welcome course of to the seasoned canner. In truth, I miss it if I’ve gone a month or two with out placing up just a few jars.
Quickly you’ll find your self trying ahead to the harvest. Not just for the blessing of contemporary fruits and veggies, however for the chance to increase the depth of your individual pantry.
When you get into strain canning, then you definately’ll by no means make a single batch of soup or stew once more. In truth, I’ll even wager that you simply’ll begin in search of canning-ready recipes and cooking up just a few gallons at a time.
Canning FAQ
Sure! Achieved accurately, might greens, fruits, stews, meats, and broths could be safely canned at house. Use a trusted recipe, the right substances, and the proper gear and you may safely can at house.
Most meals will final 1 12 months when canned at house. Use your senses and customary sense everytime you open a jar of canned meals.
It’s protected to take action if canned inside 24 hours. Refrigerate the sealed jar if canning the subsequent day. Substitute the lid and re-can as quickly as attainable.
If the processing time is 10 min or extra, then there is no such thing as a must sterilize the jars first.
Jars break due to hidden cracks or due to thermal shock. All the time examine your jars earlier than use. All the time have the water, jars, and meals at comparable temperatures.
Sure! Salt solely contributes to the style of your canned product. It doesn’t have an effect on meals security.
Sure! The first distinction between the 2 is that desk salt contains an anti-caking agent. When utilized in canning, the anti-caking agent might trigger the liquid to be cloudy, however in any other case it’s completely protected.
Native cooperative extensions, homesteading teams, and FaceBook are all nice sources for locating a canning class in your space.
No! Make certain to examine the packaging. There are a variety of ornamental jars available on the market lately. Canning jars will probably be clearly labeled as such.
Sure! By no means put jars immediately on the underside of the canner. The warmth and ensuing thermal shock might trigger the jar to interrupt.


")


